


DIY Vintage Recipe Wall
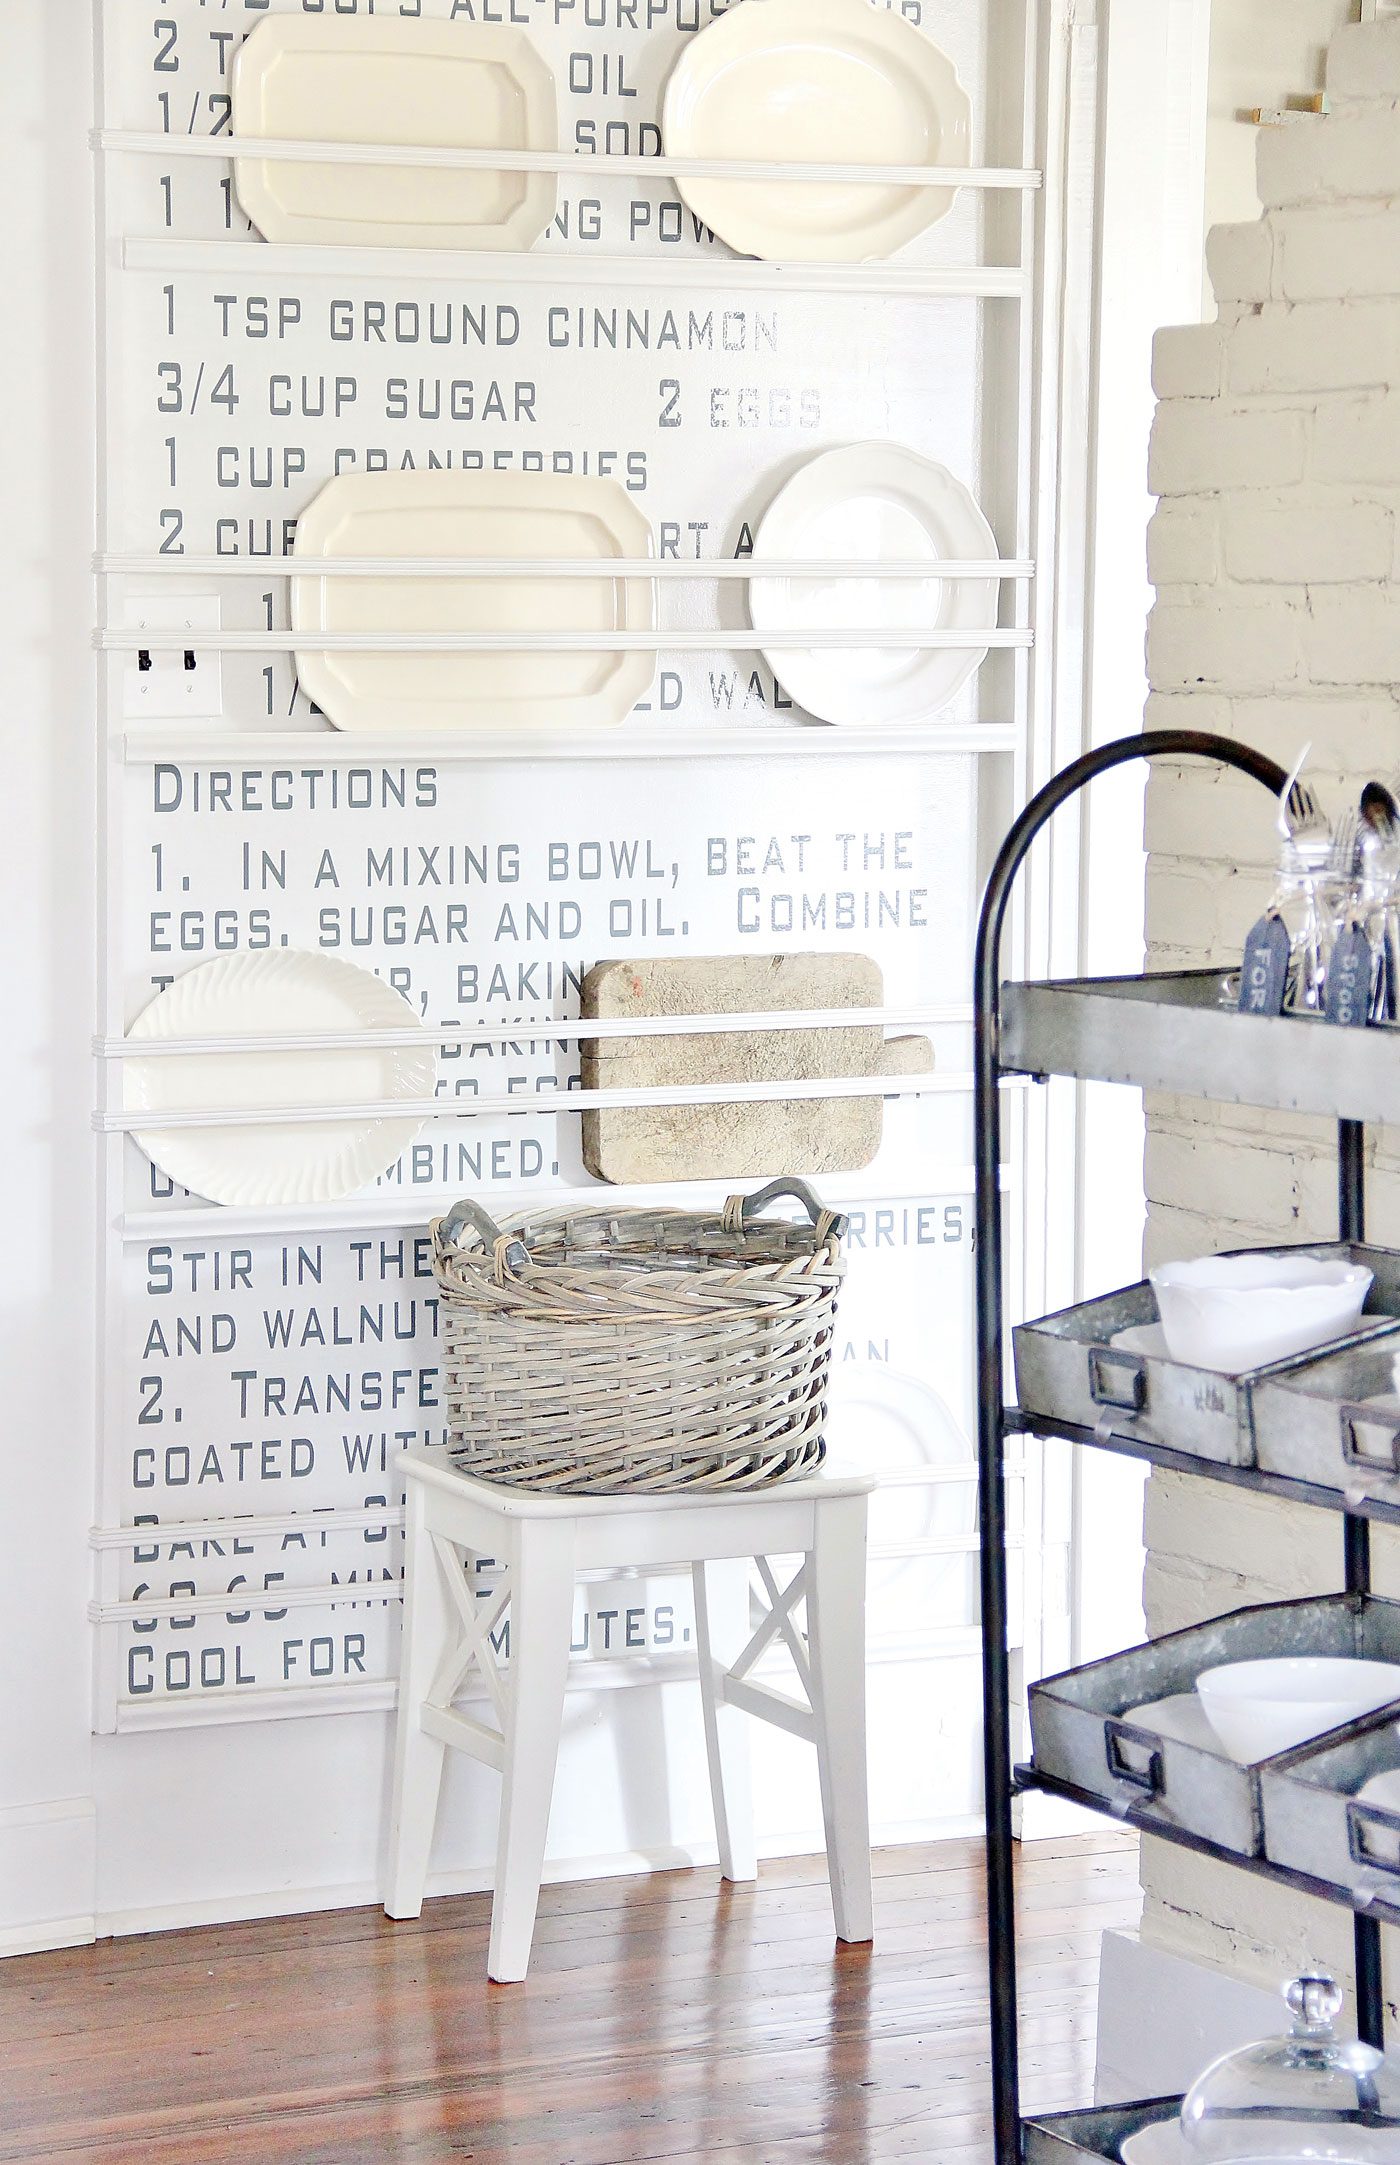

Looking for a way to create visual interest in a room without a lot of space? You can add small decor for your small spaces. Or, try adding a recipe wall! This project is a fun way to memorialize a family recipe, favorite side dish or even your grandmother’s special dessert. You can create this recipe wall with a vinyl maker or even by simply applying stickers. The entire project costs about $40 and takes an afternoon to finish. Here are the steps to create your very own recipe wall.

What You’ll Need:
- Recipe
- Font of choice
- Vinyl die-cutting machine, or letter stickers
- Tape measure
- Pencil
- 1-inch painter’s tape
What You’ll Do:
- Decide on your recipe. Find a recipe that means something to you and your family. Ideally the best recipe for a project like this will have 5 to 8 ingredients, and 4 to 8 steps. You can adjust the text depending on the wall space.
- Choose your font. The font here is a basic sans serif font in all capital letters. Choose a font that matches your design style and kitchen or home décor. You can also alternate between capital and lowercase letters if that works better with your recipe.
- Create vinyl letters. You can either create the letters with your vinyl letter machine or purchase stickers from the craft store. The letters here are approximately 3″ high. You can adjust the letters and size, depending on how much space you have to work with and the letter count of your recipe.
- Measure your spacing. Allow for a 1″ margin between the rows of text on the wall. Measure out the needed space for the first row of text, mark with a pencil, and then stretch a piece of painter’s tape at the bottom of your horizontal row. Keep adding strips of tape between the lines of text until you have your recipe properly spaced.
- Place the letters. If you have a vinyl cutter, print out the recipe words and attach them to the wall with painter’s tape along the horizontal line. Tape the entire recipe to the wall before peeling off the backing to ensure proper spacing. If you are using stickers, allow a ½” space between each letter and a 1 ½” space between each word. Cut out the stickers with the backing. Do not peel them off until you ensure proper spacing.
- Ensure spacing is correct. Check your spacing with the words and letters one more time. Move any words or letters that aren’t spaced properly.
- Peel off the letters. Peel off the backing from the letters and press them into place. Affix all the letters into place until your recipe
is complete. - Enjoy! Your recipe wall is ready for company.
Thinking about new granite counter tops? Get the pros and cons here. Add some color with these 3 fool-proof tips! Of course, don’t forget to follow us on Instagram, Facebook and Pinterest to get your daily dose of farmhouse inspiration!

KariAnne Wood writes the decorating and lifestyle blog Thistlewood Farms from her project-filled historic home in Dallas, Texas, where she lives with her husband and four children. Thistlewood Farms is full of stories of family and faith, and features hundreds of the home décor projects KariAnne creates every week for readers. She’s also the author of four books, including The DIY (Decorate It Yourself) Home Planner (Harvest House 2018) and The DIY Style Finder (Harvest House 2019).