


Make Your Own Wooden Box for a Farmhouse Centerpiece

Craft your own wooden box to use as a perfect farmhouse centerpiece to display your summer blooms—or whatever you fancy!
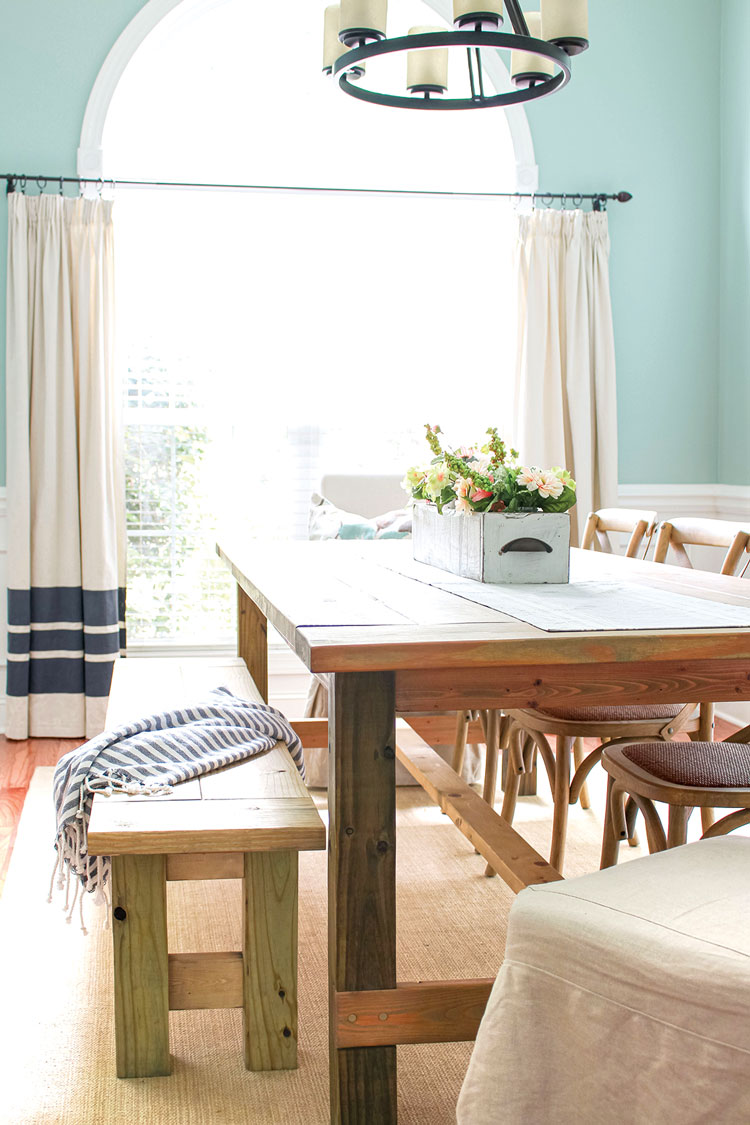
Summertime means longer days, opportunities to spend time outside, and gatherings with loved ones around the table. What better way to spruce up your dining room, whether indoors or outdoors, than with a handmade centerpiece? Laura Nickelson created her blog, The Turquoise Home, to share her DIY projects and home-décor ideas. This simple DIY wooden box project is perfect for tabletop floral arrangements or to use anywhere in your home to display treasures.
What You’ll Need:
Wood pieces (Laura had a 1 x 6 x 8 cut into 3 boards 26 in long, and 2 boards cut to 7 in long)
Kreg® Jig
Kreg® Pocket Hole Screws (Laura used 1¼ in)
Clamp
Screwdriver
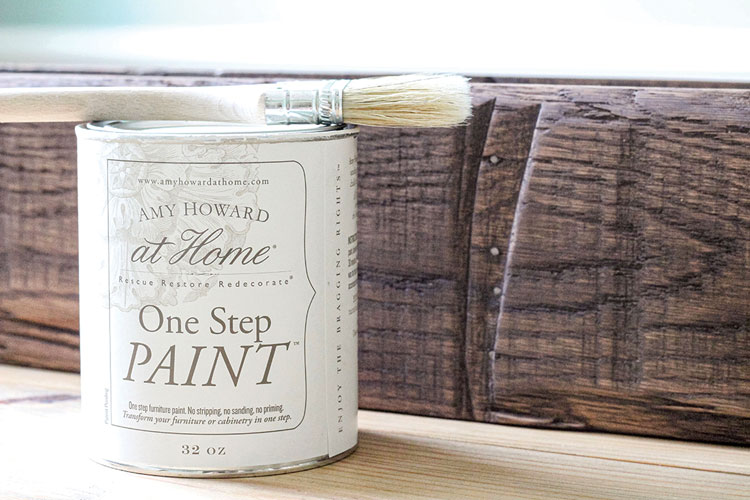
Stain (Laura used Dark Walnut by Minwax)
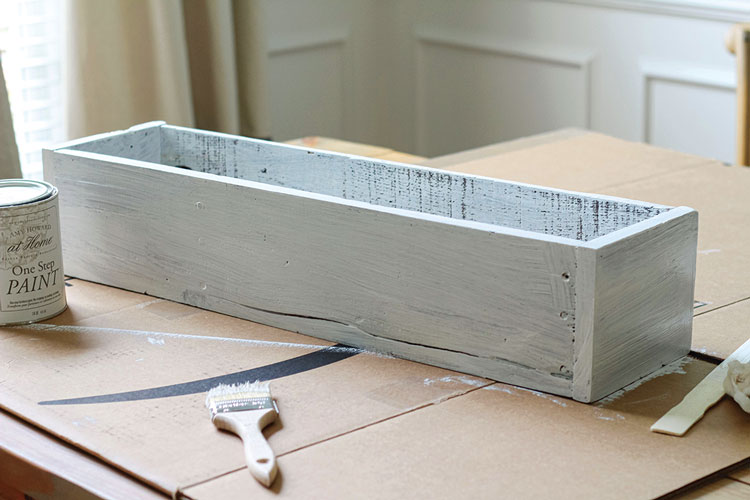
Paint (Laura used Amy Howard’s One Step Paint in Bauhaus Buff)
Clear wax
Paint brush
Wax brush or lint-free cloth
2 handles (optional)
Drill bit (optional if you’re doing handles)
What You’ll Do:
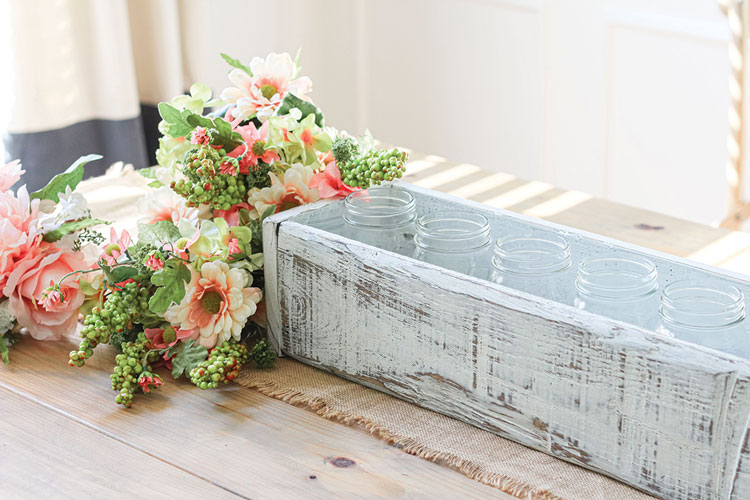
Choose your box size. Laura wanted a large box to sit on her dining table, but you can make it any size you desire.
Cut your wood. Laura used 1 x 6 pieces of wood. If the size of the wood doesn’t match the exact size of the wood piece, measure your boards and make adjustments as needed to these directions.
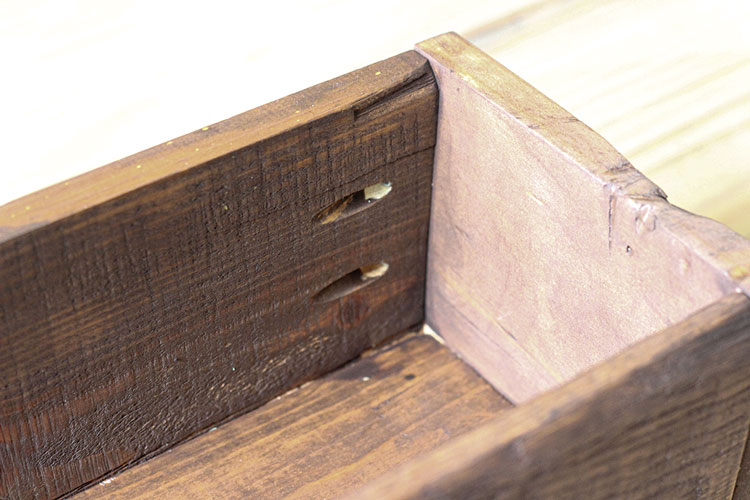
Use the jig to drill pocket holes on the underside of the bottom pieces of your box. Laura drilled three holes on each long side and two holes on each short side. Do this before assembly.
Drill two holes on both of the short side pieces, on the inside. Do this before attaching them to the bottom pieces.
Attach the bottom pieces to the side pieces. Using a clamp, place one side piece next to the bottom piece and screw together with the pocket holes and screws on the underside of the bottom piece. Make sure everything stays in line and straight while joining.
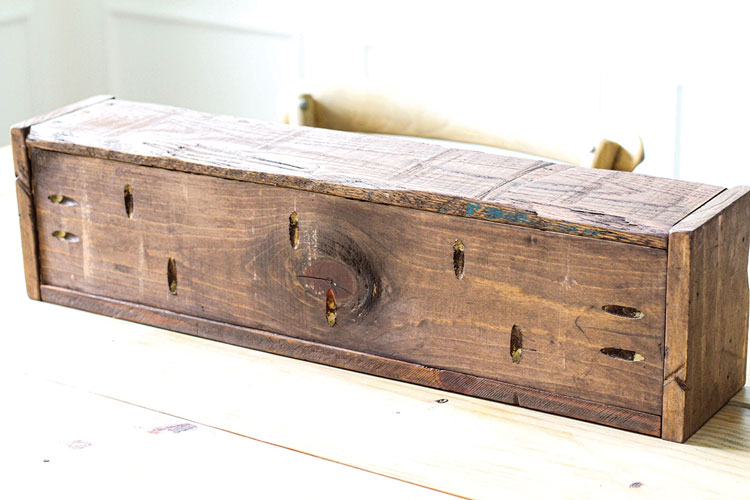
Screw together the end pieces to the side and bottom pieces. You’ll want to have measured the end pieces to the exact size you need. Your pocket holes should be on the inside.
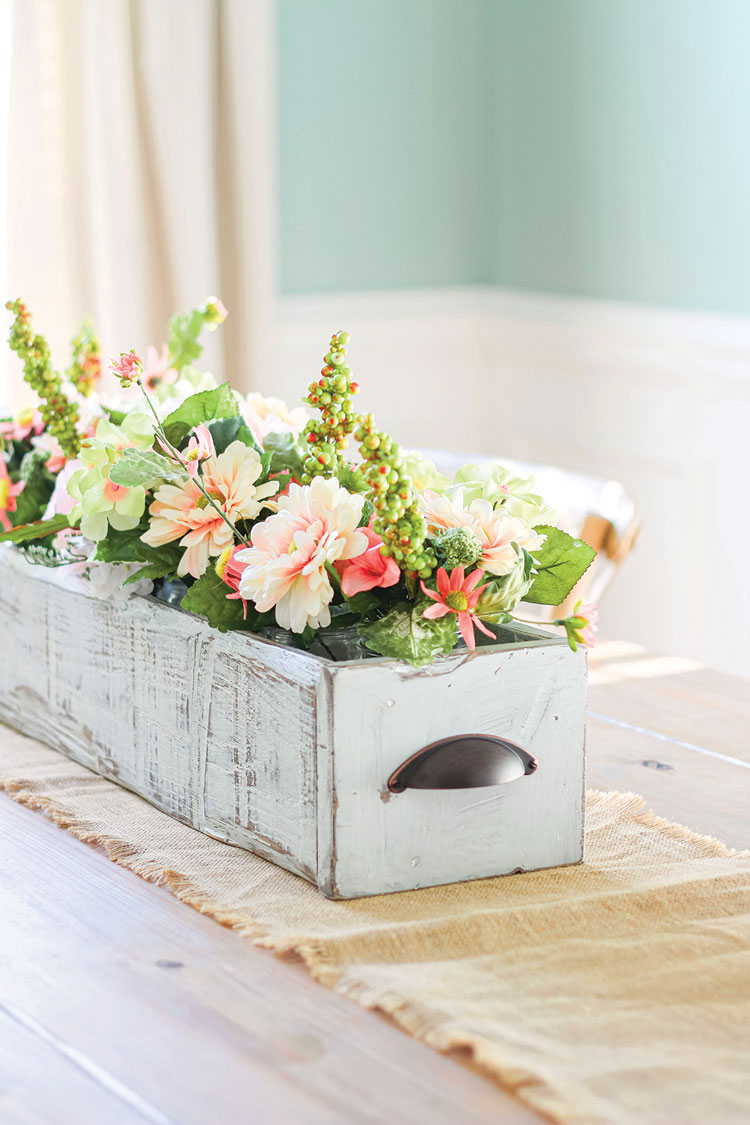
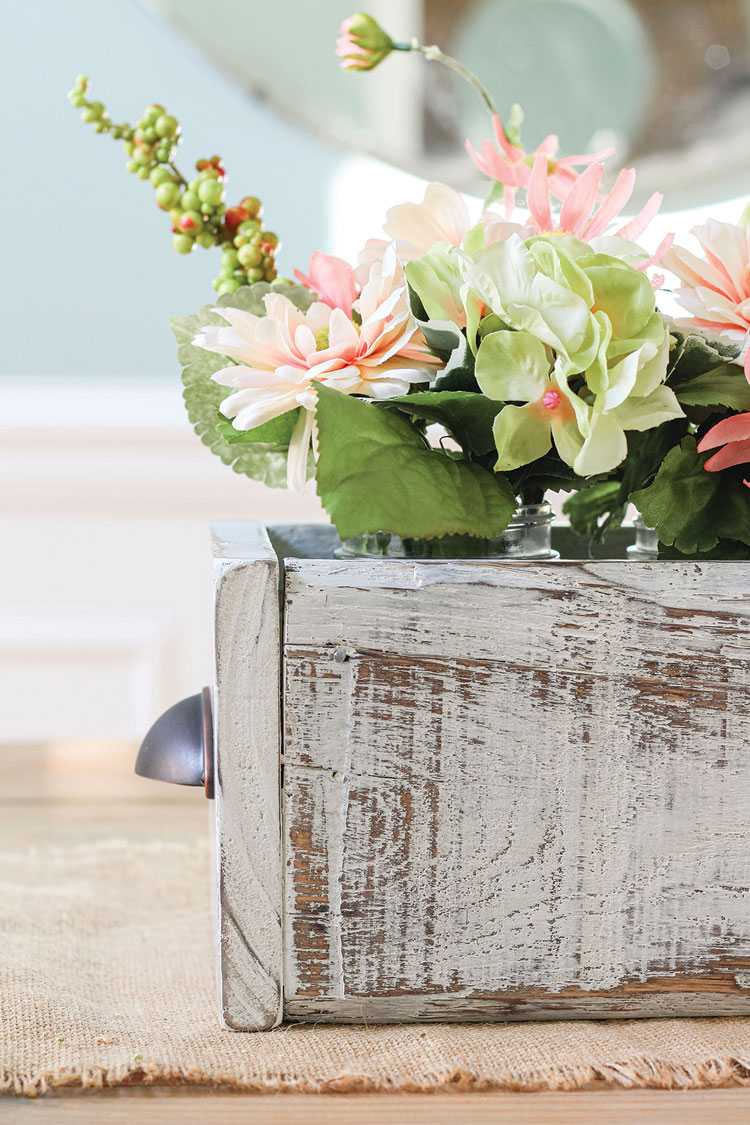
Cover the box with stain or paint–or both. Wipe down your box to get the sawdust off. Laura applied a dark stain and then paint on top.
For a distressed look, sand the raised parts of the wood to let the stain show through. Make sure you don’t sand too hard–you want to keep the stain. When you’re done, wipe everything with a damp cloth.
Seal the project with clear finishing wax.
Optional: Add handles or pulls. Measure the end piece to center your handle or pull. Laura used a drill bit larger than the handle screws to drill them into place; then she attached the pulls using the screws that came with them.
Style it! Laura used mason jars and faux flowers.
Getting excited for summer? Read on for How to Transition to Summer Décor. And, don’t forget to follow us on Instagram, Facebook and Pinterest to get your daily dose of farmhouse inspiration!