


Handmade Wood Lanterns
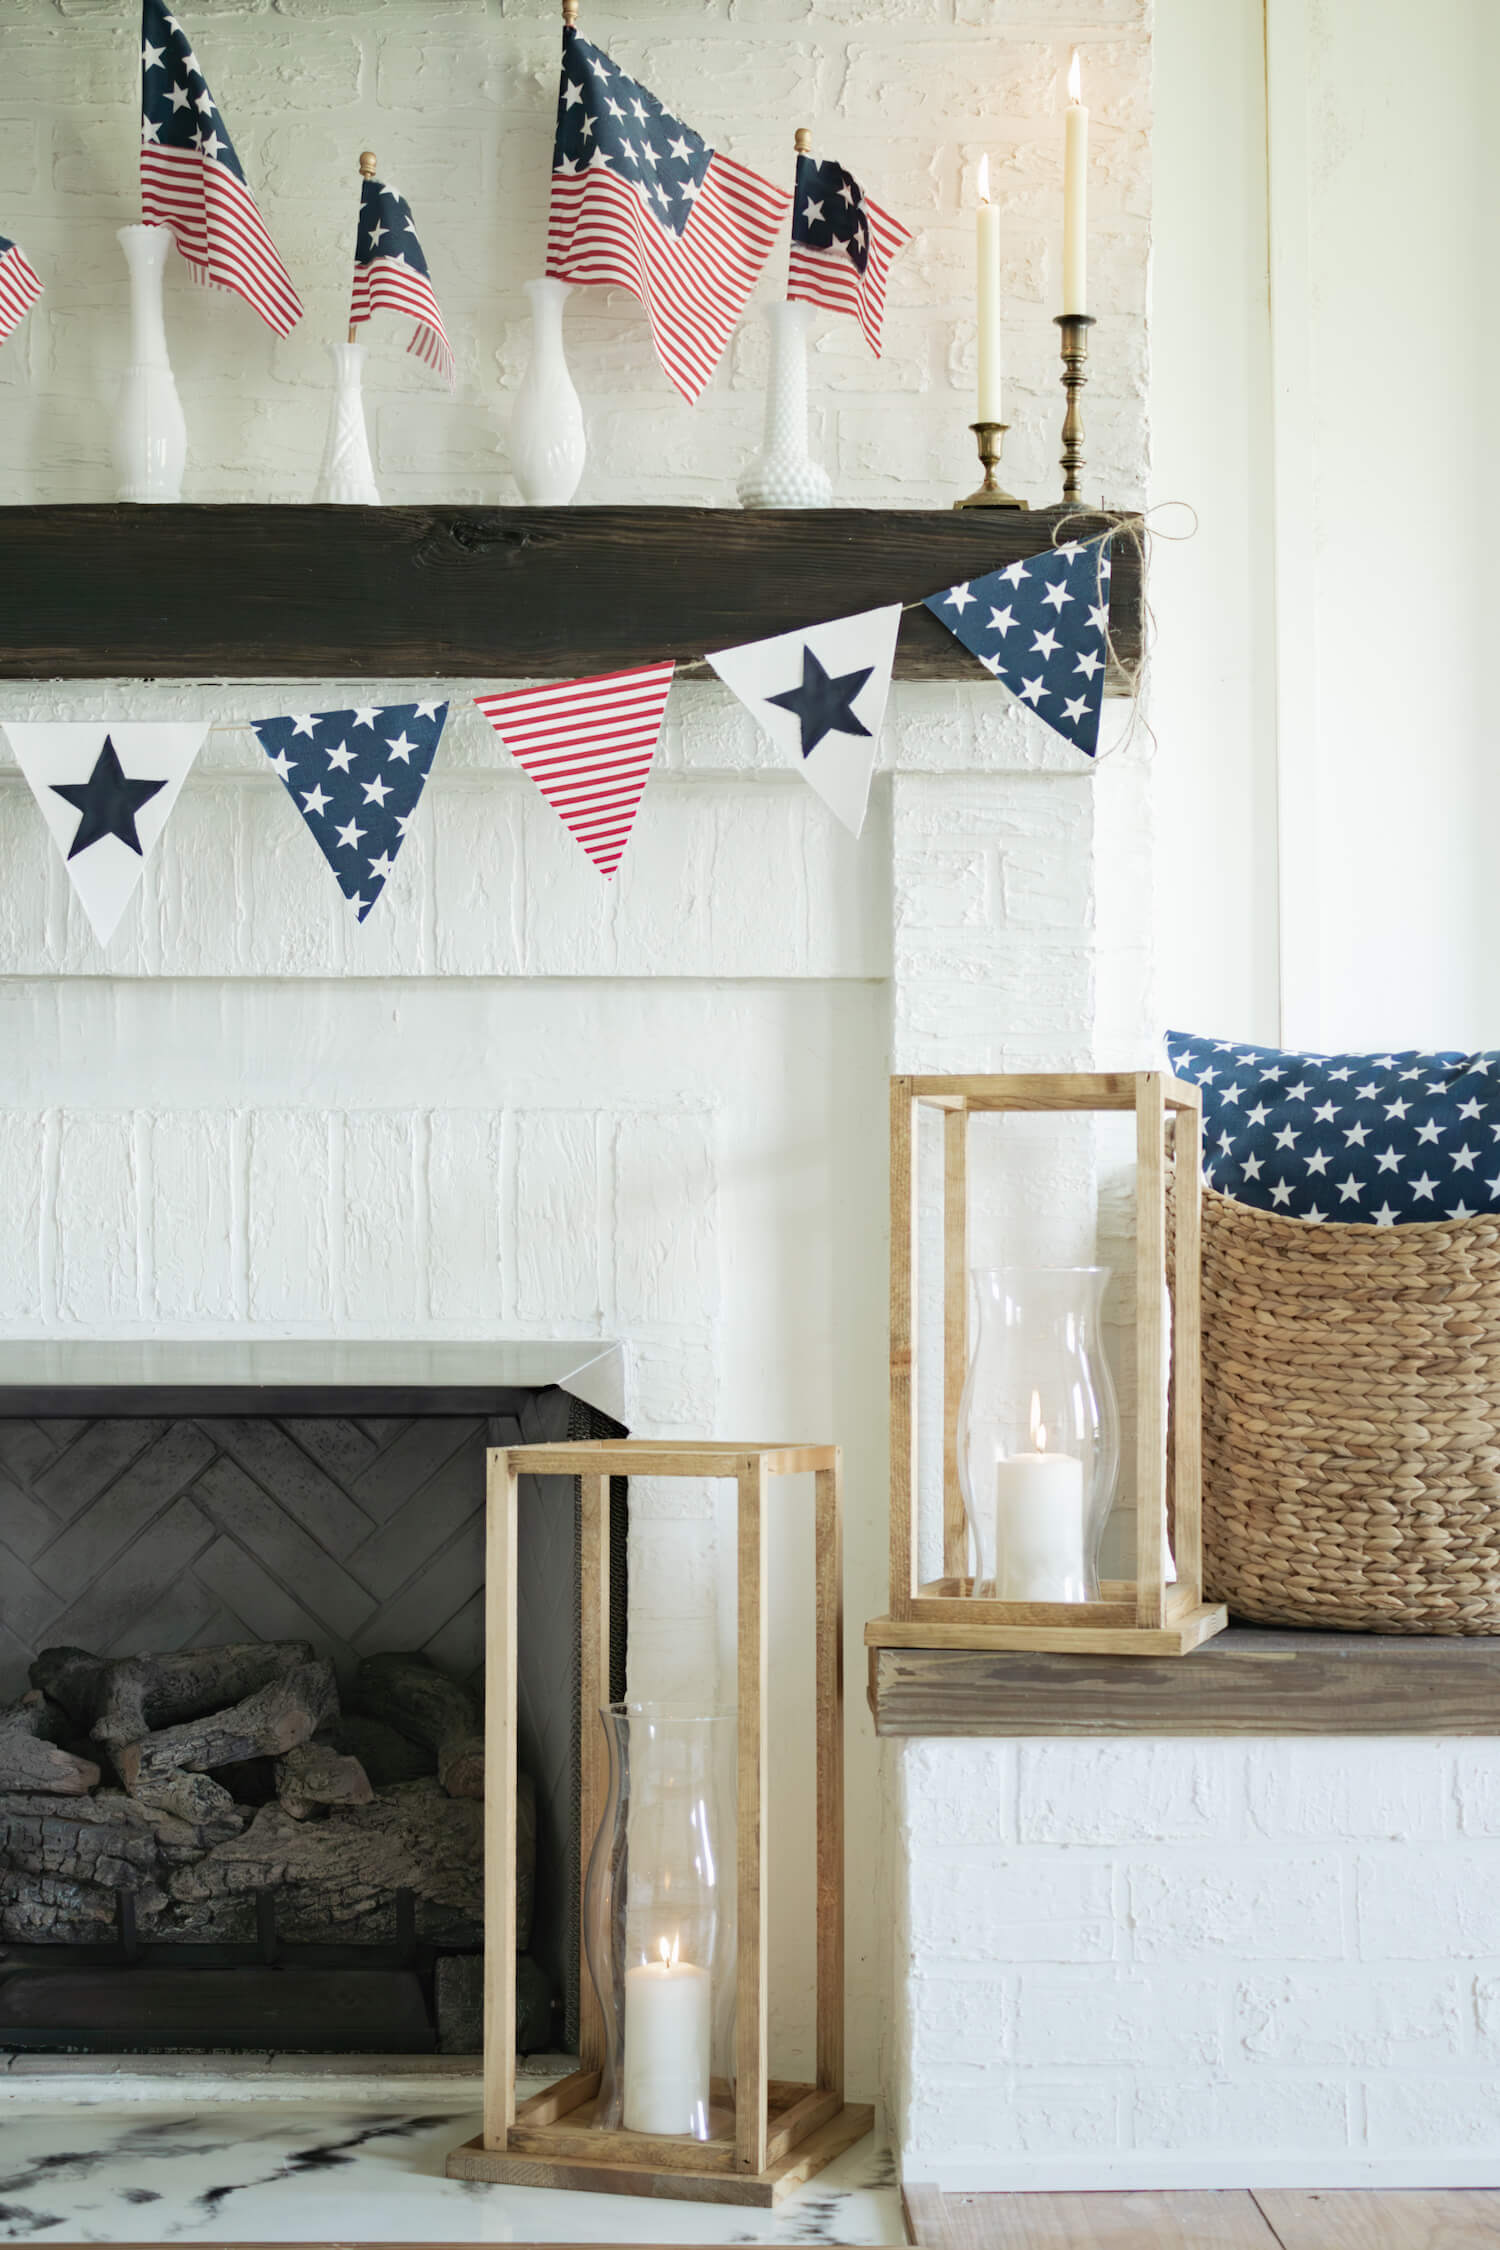

Illuminate your patriotic celebrations with a warm glow by crafting your very own handmade wood lanterns.
These simple, rustic beauties are the perfect way to add a cozy ambience to your Fourth of July festivities, outdoor dining tablescapes, or any space that could use a touch of Americana.
What You’ll Need:
- Wood (6’ long x 12” wide x 1” high pine)
- Chop saw
- Table saw
- Tape measure
- Nails
- Nail gun & air compressor
- Wood glue
- Orbital sander and 120 grit sandpaper
- Stain
- Glass hurricanes
- Candles
Note: Medium Lantern Dimensions: 9” l x 9” w x 18” h (with square base of 10 ½” x 1” h).
Large Lantern Dimensions: 9 ½” l x 9 ½” w x 23” h (with a square base of 11 ¼” x 1” h).
What You’ll Do:
(Medium Lantern)
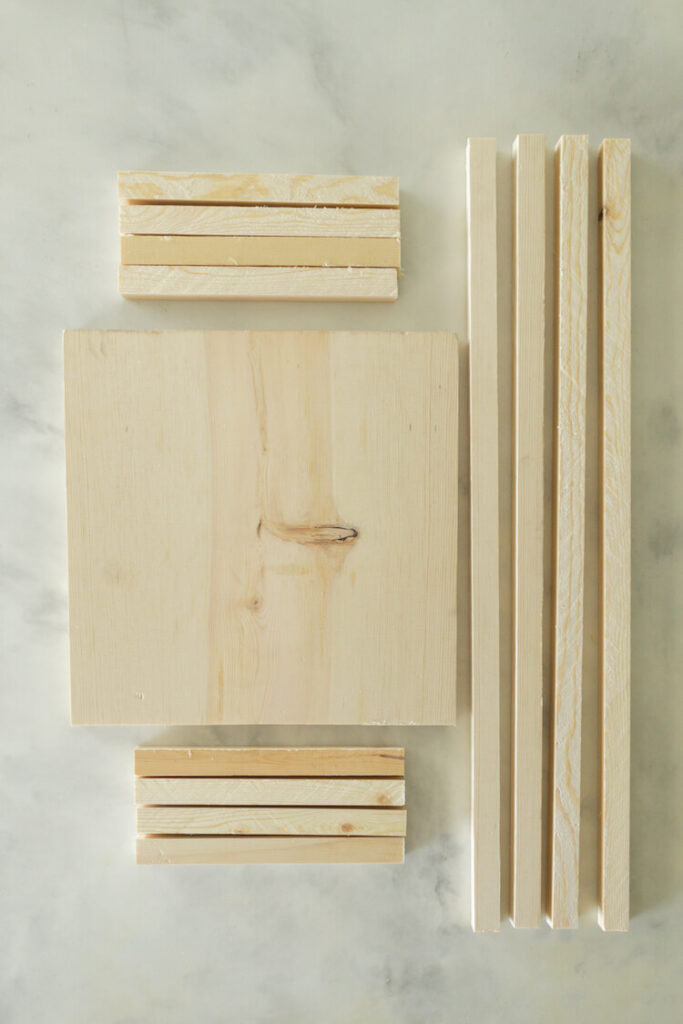
Cut the base:
- Use a chop saw to cut the base 10 ½” square.
- Set aside.
For the lantern:

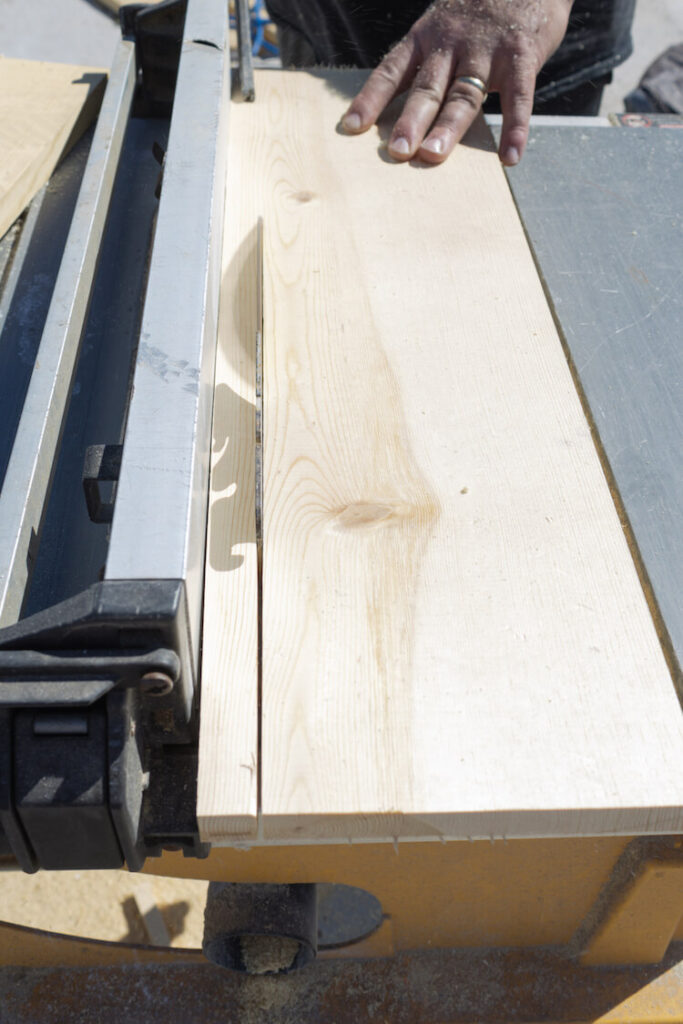
- Use a chop saw to cut an 18” length of wood.
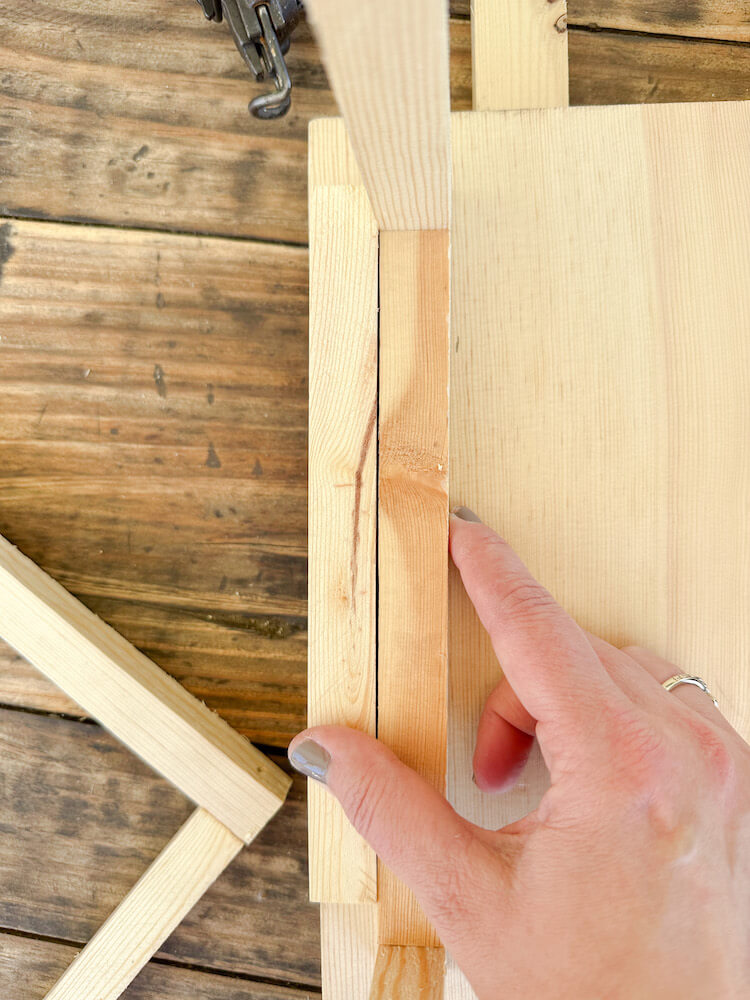
- To rip the stock board, set the rail of the table saw at ¾” and the blade at 90 degrees. Carefully run the board along the rail. Repeat this process to make 8 pieces. This will give you eight ¾” square pieces of wood in 18” lengths for the lantern frame.
- Set aside 4 frame pieces for the sides of the lantern frame.
- Using the remaining frame pieces, cut eight pieces at 7 ½” l for the top and bottom of the lantern frame.
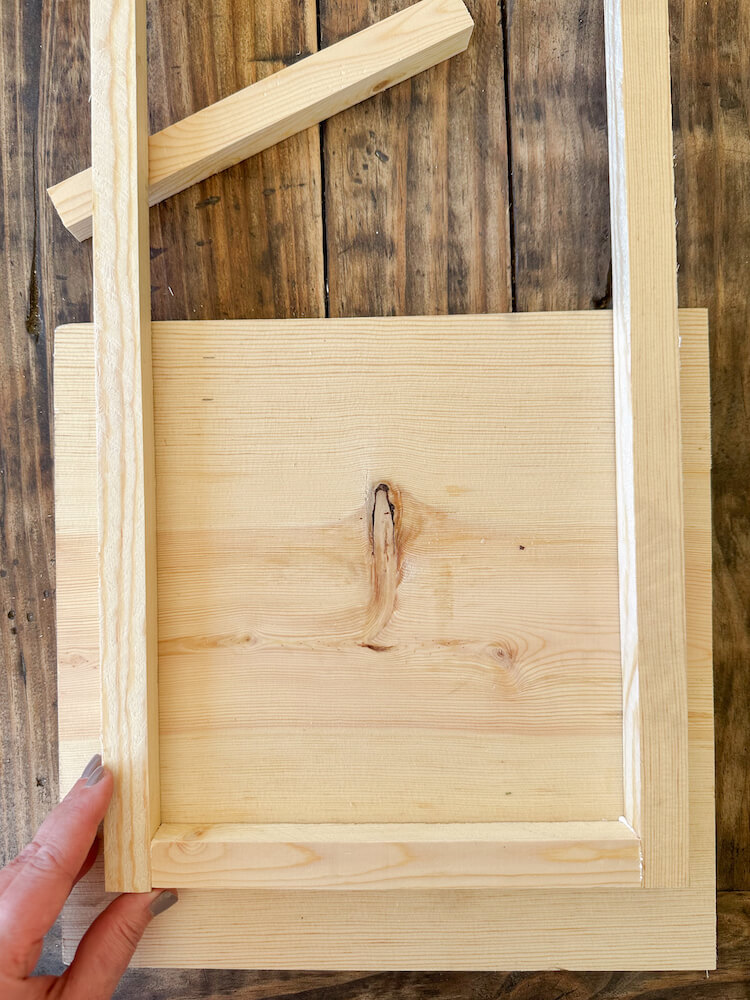
- To construct the sides of the lantern, use two ¾” square x 18” l pieces and two ¾” square x 7 1/2“ l pieces. Glue and nail the pieces together with the 18” length pieces as the sides on the right and left, and the 7 ½” pieces on the top and bottom. The 7 ½” top and bottom pieces should be placed on the inside of the 18” l side pieces when constructing. This will create a rectangular shape. Repeat the process to make another rectangular-shaped side.
- Connect the two side pieces by gluing and nailing the remaining four 7 ½” pieces of wood, using one piece at the top and bottom for each side to make a square.
Putting it Together:
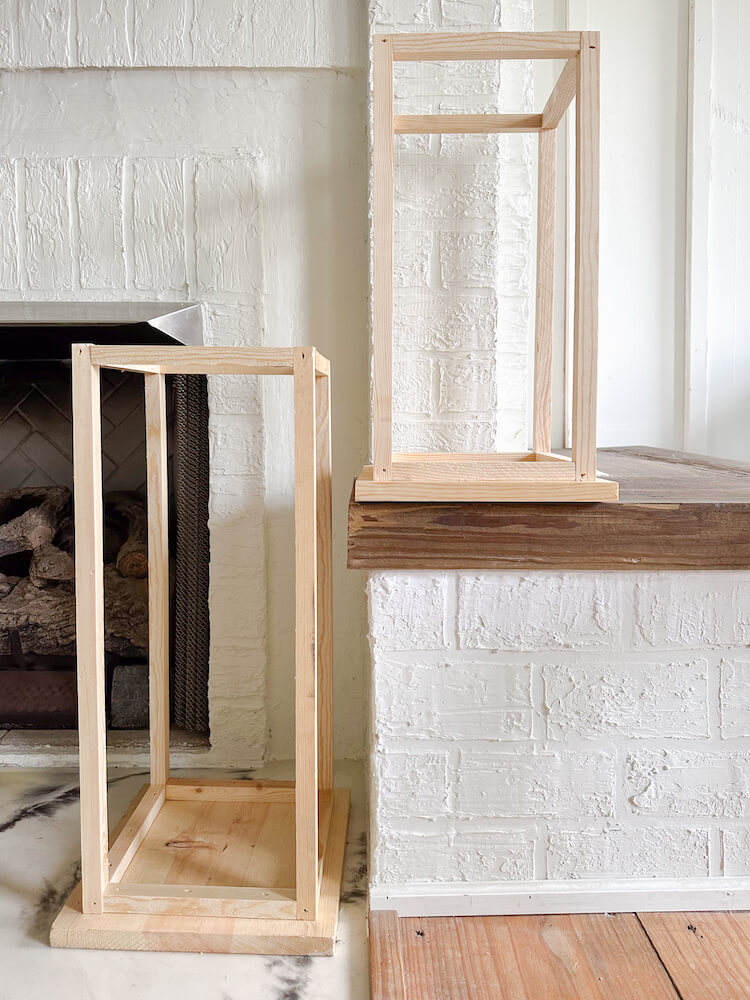
- Attach the lantern frame to the center of the base leaving ¾” space around the outside perimeter of the base. Tip: Use a scrap piece of ¾” square wood to guide your spacing.
- Sand with 120 grit sandpaper until smooth and stain in the color of your choice.
- Once dry, add glass hurricanes and candles.
For the Large Lantern, repeat the process using pieces of wood in 23” lengths for the sides and 8” lengths for the top and bottom. Now you have handmade wood lanterns you can use for the Fourth of July or any time of year!
*Please note, never leave a candle unattended. Battery operated LED candles are a great alternative.
To see more of Stephanie’s patriotic DIY ideas, don’t miss our June/July print issue! Find out more about Stephanie, our 2024 Brand Ambassador, here. Of course, don’t forget to follow us on Instagram, Facebook and Pinterest to get your daily dose of farmhouse inspiration!