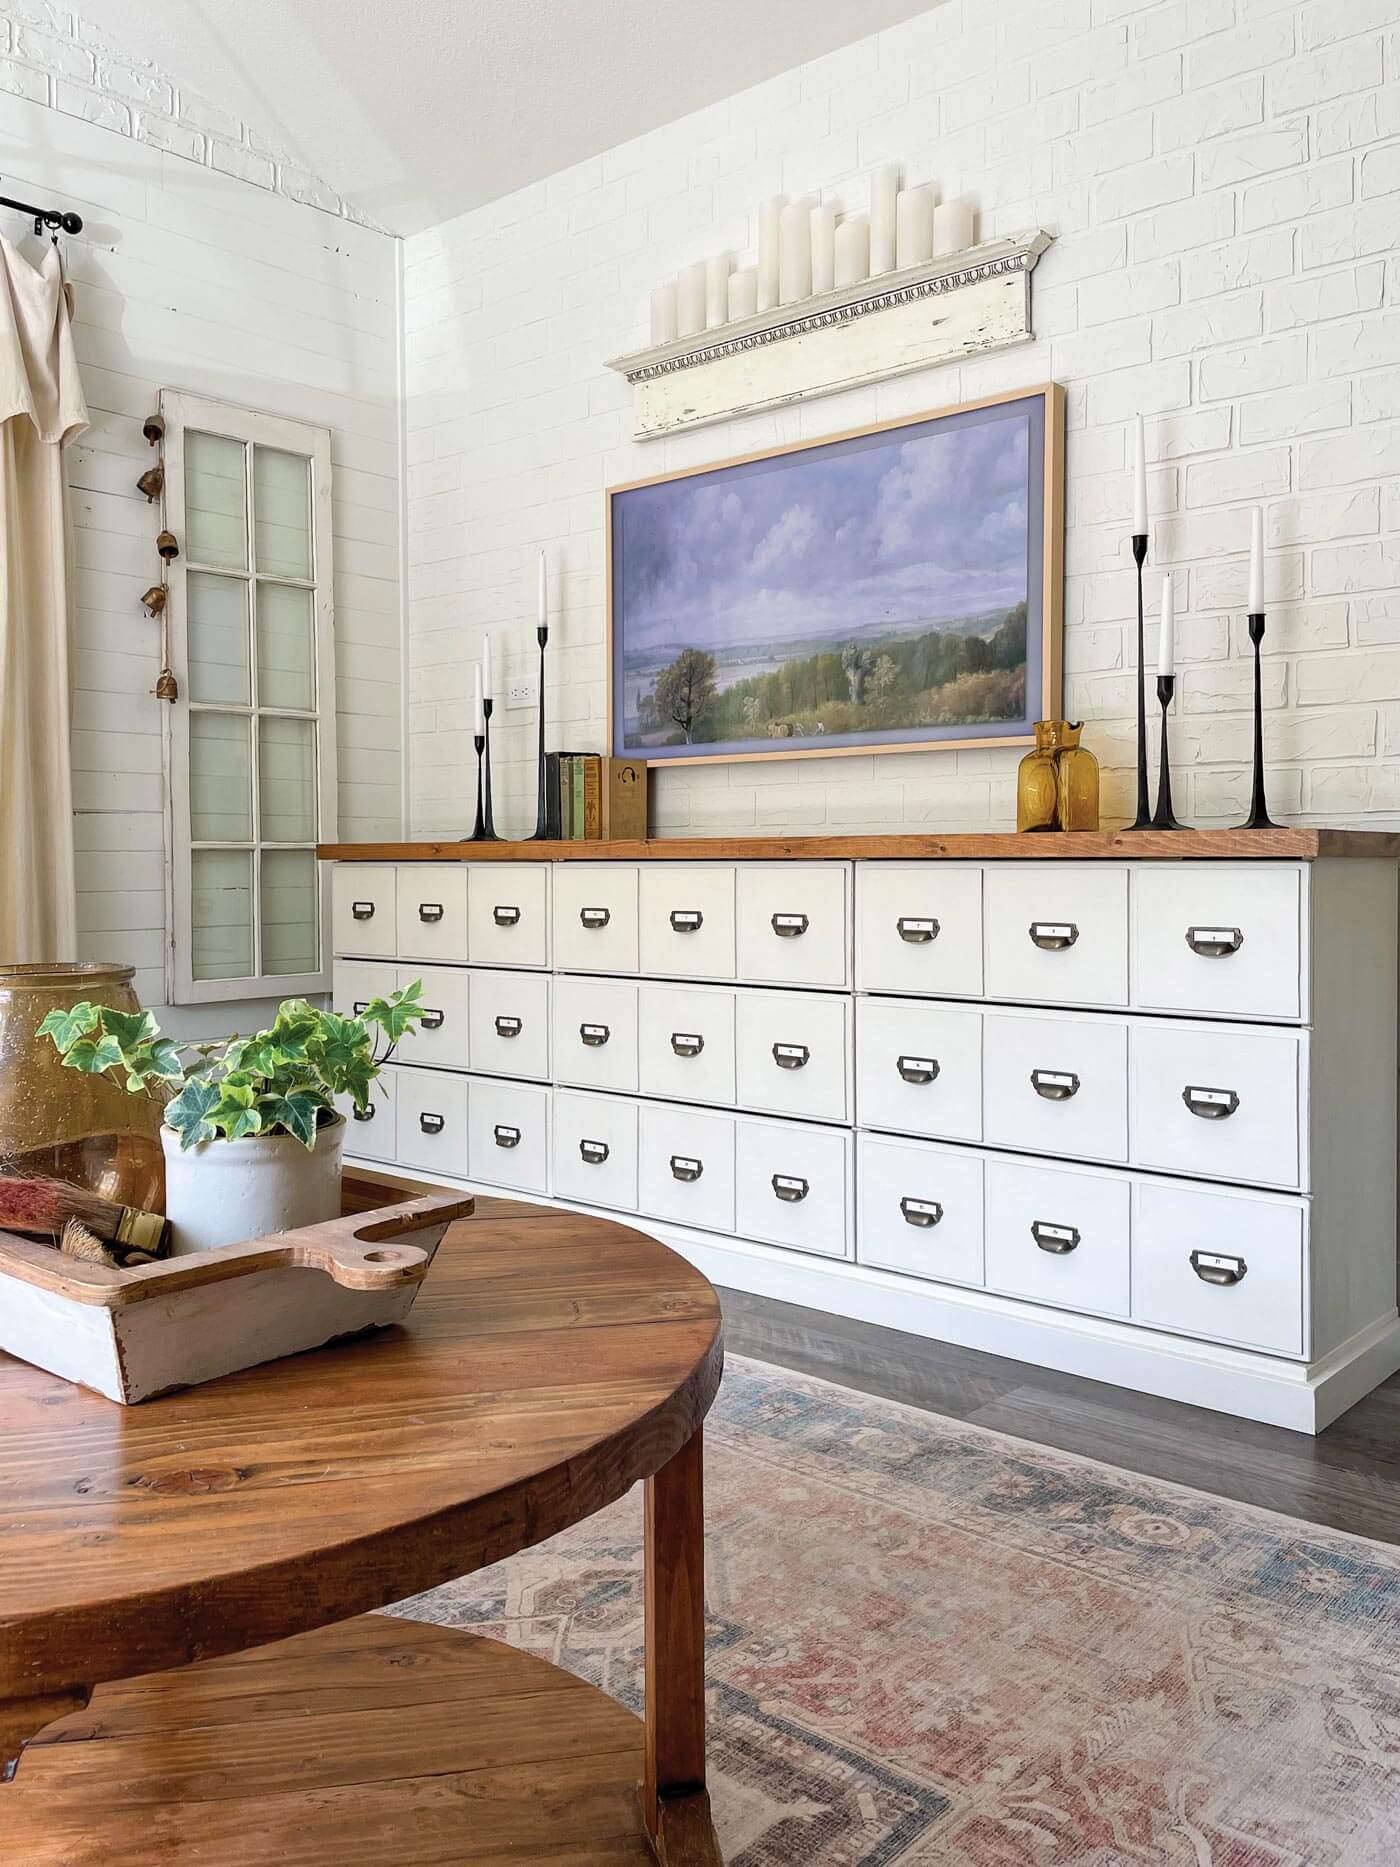
Vintage apothecary cabinets, also known as apothecary chests, are a hot collectible for farmhouse and flea market enthusiasts. The problem with popular collectibles, however, is that the demand always increases the prices. “Everything I found cost way more than I was willing to spend,” says blogger Andi Chow of The Simply Distressed. “So we came up with our own solution: Make one ourselves.” Here are the steps you can use to recreate her vintage look without the price tag of an authentic apothecary style cabinet.
What You’ll Need:
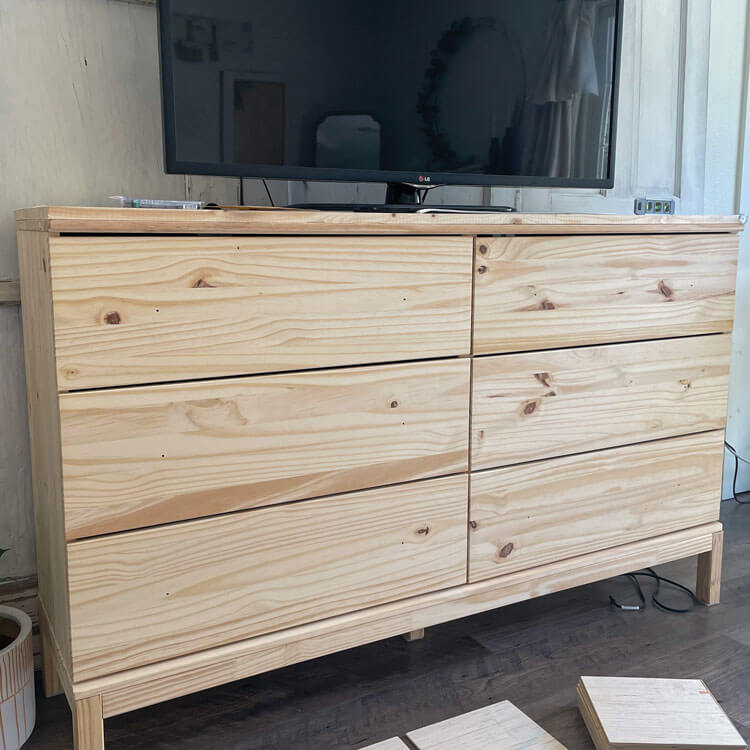
Ikea dresser (Andi used the Tarva Dresser)
5-mm plywood, enough to cover the drawer fronts
Measuring tape and pencil
Table or miter saw
Level
Wood glue
¾” and 1 ¼” brad nails
Optional: 1″ x 16″ wood piece for new dresser top
1″ x 2″ trim piece for around the dresser
Baseboard trim piece for around the dresser bottom
Optional: scrap piece for securing baseboard trim
Paint and stain of choice
Paint brush
Drawer pulls of choice
Electric drill
What You’ll Do:
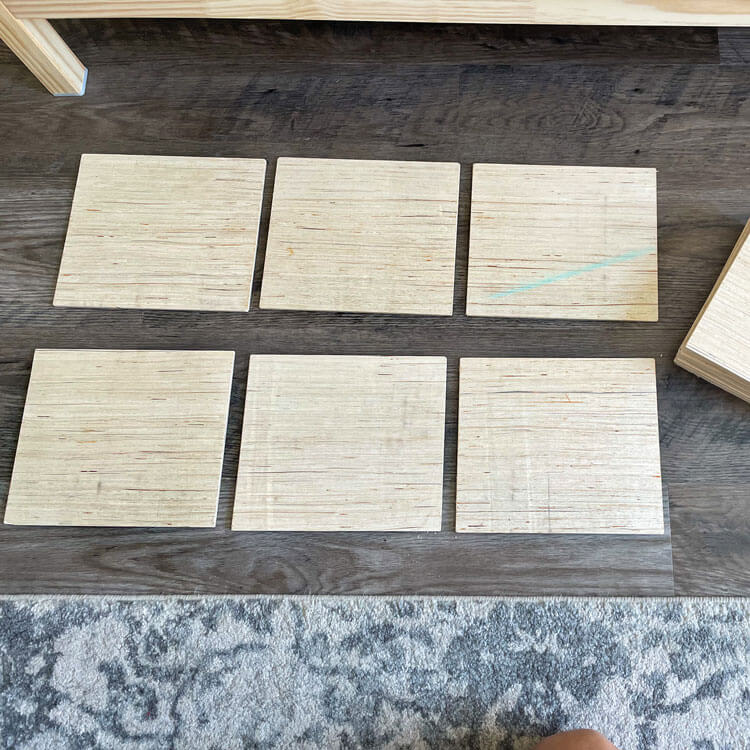
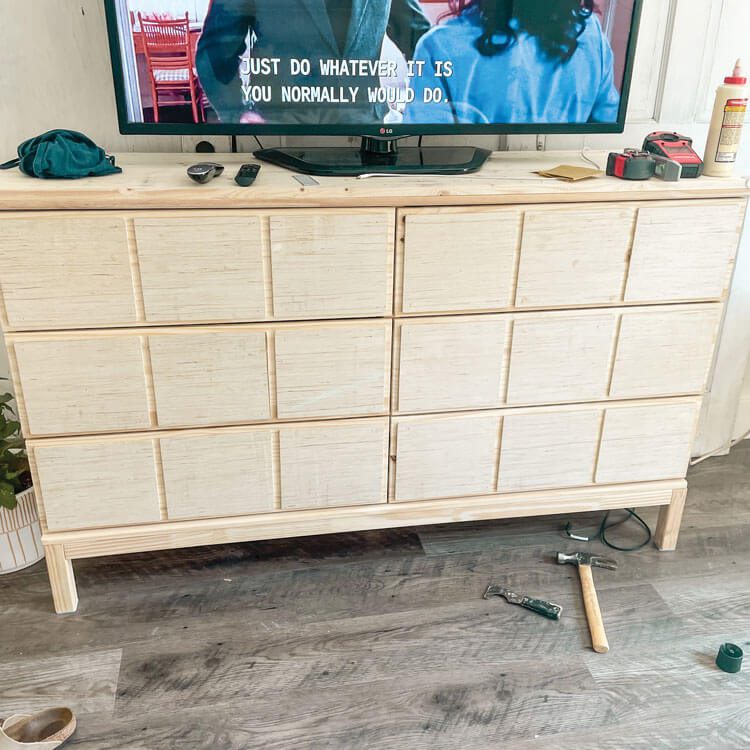
Assemble the Ikea dresser.Cut the 5-mm plywood into to 8″ x 9″ rectangles. (Note: If you use a different dresser, measure for the dimensions of the drawer fronts.) This allows for three fronts to fit on each drawer. “We found it easier to use a table saw, but a miter saw will also work,” Andi says.
Attach the plywood to the drawer fronts. Measure where you want them to go, using a level to help place them. Once you mark where each front will go, use wood glue and ¾” brad nails with an air compressor at a light pressure to help secure them in place while the glue dries.
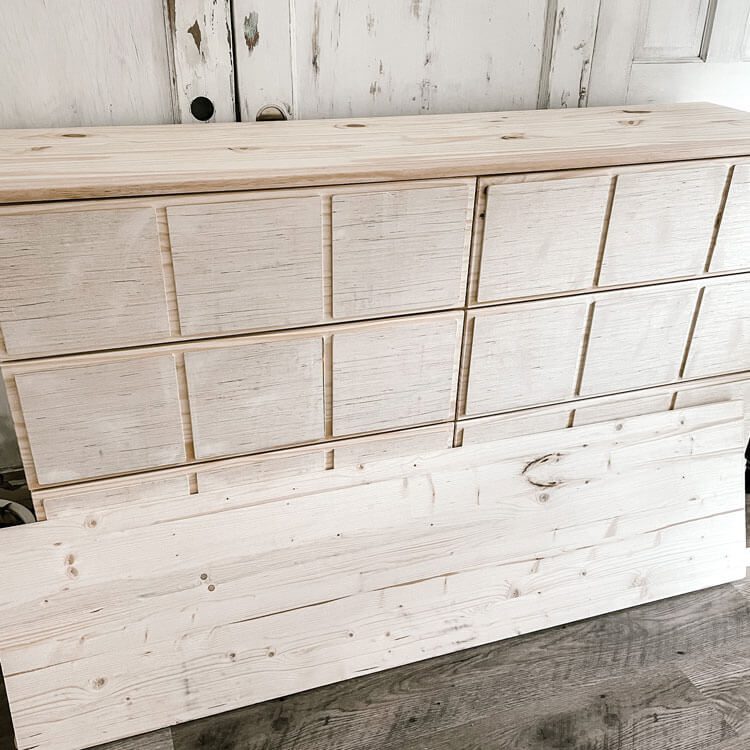
Optional: Add a new dresser top. “To be able to add wood trim to the top, we first had to add a 1″ x 16″ board for thickness,” says Andi. Cut the new top to size, then use wood glue and 1 ¼” brad nails to secure it.Add the 1″ x 2″ trim around the outside of the dresser top. Measure the dresser’s front and sides, then cut the trim down and secure it around the top with wood glue and 1 ¼” brad nails.
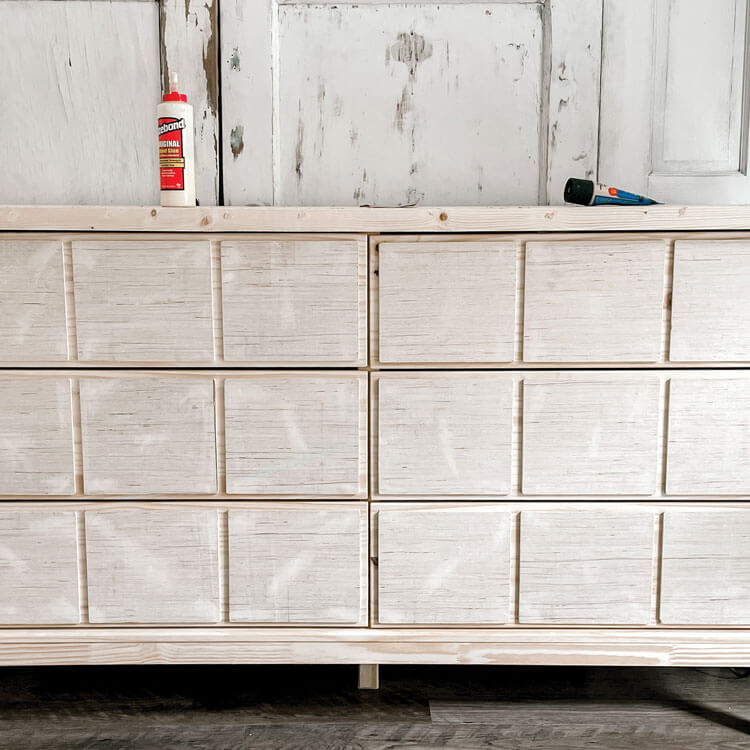
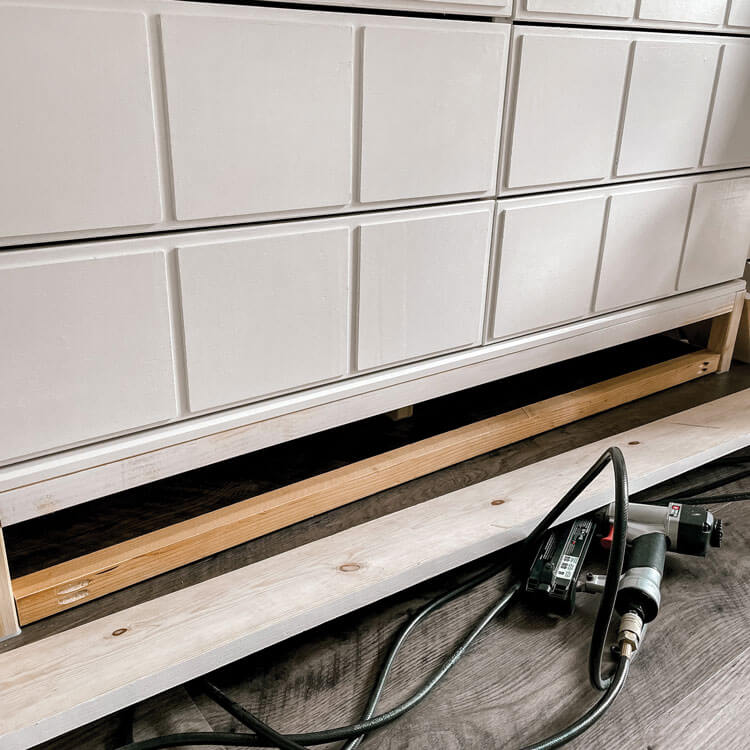
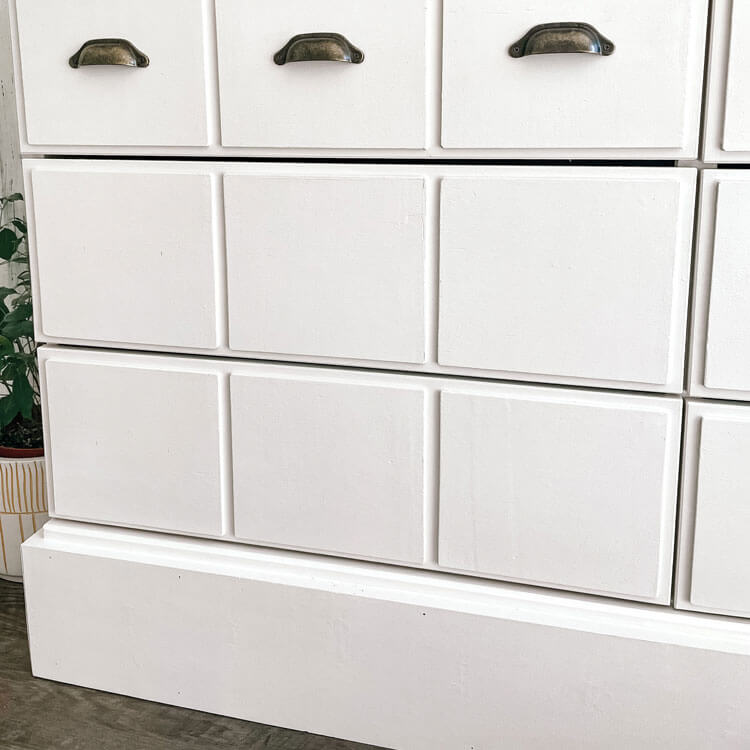
Add the baseboards. Cut the boards to size around the outside of the dresser, making sure the pieces cover the bottom edge of the existing dresser. Andi used a 1″ x 8″ board. “We first added a scrap piece of wood on the bottom to help secure the baseboard,” Andi says.Paint and/or stain the dresser as desired. Andi painted the base with Fusion Mineral Paint, and used a natural tone stain for the dresser top.
Attach the drawer pulls to the front of each “cabinet,” marking each before using the electric drill to secure the pulls.
Now you have your very own new-old white apothecary style cabinet!
Hi! I am Andi of The Simply Distressed. I am a mom to two girls, a baby boy and two fur babies. Since having our oldest daughter, I have worked from home as an online high school math teacher. I have always had a love for distressed furniture, taking something old/new and transforming it to my liking. But ever since purchasing our first house and working from home, my love for home projects has grown. I am married to my best friend. I love anything from easy and inexpensive DIY projects to tackling a major renovation…and all the failures and learning lessons along the way. In addition to my love for DIY, spending time with my awesome family is top of the list. I also love to workout, have a major addiction to coffee and genuinely love what I do.