


DIY Pressed Flower Art

Editor’s Note: Dena Breitmeyer of Fletcher Creek Cottage is sharing with us her DIY pressed flower art today!
Every year, when the end of summer draws to a close, I can’t help but feel a little sad at the thought of saying goodbye to all the beautiful blooms in the garden. All summer long I’ve made it my morning routine to water the garden beds and then take a few moments to gather a bouquet for the dining table or for a friend or family member! That’s where pressed flower art comes in.
Fresh flowers bring people so much JOY! There’s just something so wonderful about them and an early morning walk in my garden recently got me thinking…”how could I make these little bundles of joy LAST a little longer?”
I remembered back to last year when I had the same feeling of wanting to preserve the vibrant colors of autumn that painted our backyard. My daughter and I went on a walk, gathered all kinds of leaves, pressed them in between the pages of heavy books until they were dry. Then I painted an old framed print a neutral color before creating a pattern on it with all the contrasting leaves. I used Mod Podge to secure the leaves to the print and really loved looking and the fall colors inside hanging in our kitchen with pressed flower art! It was so vibrant! Few things are more beautiful than what is found in nature.
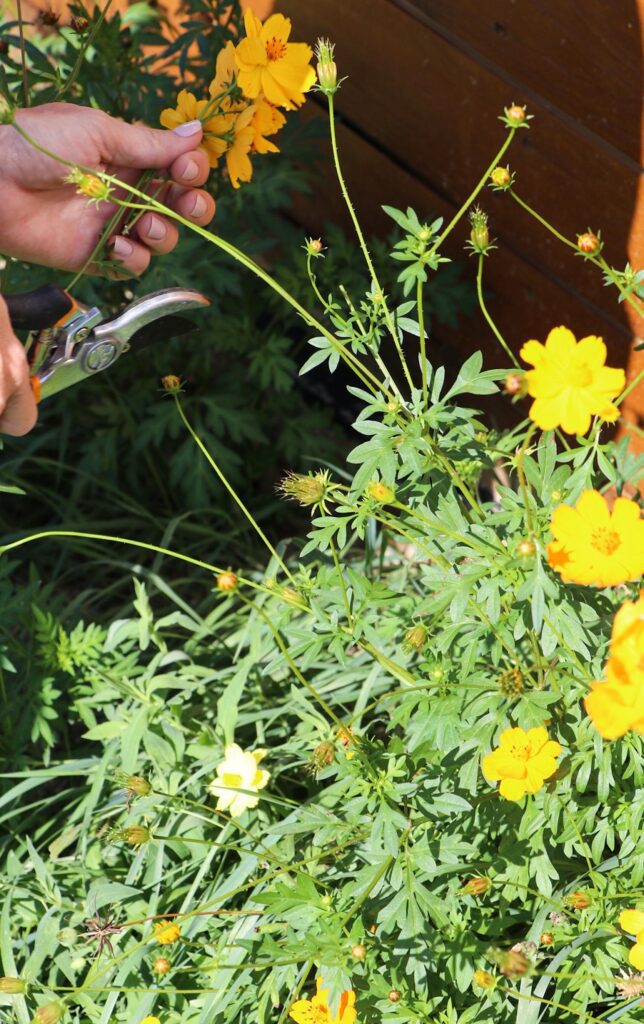
Thinking back on that DIY pressed flower art I realized, I could do the same thing but instead of fall leaves I could use things from my garden beds. So I eagerly went to the garden with my snips and cut a variety of cosmos, dahlia petals, hydrangeas, and yes…even some of my carrot tops! Call me crazy, but I just think carrot tops are absolutely beautiful!
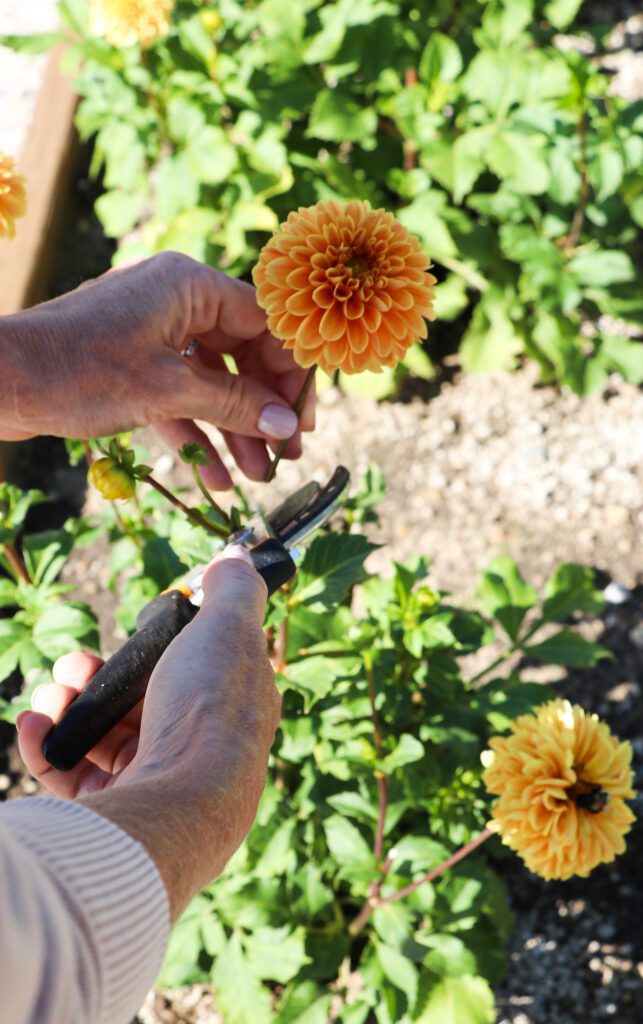
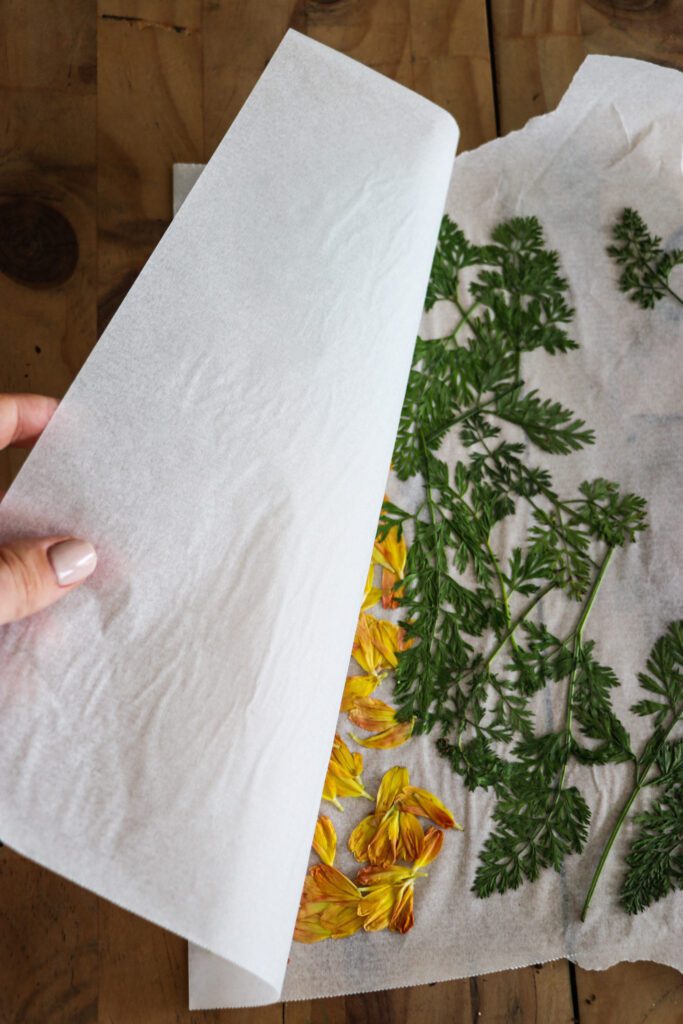
After I gathered all my flowers, I chose my favorites and pressed them in wax paper and between the pages of heavy books like we used to do back in my school days. Then I stacked even more books on top of them for weight and let them dry. If you can let them dry for a few days that’s great or longer is ideal for the pressed flowers.
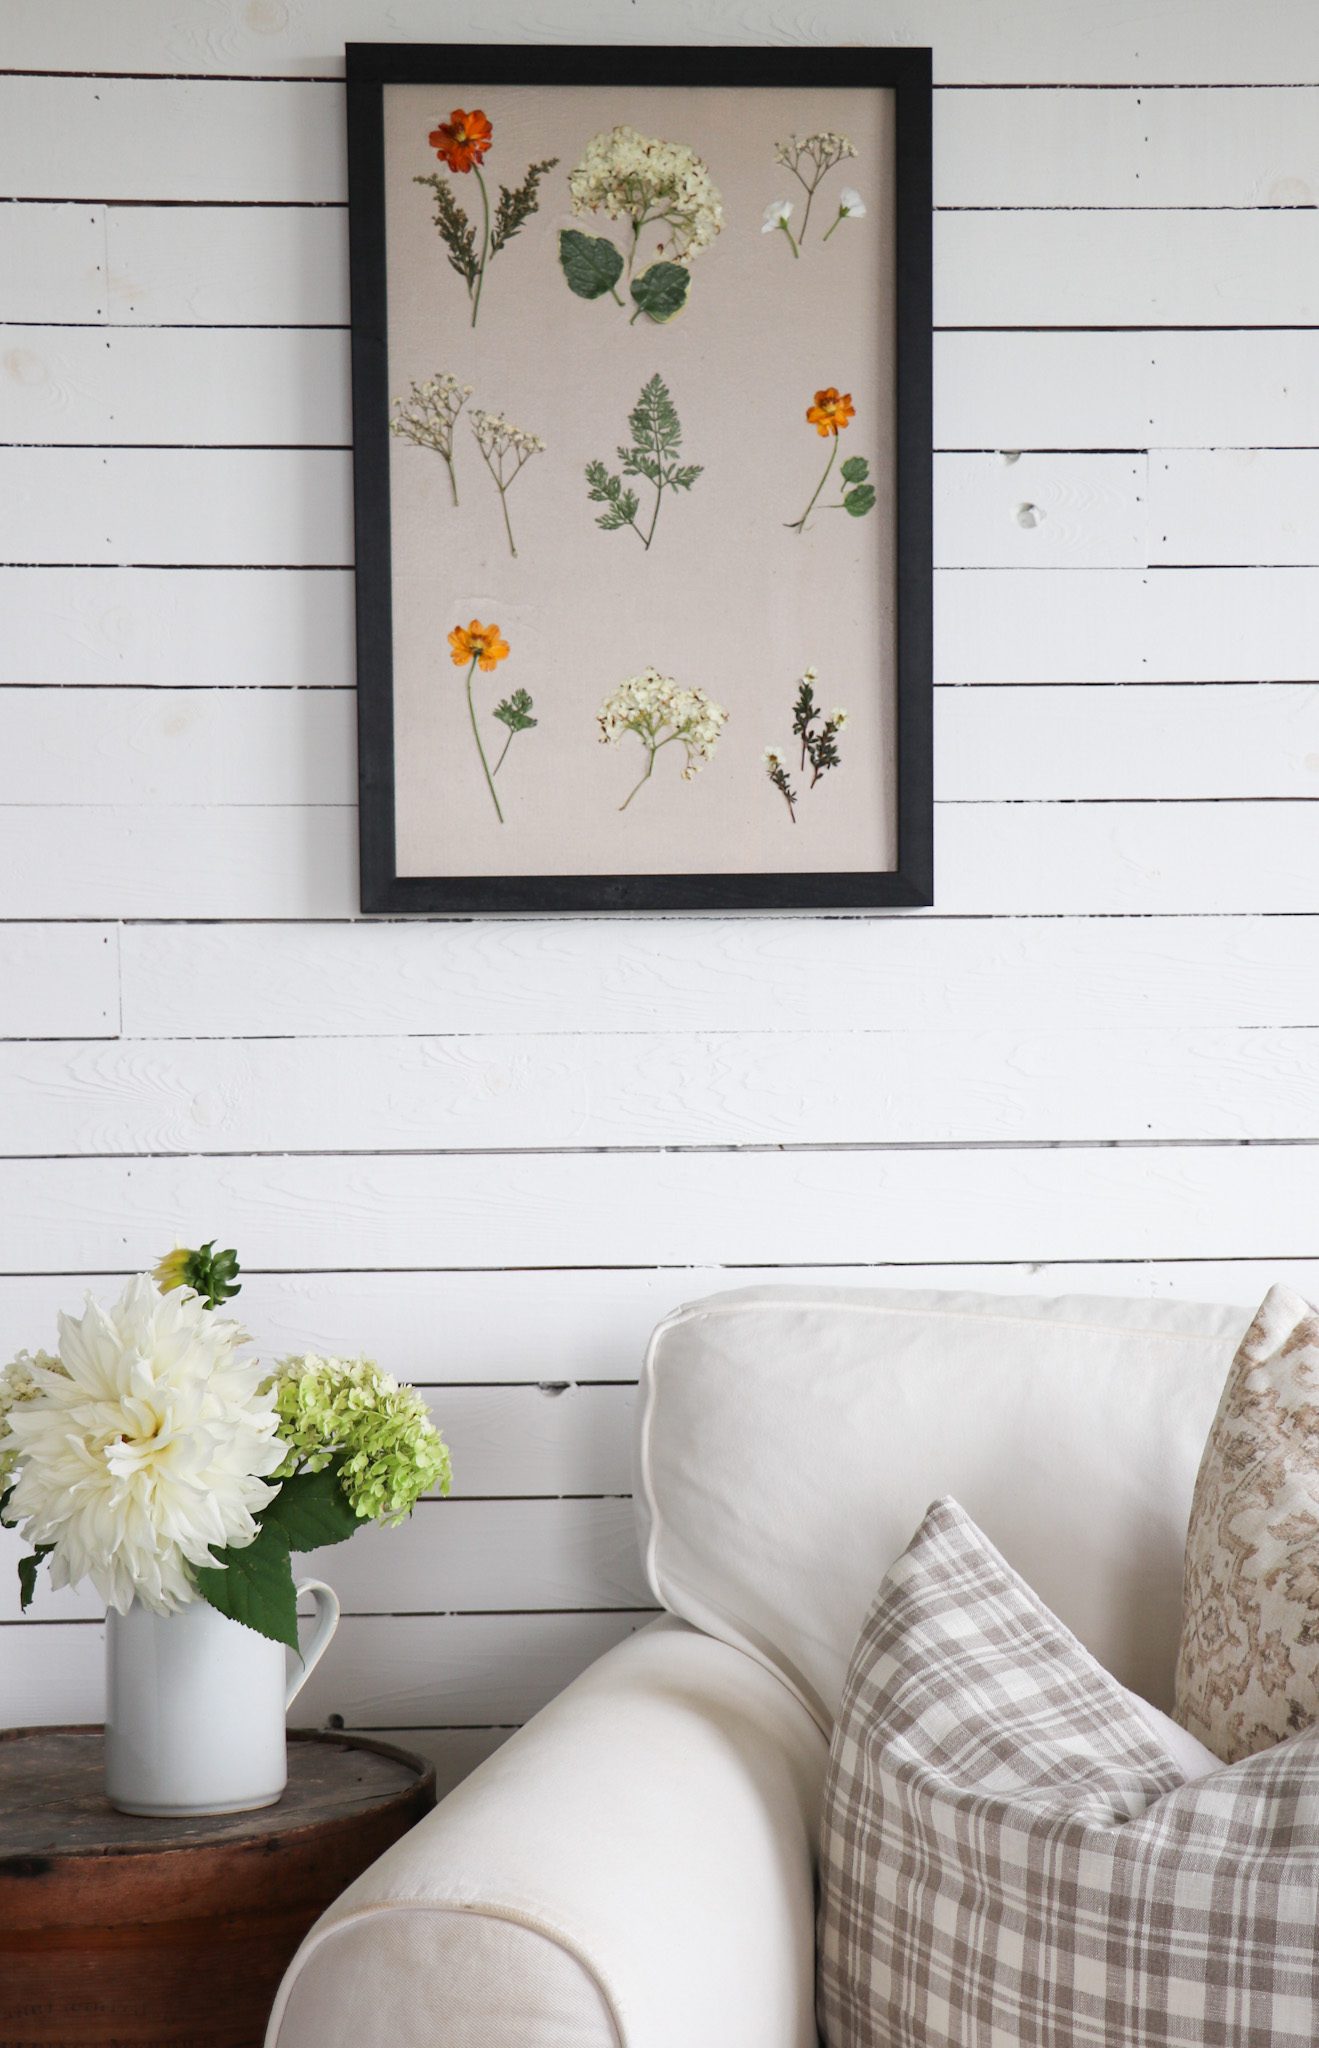
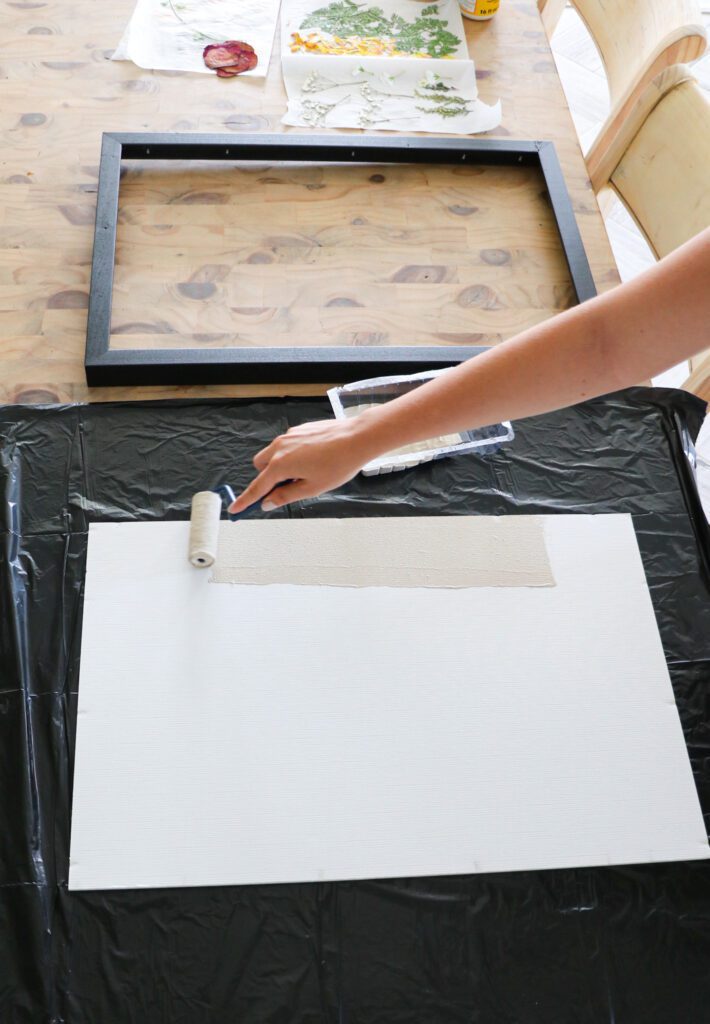
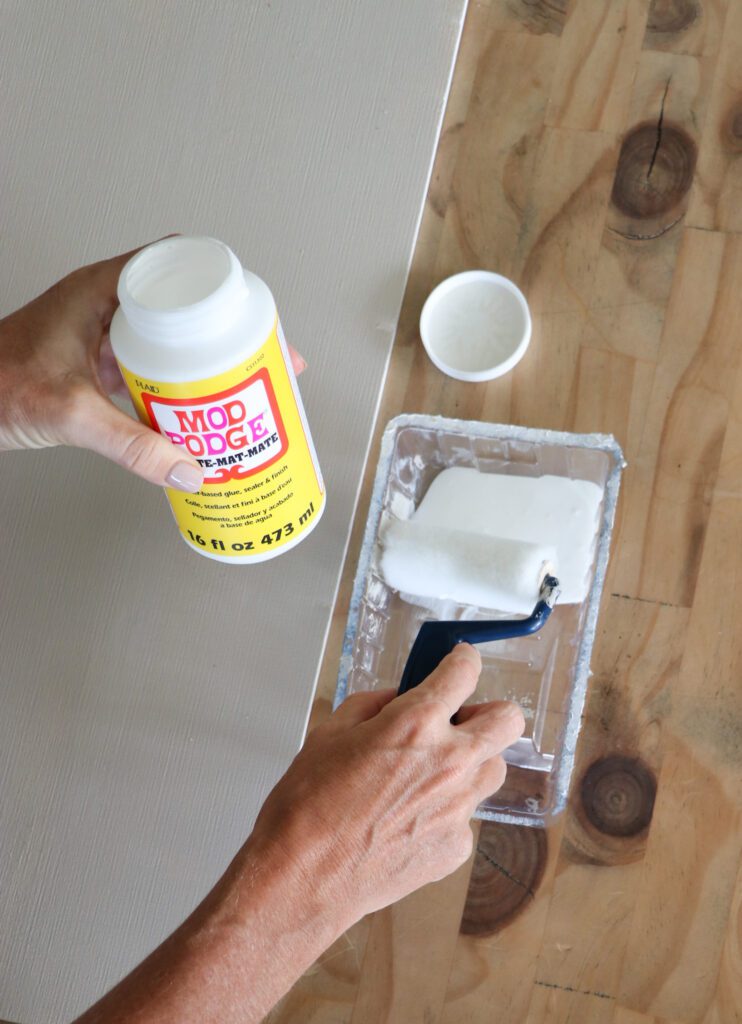
While my flowers were drying, I went up and rummaged through my attic and found an old framed print that I hadn’t used in years. I removed the frame and painted the insert with a neutral color called “Cathedral Taupe”. If you don’t have any old framed prints, no worries! You could easily purchase a frame and still make this DIY pressed flower art for around twenty dollars or so.
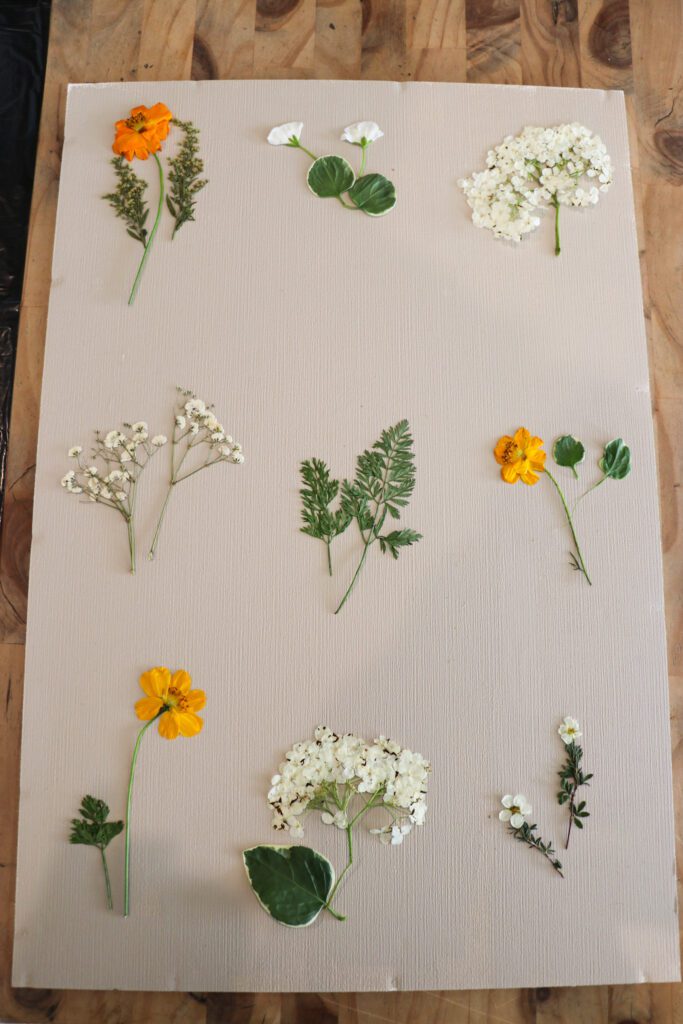
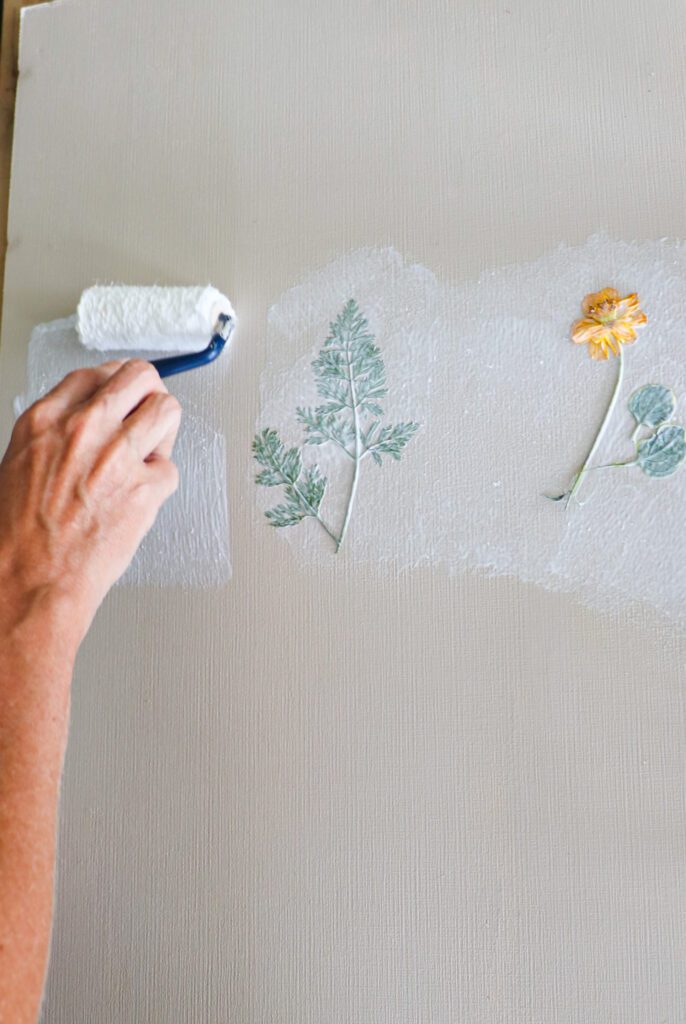
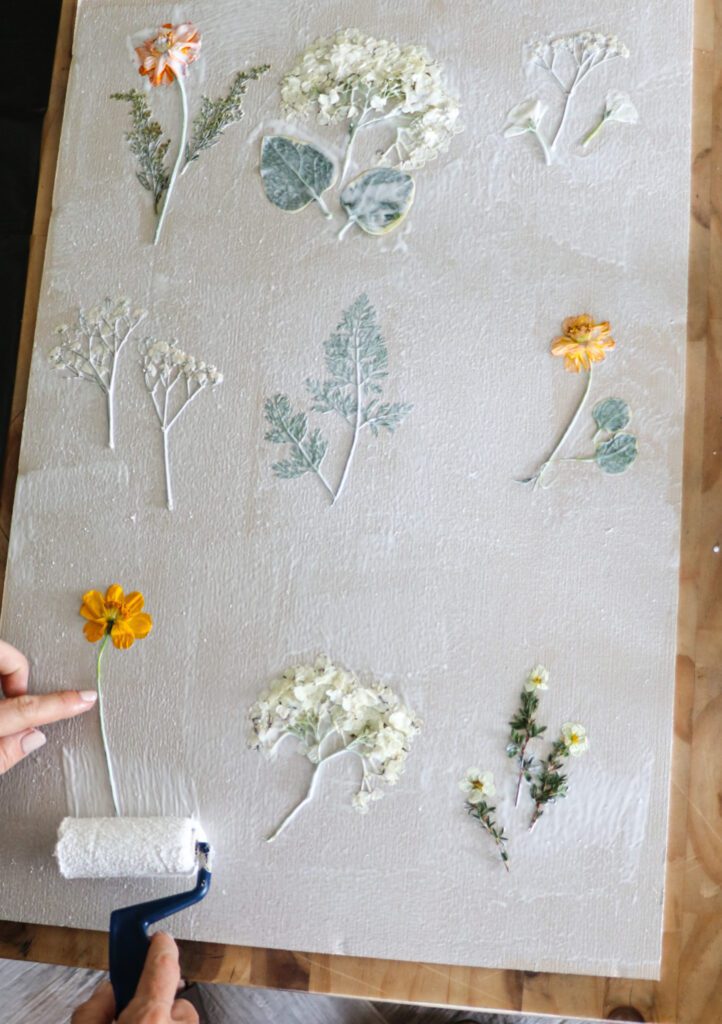
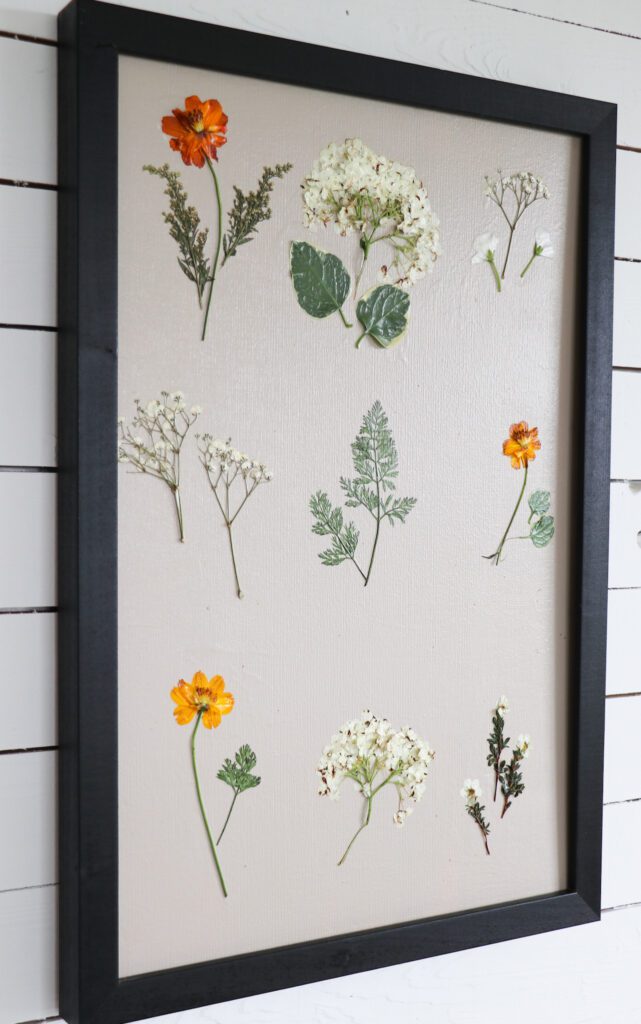
Once the paint was dry and the flowers were too, I played around for a little with the flowers trying to decide on a layout or a pattern. After a few tries, I decided that I preferred the look of the flowers spaced out making somewhat of a grid of nine different little small arrangements.
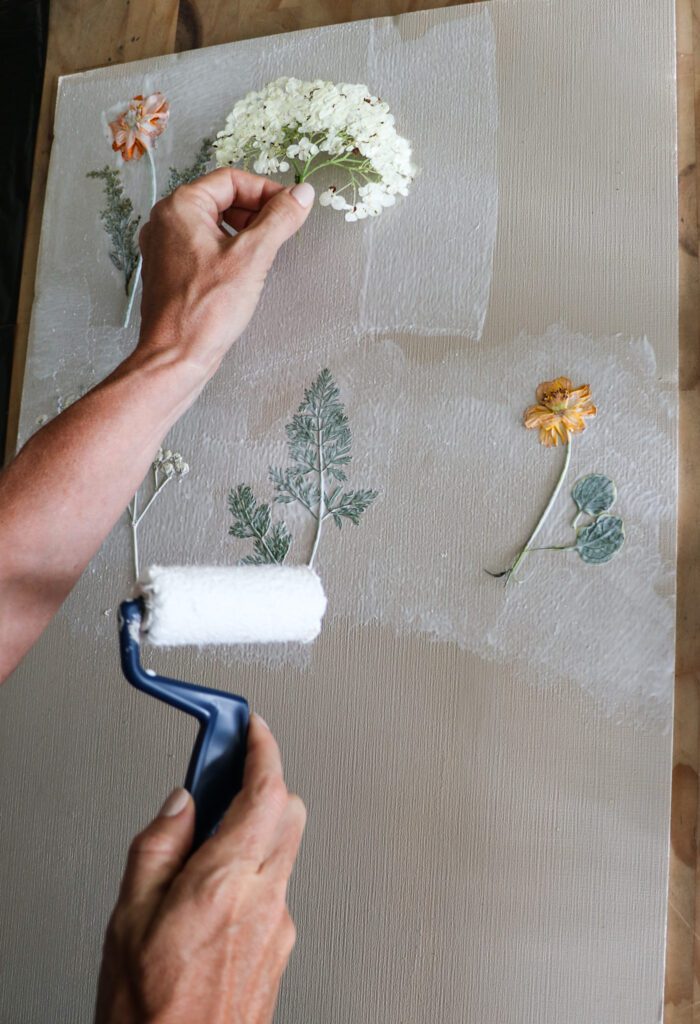
To adhere the flowers, I used a small foam roller to apply a thin coat of Mod Podge to the board, then placed the dried flower where I wanted it and once in place, I went over the top of the flowers with another coat of Mod Podge.

After I was all done I let it dry and gave the pressed flower art another full coat just to make sure it was sealed really well and would last!
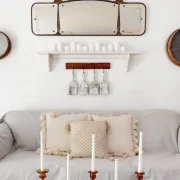
If you’re like me and you aren’t quite ready to say goodbye to your flower garden, I hope you’ll make your beautiful bouquets last a little longer by trying this really simple and budget friendly DIY preserve method! More importantly I hope it brings you JOY and reminds you of lovely summer days spent in your garden!
Materials Need
- Framed Print (old or new, I recycled one)
- Paint color of your choice (if you want to pant the print backdrop)
- 2 Foam Rollers and tray (one for paint and one for Mod Podge application)
- Fresh flowers and greenery
- Mod Podge (I used Matte)
- Heavy Books
- Wax Paper
Steps
- Cut your favorite flowers and leaves from your yard or gardenFold the flowers and leaves in between two sheets of wax paper and press them inside the pages of very heavy books.
- Let flowers and leaves dry for a few days if possible.
- Choose a framed art print to upcycle or purchase one.
- Paint your backdrop and or frame (optional )
- Choose a pattern for arranging your dried flowers on your board
- Apply a thin layer of Mod Podge before placing each flower onto the board
- Once flowers are in adhered, apply another coat of Mod Podge over the entire board and allow to dry before adding a second coat (helping to seal it better)
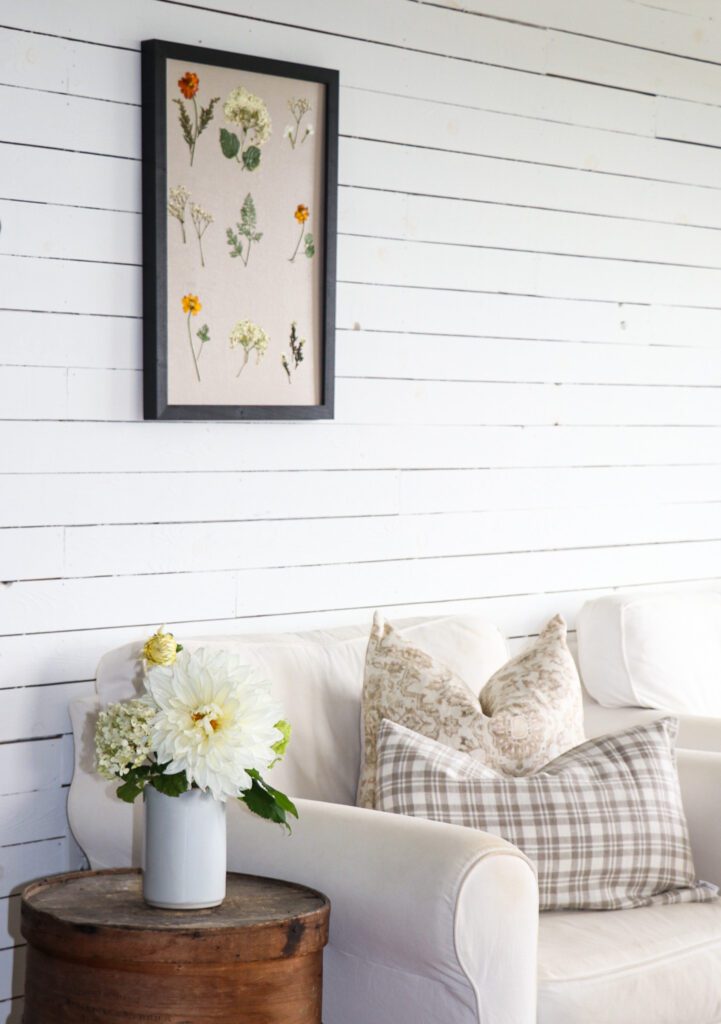
- Once dry, place art into frame and enjoy your beautiful wall pressed flower art bouquet.

Helpful TIP: Choose flowers that aren’t too 3-dimensional or dense to preserve. The larger Dahlias didn’t work well but the cosmos, hydrangeas and carrot tops worked wonderfully!
Love flowers? Who doesn’t! See how the Pandemic Created Home Gardeners. And don’t forget to follow us on Instagram, Facebook and Pinterest for your daily dose of farmhouse inspiration!