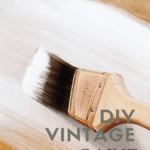


Make It Vintage Paint Technique
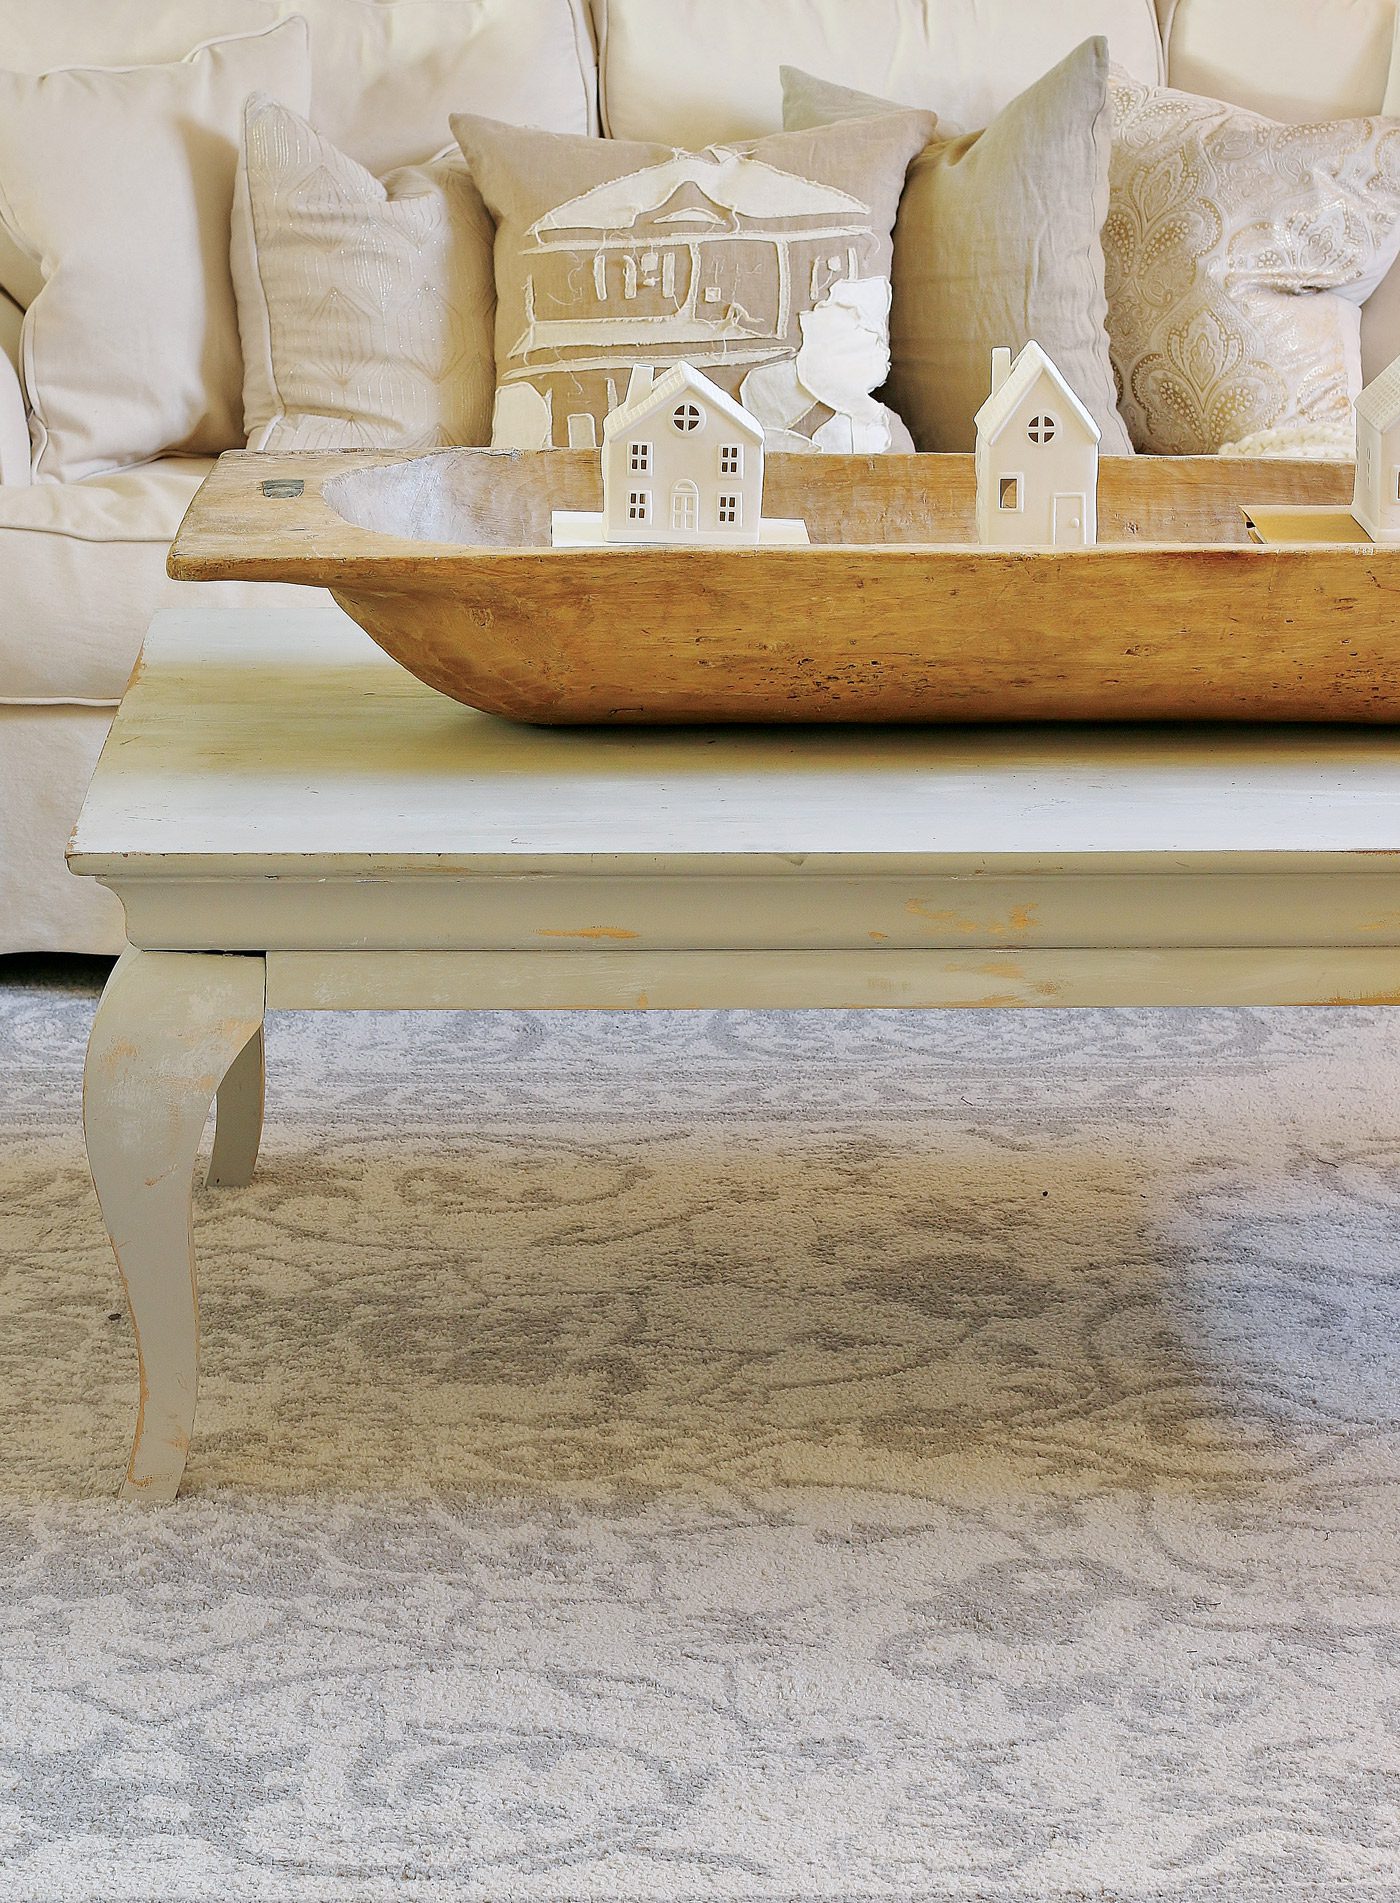

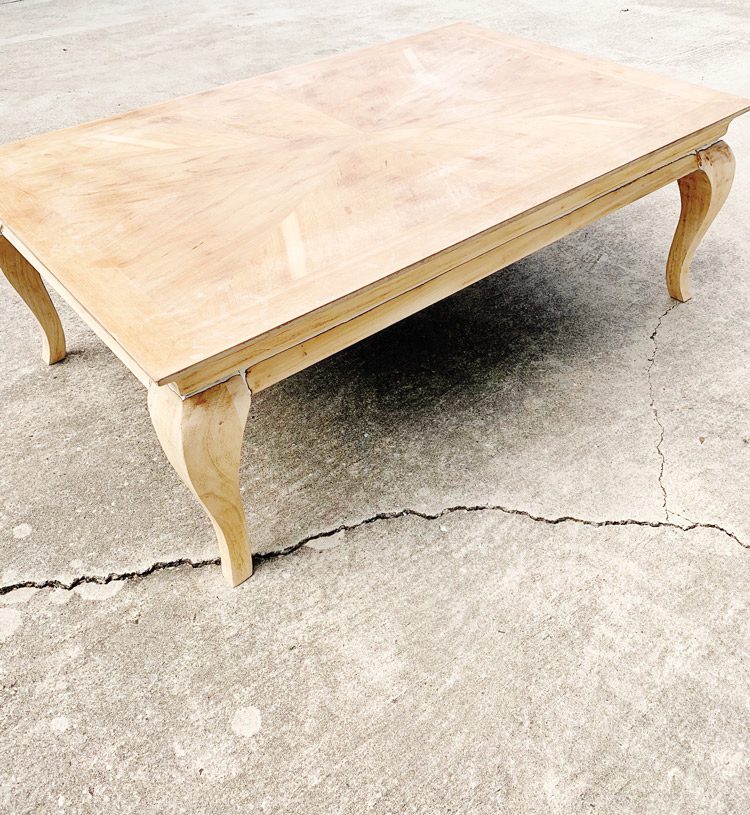
Antiques and vintage pieces such as a farmhouse table sometimes come with expensive price tags. But you can create your own instead by adding the patina with its cracks and chips and timeless appeal to a yard-sale or thrift-store find. It’s so much easier than you might think. All you need is a little glue and know-how. Use this paint technique for a DIY vintage look on a table for your living room or another space in your home.
What You’ll Need:
- Piece of furniture
- Paintbrush
- Glue
- Paint of choice
- 220-grit sandpaper
What You’ll Do:
- Lightly sand. Begin by lightly sanding the surface of the table. This gets rid of any raised parts on the surface, but it also prepares the table for the glue and paint.
I also want to introduce an important concept about crackle. When you crackle, there are two layers. The first layer is the base layer, which will show through the crackle, and the second part is the top-coat color you want to crackle. On this piece, I wanted the wood to show through the crackle, so I didn’t use a base coat. If I wanted white to show through the gray, I would have painted it white first before adding the crackle layer.
Note: If you want a paint color to show through instead of wood, you should add a layer of paint first, let it dry and then proceed to step 2.
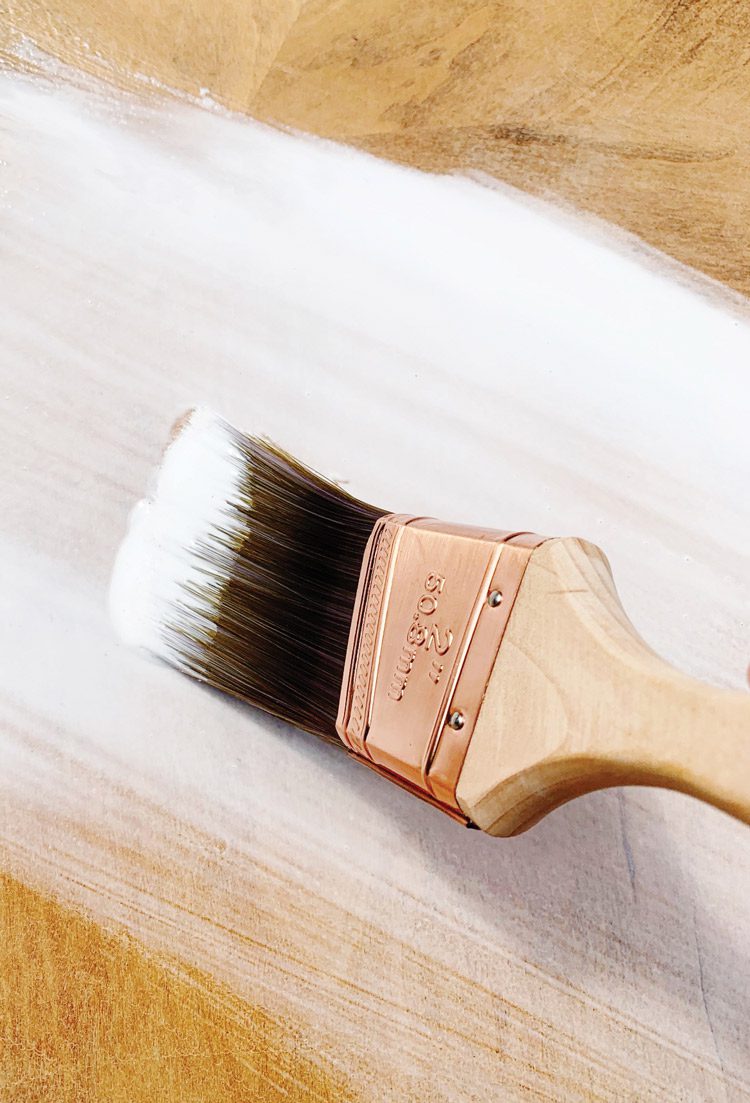
2. Apply glue. This is just regular Elmer’s glue. It will create an amazing crackle when the project is finished. With a brush, apply a thick layer of glue to the table. Don’t skimp on the glue—the more, the better. The glue provides the foundation for the crackle on the table.
3. Brush in one direction. When brushing the glue (and paint), you want to make sure you are brushing in only one direction. This helps set up the table to crackle better. You don’t want to crosshatch or apply the glue in random paint strokes. Instead, be consistent in the way you apply the glue, and keep the brush going in one direction. 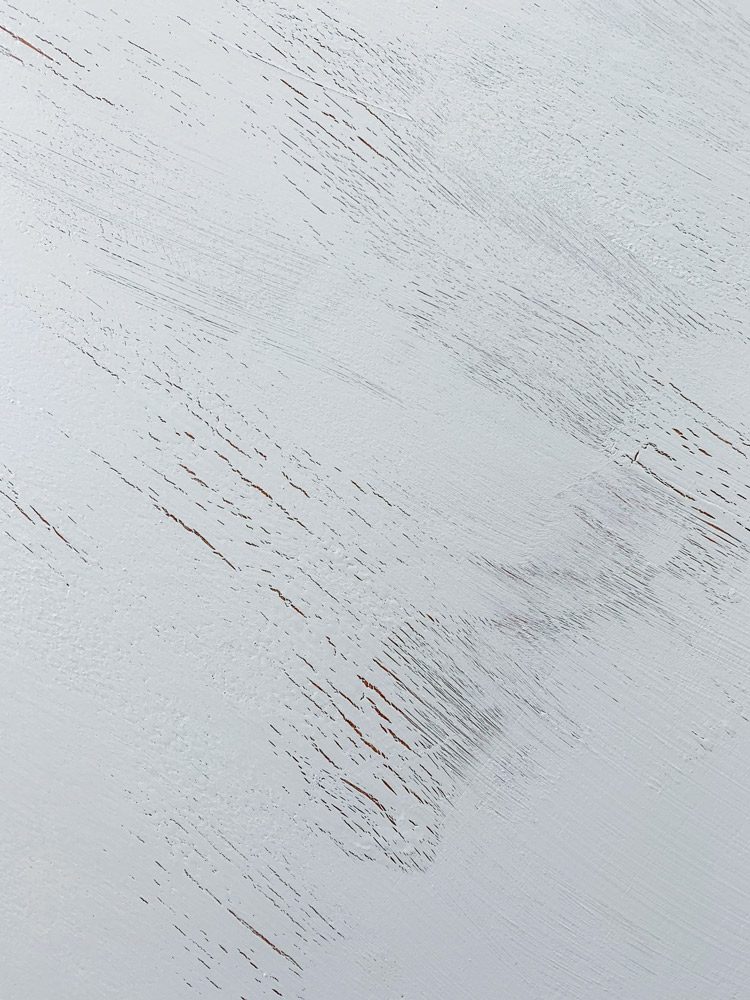
4. Brush for the crackle. To mimic the look of a real antique, you want the crackles to appear in certain areas of the table. Therefore, you don’t want to cover the entire table—just the parts where you want the crackle color to show through. The more glue you add, the bigger the crackle. The less glue? The less crackle.
5. Paint a top coat. Wait until the glue almost dries before you paint. You want your glue to be slightly tacky; then add your top coat. Again, make sure you brush it in only one direction. This table was painted with Sherwin Williams “Mindful Gray.”
6. Lightly sand. To complete the look of a vintage piece, finish off the project by sanding a little around the edges once the paint is completely dry. The glue does most of the work, but a little sanding gives it even more character. Use 220-grit sandpaper for the best results. 
7. Seal the table. After your vintage paint technique project is finished, seal the table with a water-based polyacrylic. Let the table dry for 48 hours before using it.
KariAnne Wood writes the decorating and lifestyle blog Thistlewood Farms from her project-filled historic home in Dallas, Texas, where she lives with her husband and four children. Thistlewood Farms is full of stories of family and faith, and features hundreds of the home décor projects KariAnne creates every week for readers. She’s also the author of four books, including The DIY (Decorate It Yourself) Home Planner (Harvest House 2018), You’ve Got This and The DIY Style Finder (Harvest House 2019).
Looking for more DIY inspiration? Learn how to install open shelves to make room for more storage and decor. Of course, don’t forget to follow us on Instagram, Facebook and Pinterest to get your daily dose of farmhouse inspiration!