


Got Milk Paint? Do a Furniture Makeover

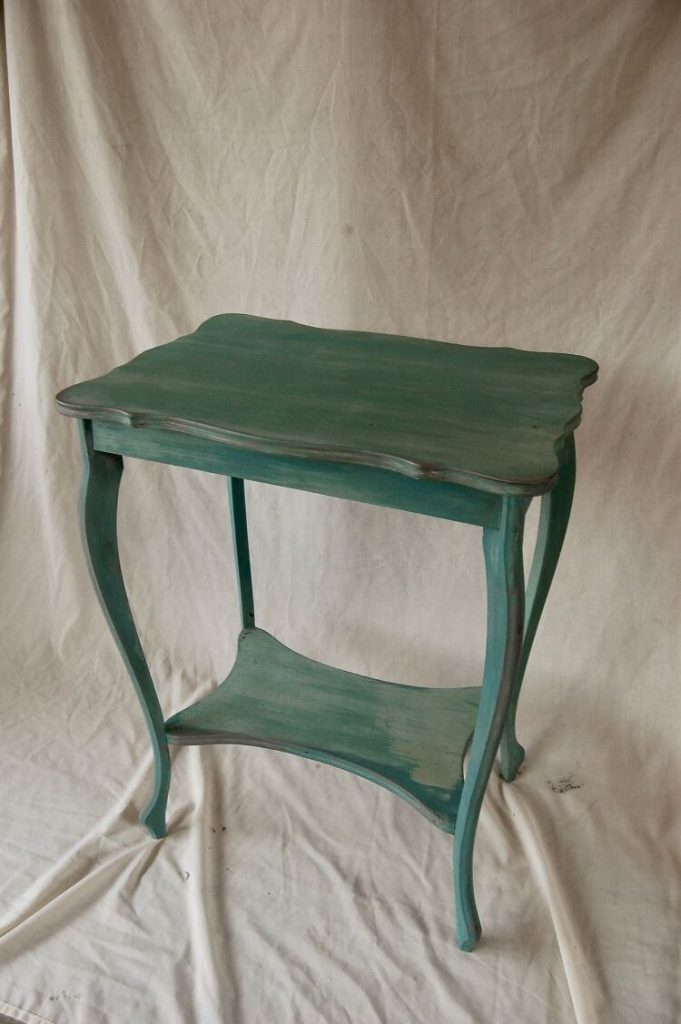
Turning an ordinary table into a vintage-looking piece can be accomplished in just a few hours with milk paint, a versatile and quick eco-friendly option providing durability and a weathered look.
Milk paint has multiple appeals: It’s non-toxic, water-based and simple to use. Because it’s made from clay, milk protein and lime, milk paint is both biodegradable and free of fumes.
The paint is sold as a dry powder, so it lasts indefinitely as long as it is kept away from moisture. Here’s how you can make your own furniture makeover.
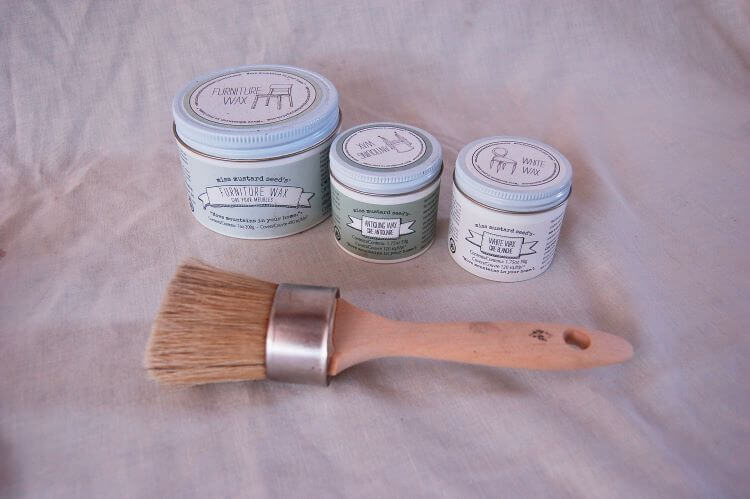
Many companies sell milk paint products and accessories but the Miss Mustard Seed’s line is demonstrated here. While some commercial paint may seem to have a limited color palette, waxes can lighten or darken a shade and experimenting with application can alter the intensity and variegation of color.
Painting with milk paint has three basic steps: prepare, paint, protect.
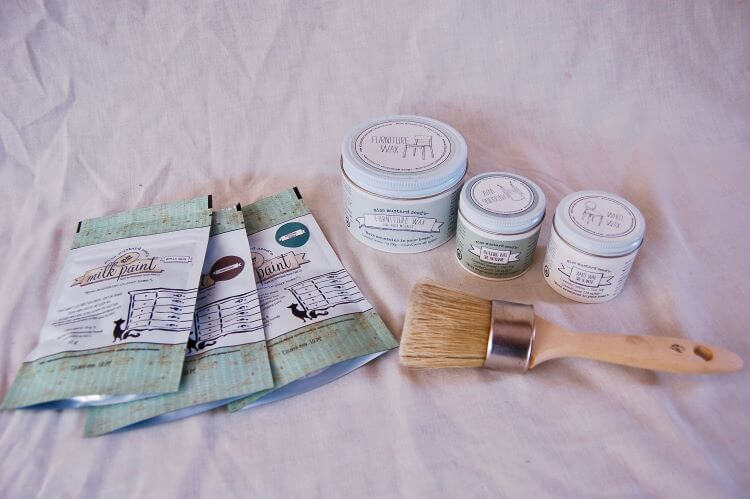
What you’ll need:
- Sandpaper and/or hand sander (for previously painted or finished wood)
- Milk paint in one or two color choices
- Bonding agent (for previously painted or finished wood)
- A container with an airtight lid or a whisk
- Water
- Measuring cup
- Paintbrush
- Wax Brush (a regular paint brush can be used)
- Damp towel or cloth (if a worn finish is desired)

1. Prepare
(Estimated time: 1-2 hours)
Unless the furniture being painted is raw wood, sanding with sandpaper or an electric sander is necessary to remove enough finish so the milk paint will adhere. While sanding to bare wood isn’t necessary, any protective coating should be removed. After sanding, remove all dust completely with a damp cloth.
2. Paint
(Estimated time: 1 hour for each coat)
After choosing a paint color, measure equal parts of paint powder and water. Pour the water into the container first, then add powder. Adding a bonding agent will help the milk paint adhere to surfaces that had been previously painted. While not required, it helps prevent paint flaking and chipping. Add the same amount of bonding agent as water. For a small table 1/4 cup of each was used.
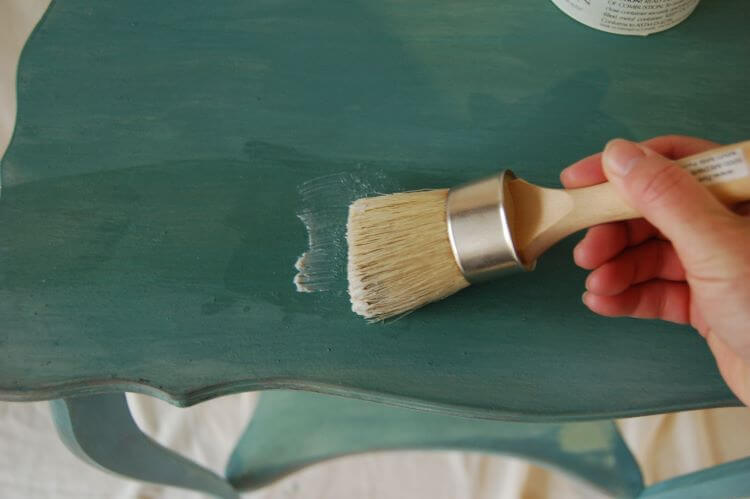
Use a whisk to blend the ingredients until there are no lumps, or seal the container and shake vigorously until the powder is thoroughly mixed. Allow the paint to rest for approximately 10 minutes. The consistency will be much thinner than latex paint.
Apply a thin coat with a brush in the direction of the wood grain. Allow the paint to dry for 20 minutes. Lightly sand then apply a second coat, allowing it to dry another 20 minutes.
If you’re happy with the look, apply a finishing coat to protect.
Alternatively, give any piece a worn finish by adding a second color of paint. Allow the base layer of paint to harden overnight, then choose a color that will be the new topcoat and is in contrast with the bottom. Mix and apply a layer of paint using the same steps as above.

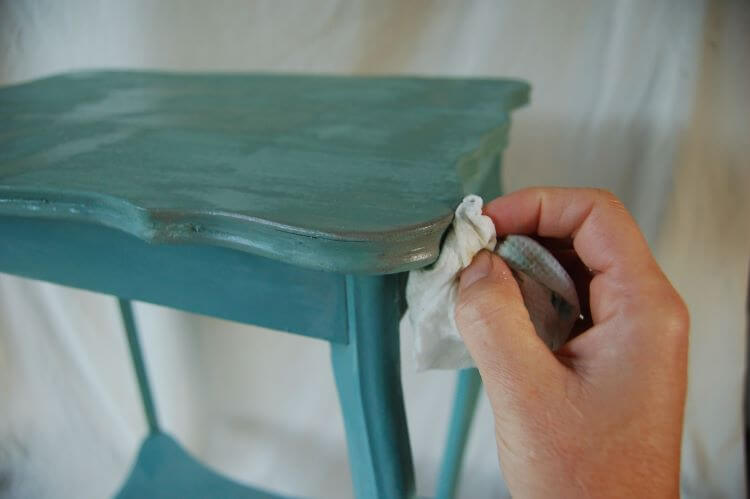
After the new topcoat has dried (approximately 20 minutes) use a damp towel or cloth to gently wipe areas that would normally be worn such as corners and edges. Work slowly and carefully when removing paint. Sandpaper can also be used gently so that too much paint isn’t removed.
3. Protect
(Estimated time: 20 minutes)
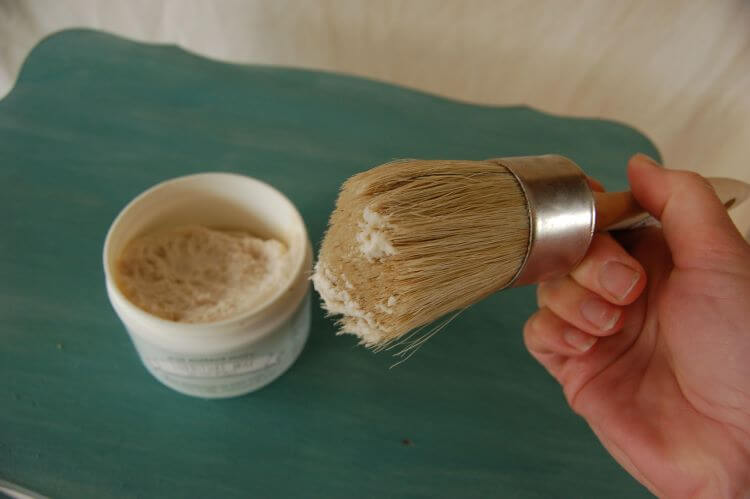
A finishing coat will seal the paint and is simple to apply. A milk paint furniture polish, beeswax or hemp oil will usually retain the current paint color. To darken the color, apply an antiquing wax, or to lighten the color apply a white wax. A combination of light and dark creates a silvery grey sheen.
To apply a wax, dip the ends of a wax brush into the product and brush into the furniture following the same direction it was painted. Blend with the brush until all nooks and crevices are covered and there is no excess wax. After five to 10 minutes the wax should be dry and your furniture item complete.
Heather Lusk is a freelance writer who loves old houses, travel and history. Between dragging her family around the world, she’s attempting to maintain a 120-year-old house in Zionsville, Indiana. She’s written for Indy’s Child, Tiny House Magazine and weekly newspaper the Current in Zionsville.
Love to DIY? Check out this copper pipe DIY candle holder here. Of course, don’t forget to follow us on Instagram, Facebook and Pinterest to get your daily dose of farmhouse inspiration.