How to Repaint Kitchen Cabinets

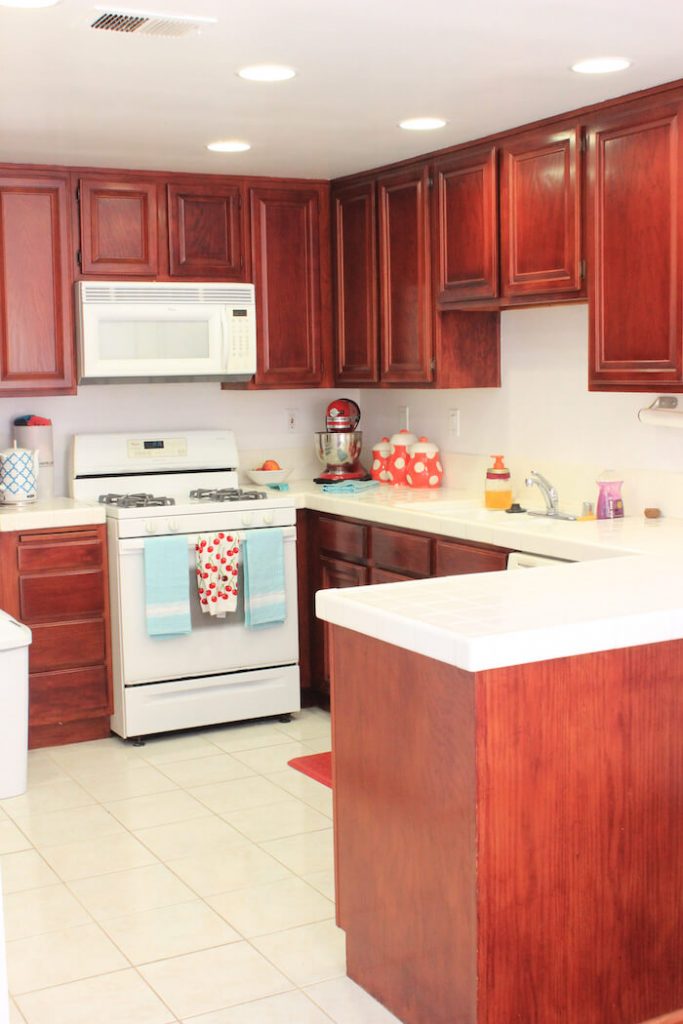
So, you’ve decided to repaint your kitchen cabinets. That’s great! You can repaint kitchen cabinets to help transform your kitchen for less cost without sacrificing style. (If you’re not sure whether you should repaint or replace, find out here.)
Here’s the process I used to repaint my 1988 kitchen cabinets, and the tips I learned along the way.
Before you start, be aware: This project takes a lot of time and quite a bit of elbow grease. Be patient and don’t skip any steps. This is one of those DIYs where if you cut corners, you can end up with cracked or peeling cabinets in six months. After putting in so much time and effort, you don’t want a poor end result. But if you stick with it, you’ll reward yourself with beautiful, lasting cabinets.
Here at American Farmhouse Style, we absolutely love to share our finds from around the web with you! That being said, you may notice that some of the links in this article are affiliate links. This means that if you click through and make a purchase, AFS receives a small commission at no extra cost to you! Truly a win-win!
What You’ll Need:
- Cleaning wipes (try one especially for furniture)
- Masking tape
- Tarps/paint cloths
- Protective masks and gloves
- Stripper (I recommend CitriStrip, which is non-toxic)
- Plastic paint scrapers (don’t use metal)
- Optional: Secondary stripper
- 120-grit sandpaper
- White, oil-based primer (I recommend Zinsser BIN)
- Paint brushes
- Oil-based paint remover
- Painter’s caulk
- Paint of choice (I recommend Benjamin Moore Advance Interior paint)
- 220-grit sanding sponges and paper
- Door knobs and drawer pulls of your choice
- Hinges of your choice
Cost (this was for my cabinets, upper and lower): $360
Time (again, this was for my own cabinets): 200 man hours
What You’ll Do:
Repaint the Cabinet Boxes.
1. Wipe everything down, including the areas next to your stove and inside the doors. (Now would be a good time to clean behind your stove too.)
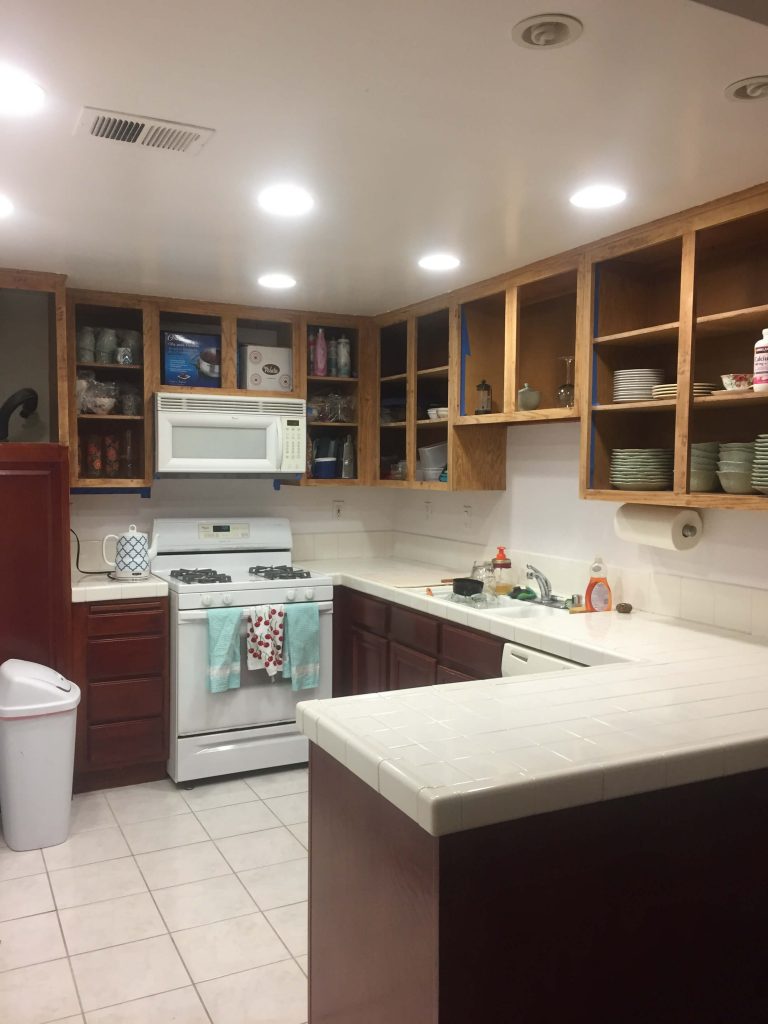
2. Take off all cabinet doors and hardware. Label the doors as you take them off so it’s easy to put them back correctly. If you’re reusing your hardware, place them in separate plastic bags as well. Don’t try to do this project with the cabinet doors on; it won’t look as good in the end.
3. Prep the area with tarps, towels, etc. I didn’t remove all our dishes for the stripping part. They did get a bit dusty, but it was easier to wipe them down when we needed them than to deal with an empty kitchen for weeks. I did remove the contents when it came time to paint.
4. Tape off your cabinet boxes. Yes, this is before you even strip the old paint or varnish. You’ll want that tape in place because the stripper gets messy.
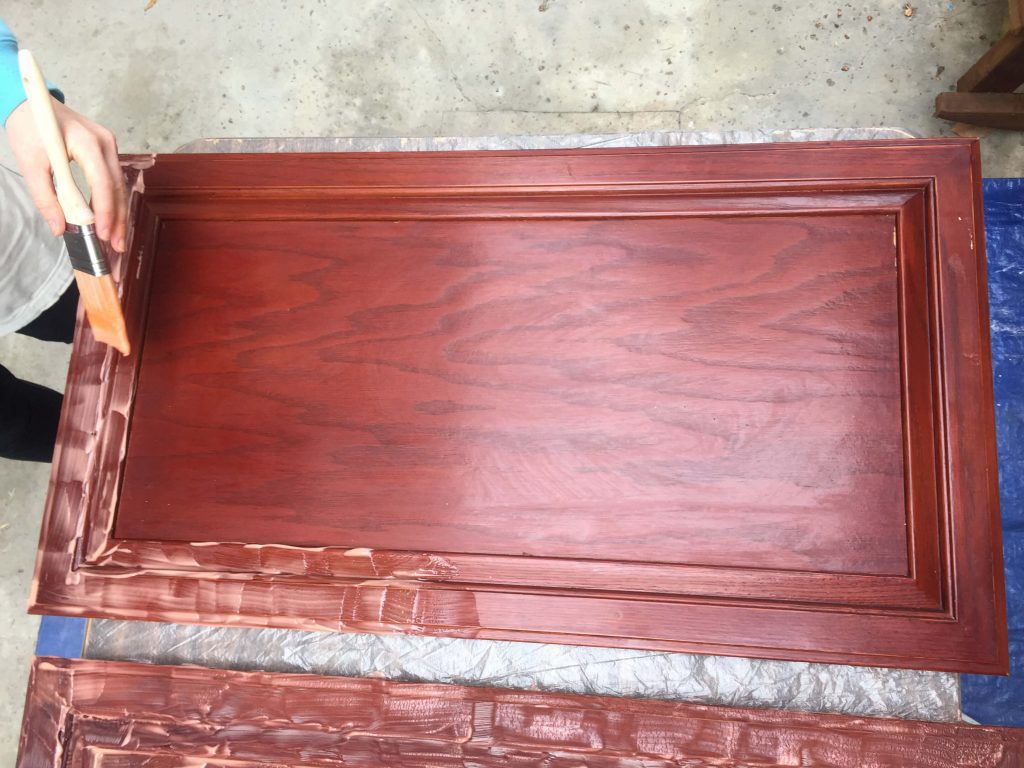
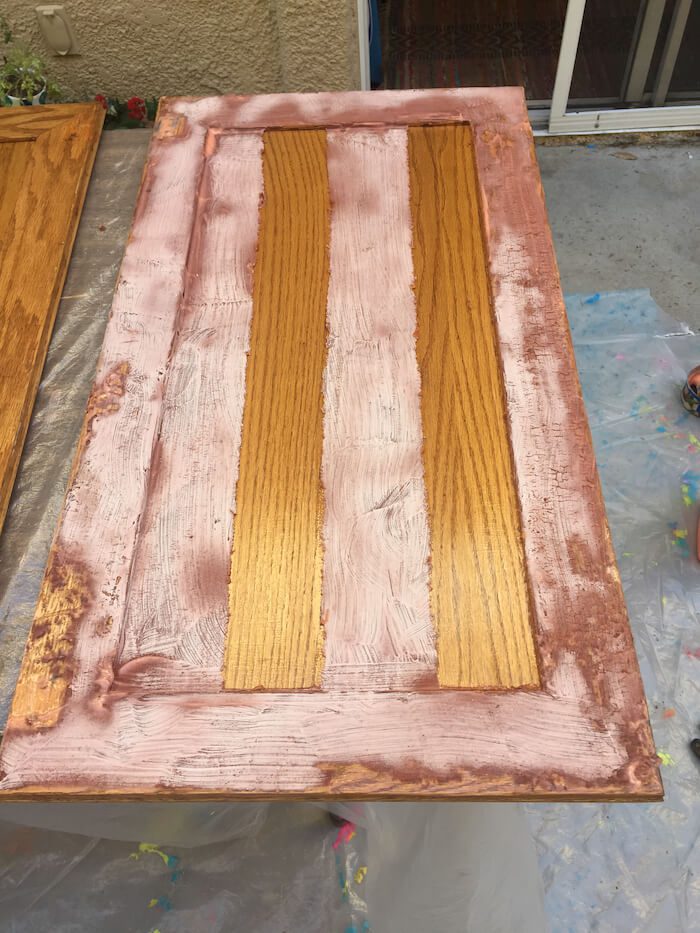
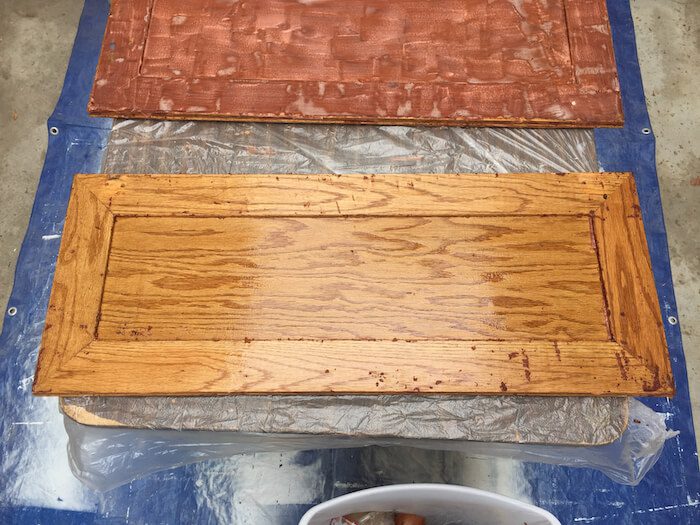
5. Strip and wash the cabinet boxes. Wear gloves and follow the manufacturer’s instructions for using the stripper. Make sure you get all the old paint or varnish off, even if it takes several coats of your stripper. This will probably take the most time out of any step of this project, but be patient.
For our cabinets, the varnish had become so gummy that even with the stripper, it left a sticky residue. We had to use a second, chemical stripper to wash the wood and remove the residue.
6. Sand the cabinet boxes with 150-grit sandpaper. While it may seem redundant to strip and then sand, this will get any remaining paint or varnish off, so that you’ll start painting with the raw wood of your cabinets. Once you’ve sanded, wipe down the cabinet boxes with a damp rag or wipe.

7. It’s finally time to paint! Prime the cabinets with an oil-based primer, using a very thin coat of paint. Once the primer is fully dry, lightly sand the cabinets with 220-grit sandpaper, and wipe them down before moving onto the second coat. Sanding between each coat will keep the cabinets smooth and give you a clean finish.
8. Once you’re finished priming, do any caulking and retouching on the cabinet boxes and ceiling.
9. Now it’s time for the paint. Using your chosen cabinet paint, paint the boxes with at least two coats. Again, don’t use too much paint or it will congeal and look less professional. Use the same sanding process in between each coat for the best finish.

Repaint the Doors and Drawers.
Now you get to repeat the whole process with the cabinet drawers and doors. This DIY takes a while, so you can make it easier on yourself by breaking up the project. Do the boxes first so you can get your kitchenware back where it belongs, then you can use your kitchen normally while you repaint the drawers and doors.
10. Strip and sand the cabinet drawer and doors. Use the same process as you did for the boxes: Strip, then sand with 150-grit sand paper, then wipe them down. For this part, it’s easiest if you set up tables where you can work so you aren’t on the ground for hours at a time.
11. Prime the cabinet doors and drawers. Again, this will be the same process as the cabinet boxes: Use a thin coat of primer and sand between each coat with 220-grit sandpaper. For the cabinet doors, I recommend painting the backs first so the fronts come last and aren’t sitting against your work surface.
12. Paint the cabinet doors and drawers, sanding in between each coat.
13. Attach your hardware and reattached the doors. We recommend getting new hardware if the old hardware is looking used; it will give the cabinets a clean and finished look.
This process of attaching the hardware can be more difficult than it seems. Attach the hardware to the door first, then to the cabinet boxes. Make sure you measure where the hardware should go, pre-drill holes so the wood doesn’t crack, and level each door as you attach it so the overall effect is even.
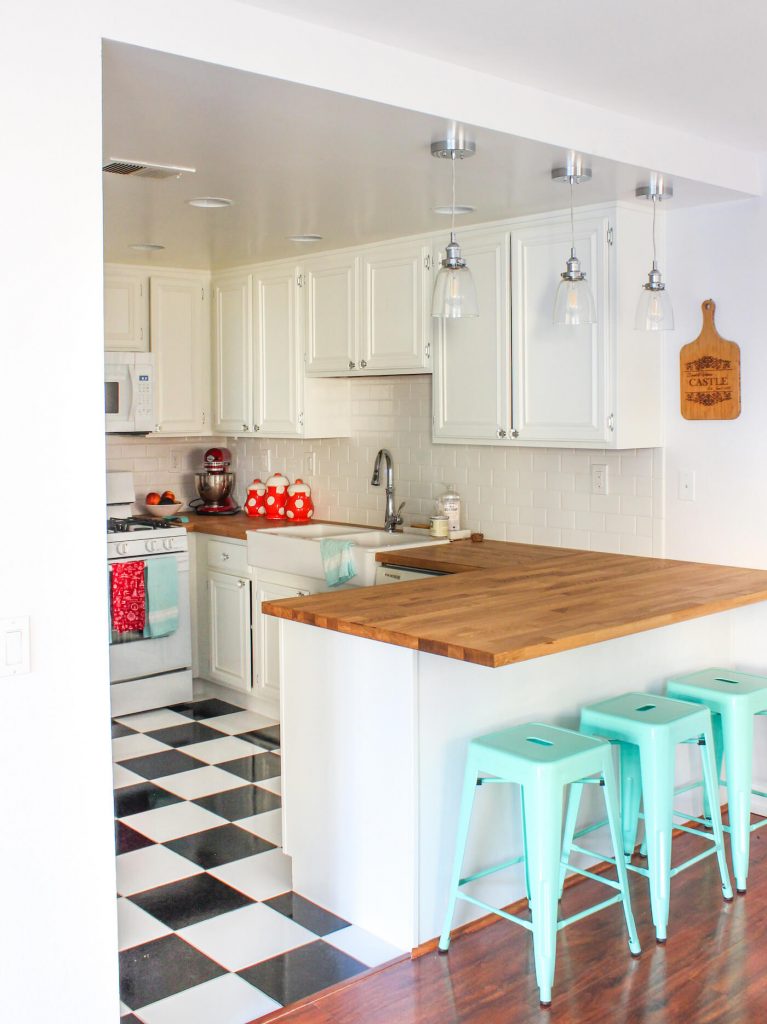
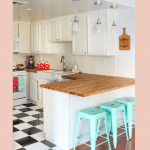
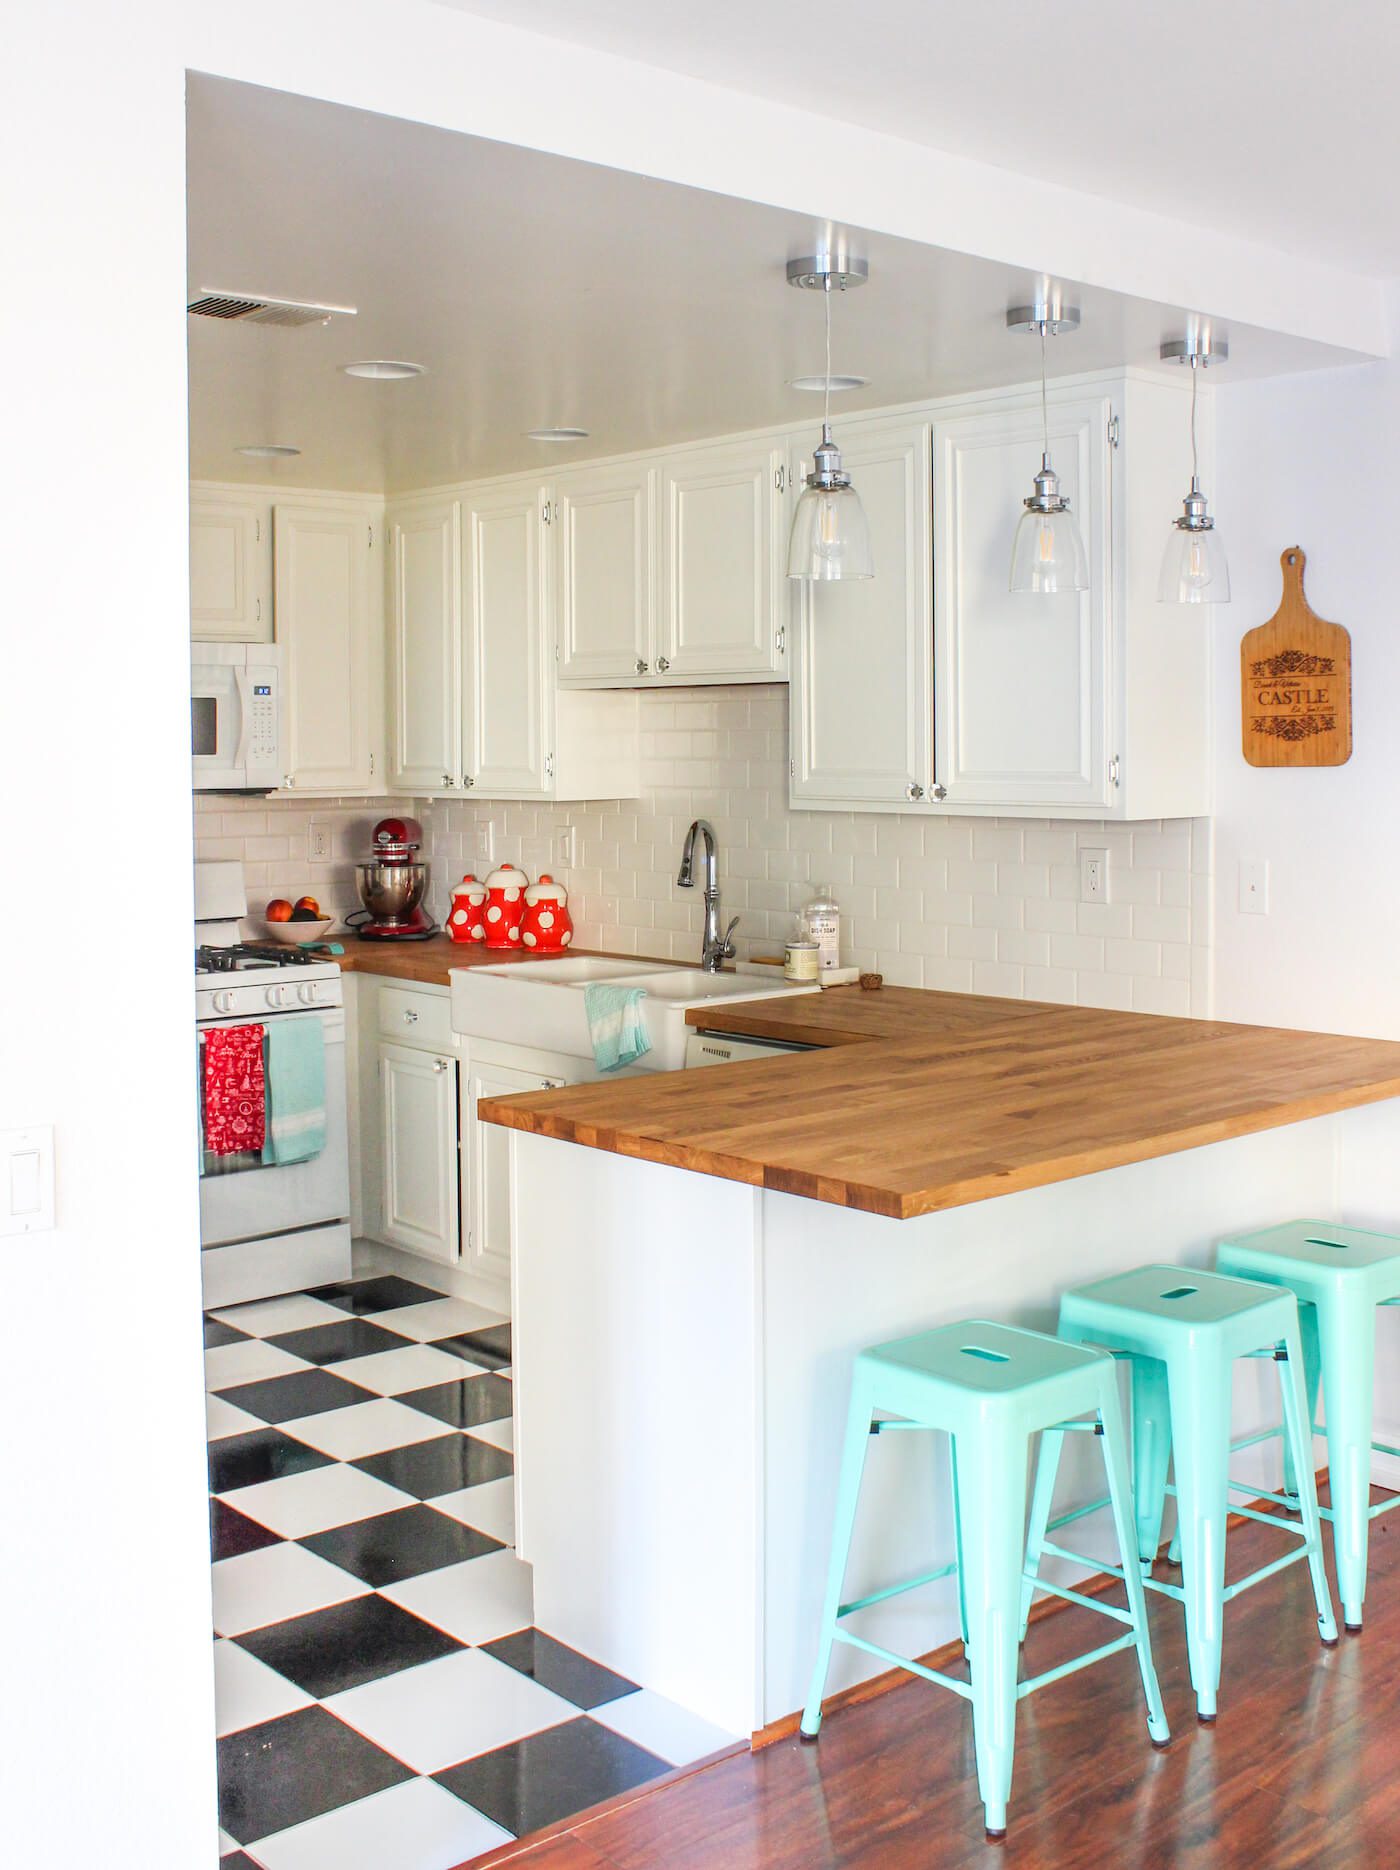
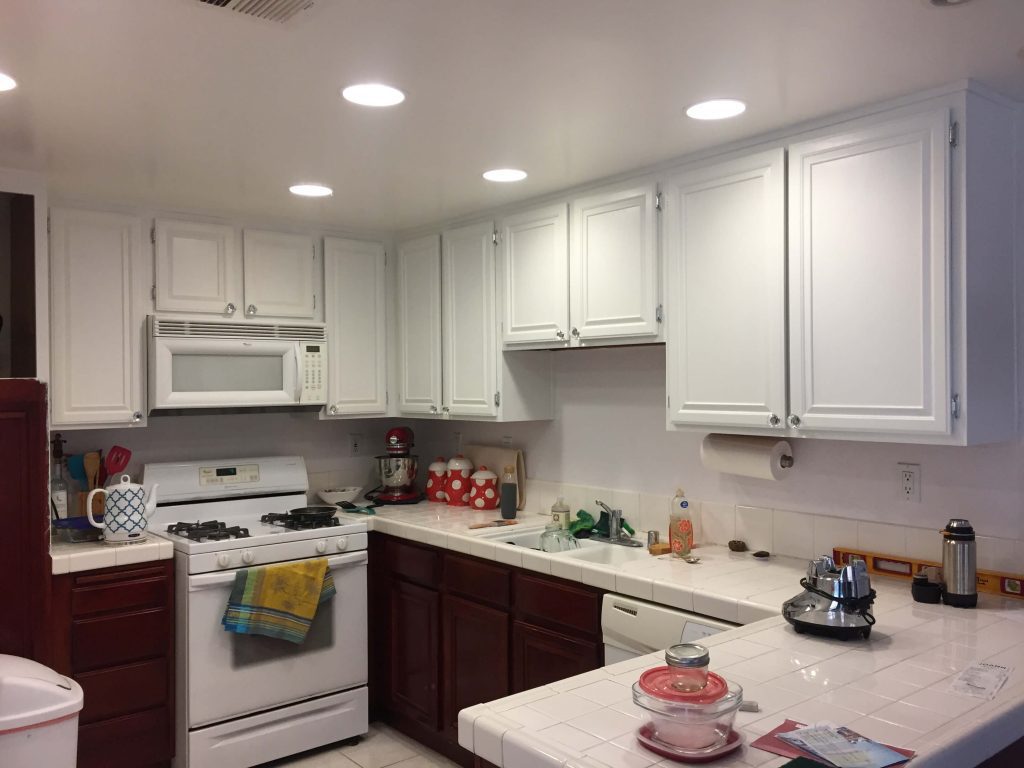
Then enjoy your finished cabinets! The single paint change can transform your whole kitchen look; take a look at how much it helped this Oklahoma kitchen. Of course, don’t forget to follow us on Instagram, Facebook and Pinterest to get your daily dose of farmhouse inspiration!