


Old Windows to New Greenhouse

A DIY journey with KBS Coatings to a magical, multi-purpose space
Written, styled, and photographed by Stephanie Leleux, 2024 Brand Ambassador
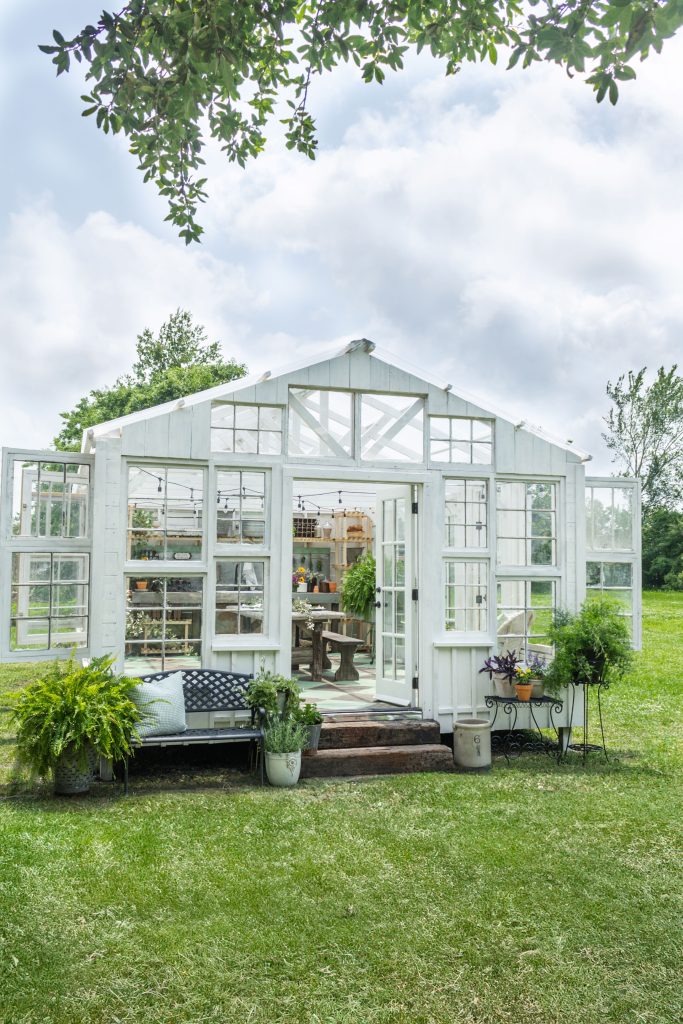
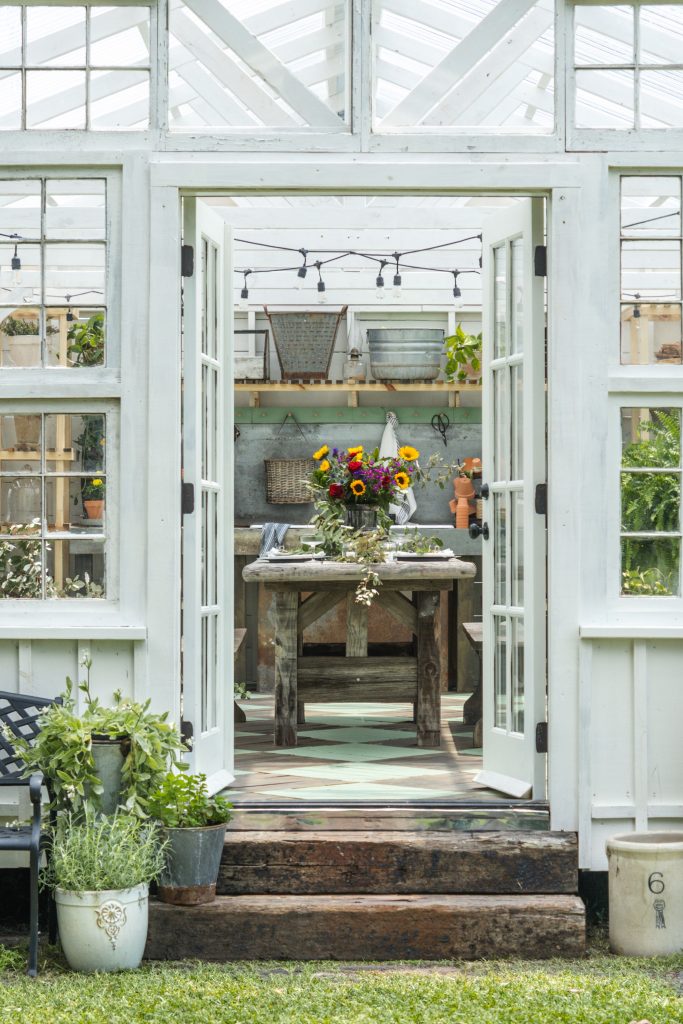
Building a greenhouse has been a long-time dream for me and my husband, Skip. Over the past few years, we’ve been continuously thrifting and collecting materials that could bring this dream to life. Our goal was to not only create a space that was functional for germinating seeds and nurturing plants for our garden, but also to serve as a peaceful escape for outdoor dining and entertaining. This year, through creativity and hard work, we turned our dream into a reality, building a greenhouse that has practical functionality and nostalgic charm. We learned so much through this DIY journey, and I’m sharing these helpful tips to guide you through the process!
Finding Your Materials
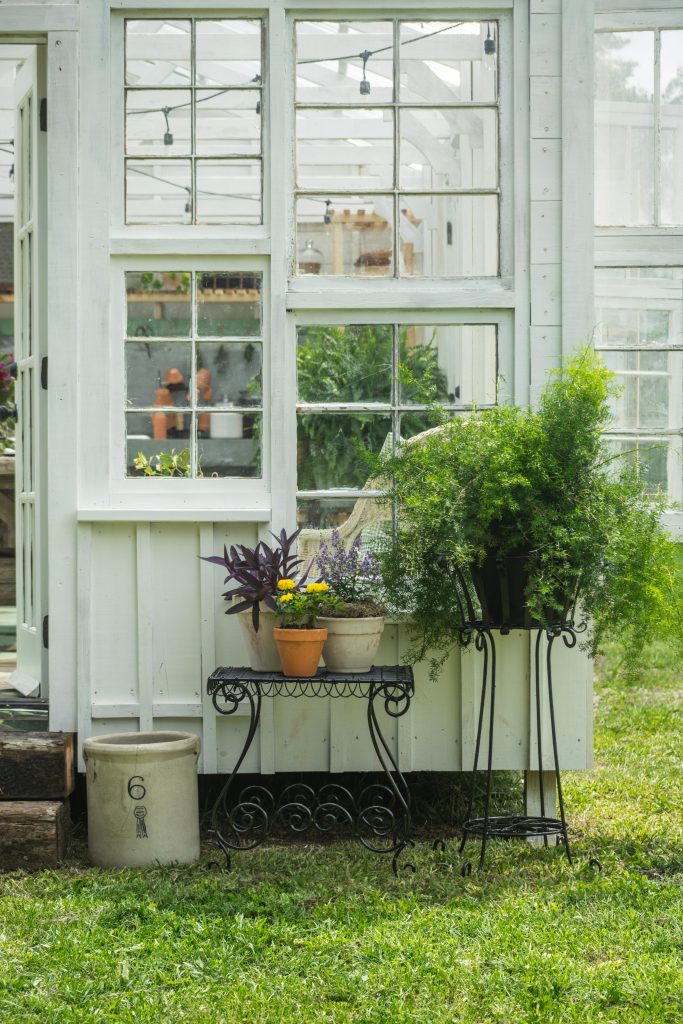
Reused: Reusing old materials is an environmentally friendly choice that adds architectural detail and personality to any garden. Our search began with the hunt for the perfect windows. Flea markets, estate sales and salvage yards are treasure troves for vintage windows. Look for ones with character—peeling paint, unique patterns, or even a bit of old hardware still attached. Remember, imperfections add character, so don’t shy away from windows that show a bit of history. Many of the windows we thrifted had broken glass panes, 22 to be exact, but they were easy to repair using glass from other thrifted windows.
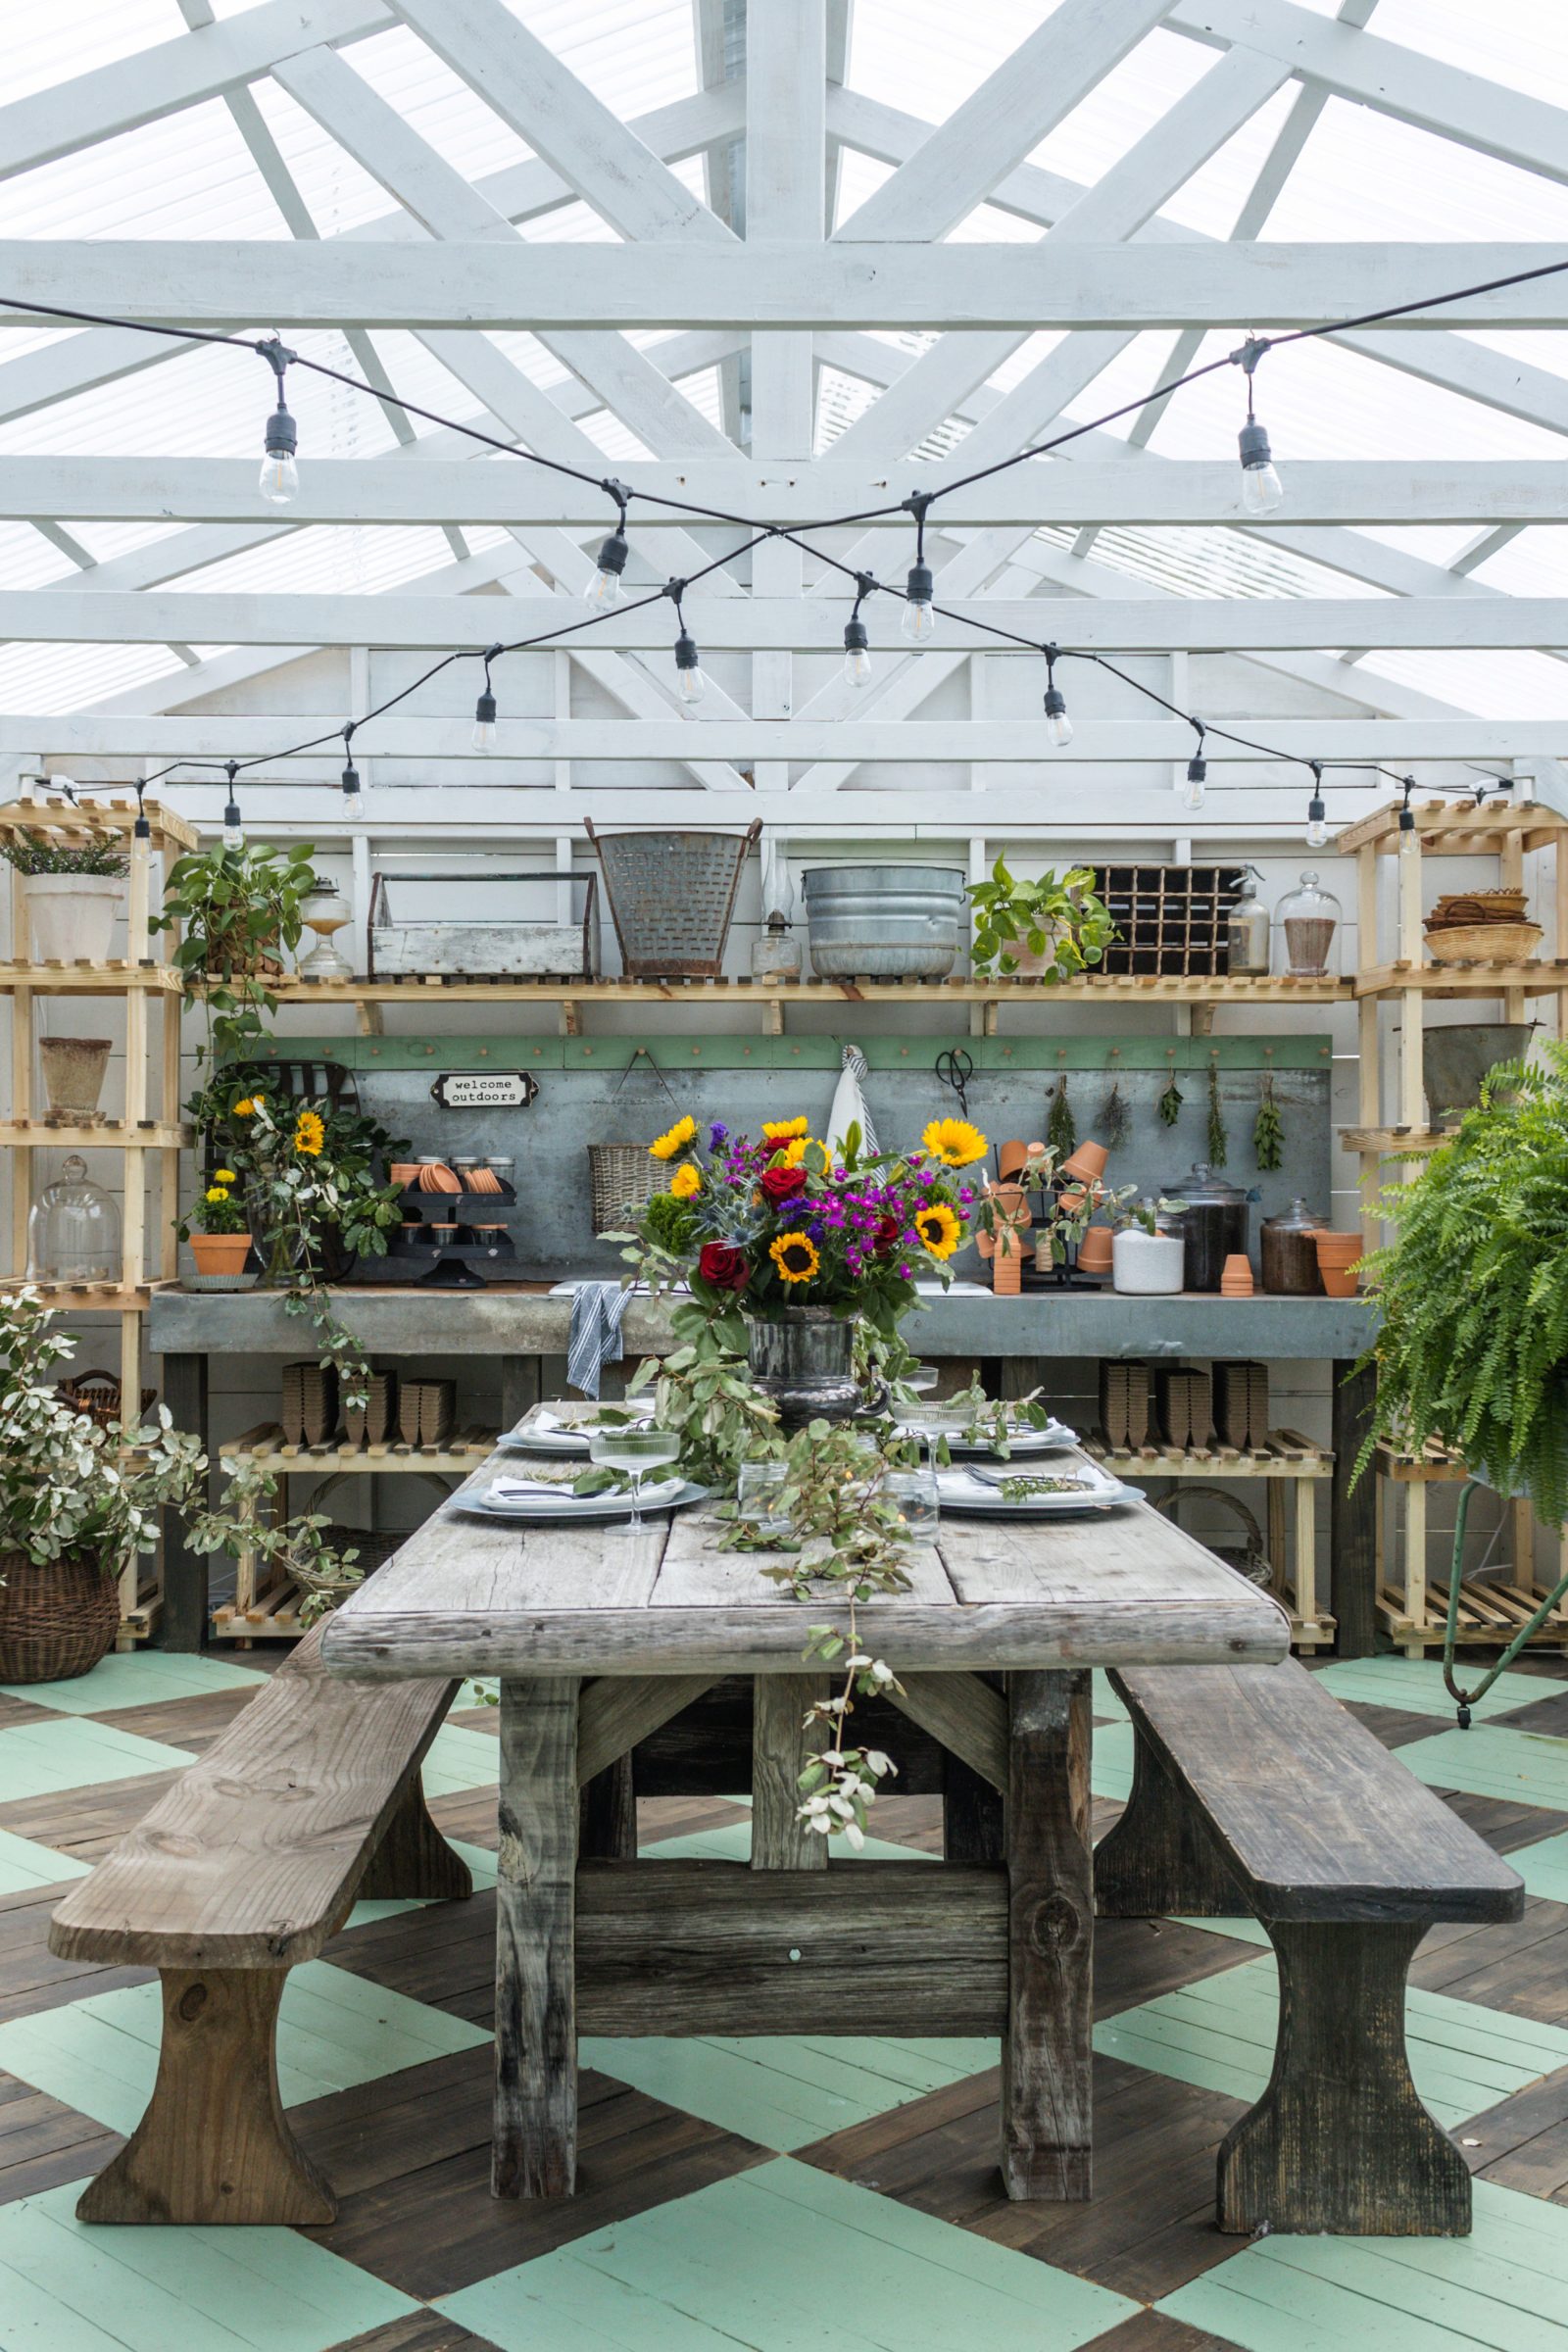
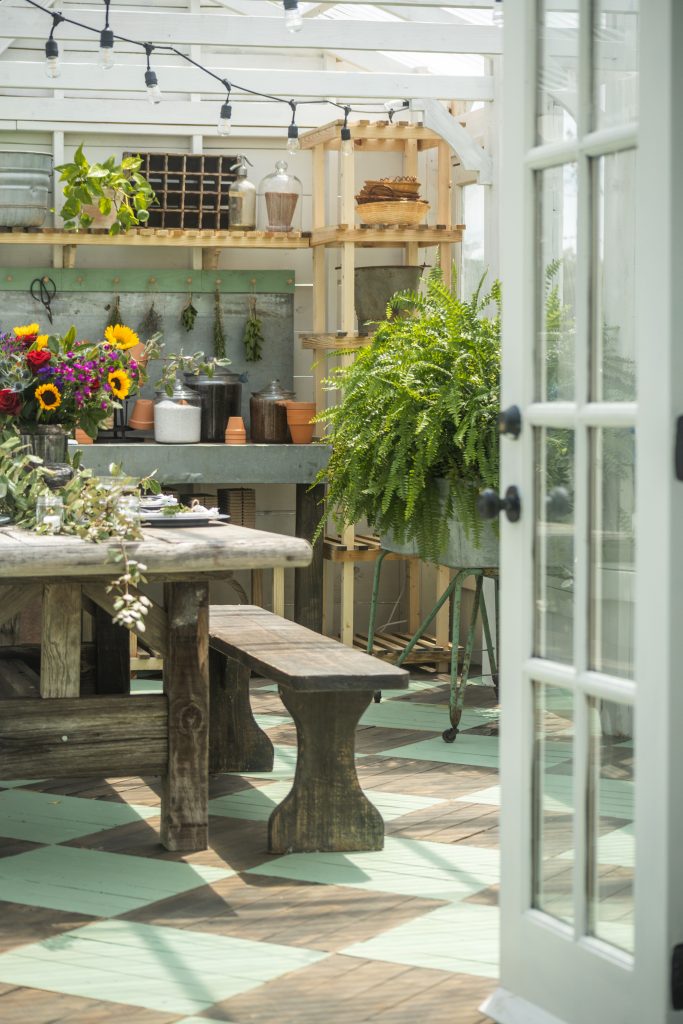
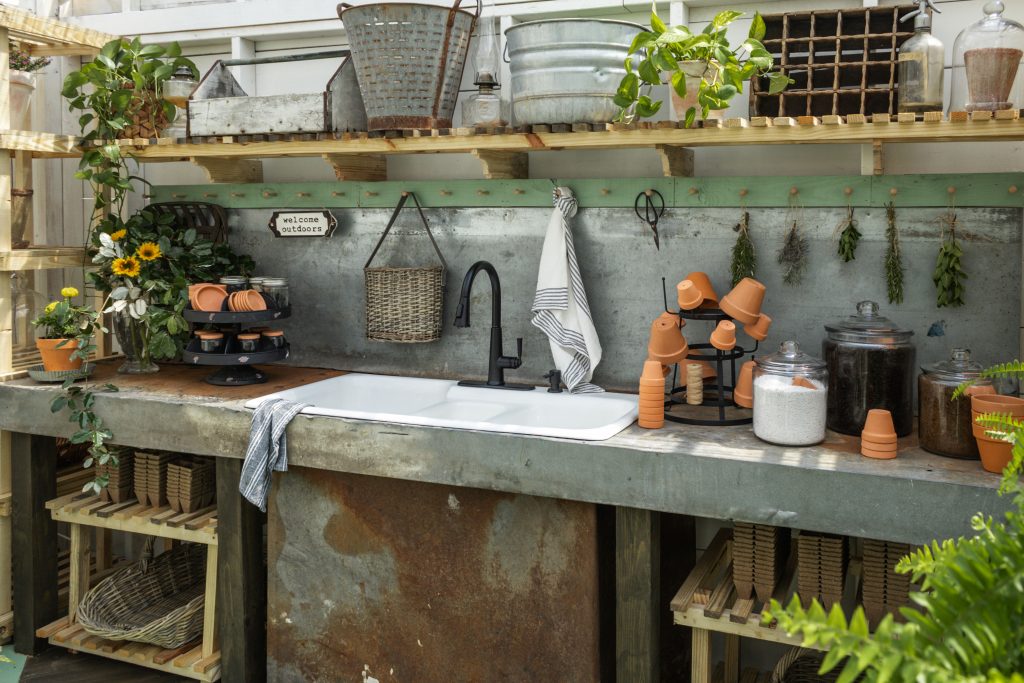
Gifted: It’s also a good idea to share your ideas and plans with family and friends. We’ve been gifted so many great pieces over the years. Once people know your passion for restoring, they will be more than happy to pass along great pieces they no longer have a use for and want to see loved and enjoyed. All the beautiful solid wood French doors in our greenhouse were gifted to us by friends after a remodel. The vintage enamel cast iron sink was also given to us by a family member, and it just needed some deep cleaning to bring it back to life. The most unique gifted piece for the space was the vintage galvanized metal workbench from a local business. We used the metal as a countertop, backsplash and made a unique cover for the sink plumbing.
Thrifted: Get creative to source building materials! Shopping online marketplaces for building materials can be a substantial cost-saver for your project. We found a listing for short pieces of lumber, which led to the discovery of a local business that builds shipping crates for commercial tools and sells the cut off pieces of wood. We were able to source all the exterior cladding and floors from this company for only $120!
Designing Your Greenhouse
Once you’ve collected enough windows, the design phase begins. Consider the size and location of your greenhouse. It should be positioned to receive ample sunlight, ideally facing south. Sketch out a rough blueprint, thinking about how each window will fit together. The most straightforward design is a rectangular structure with a pitched roof, but feel free to get creative depending on the shapes and sizes of your windows.
Construction Tips
· Foundation: Start with a solid foundation. Using cinder blocks or a wooden frame can ensure stability and prevent moisture from seeping in.
· Framework: Create a wooden frame to fit your windows. This might require some cutting and sanding to ensure a snug fit.
· Assembly: Attach the windows to the frame using heavy-duty hinges for the ones that will serve as opening panels. Use weather-resistant screws and sealants to protect against the elements.
· Ventilation: Ensure good air circulation by incorporating vents or opening windows. This is crucial to prevent overheating and to maintain a healthy growing environment for your plants.
Styling Your Greenhouse
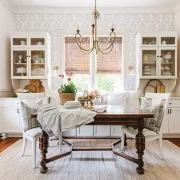
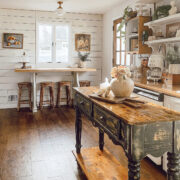
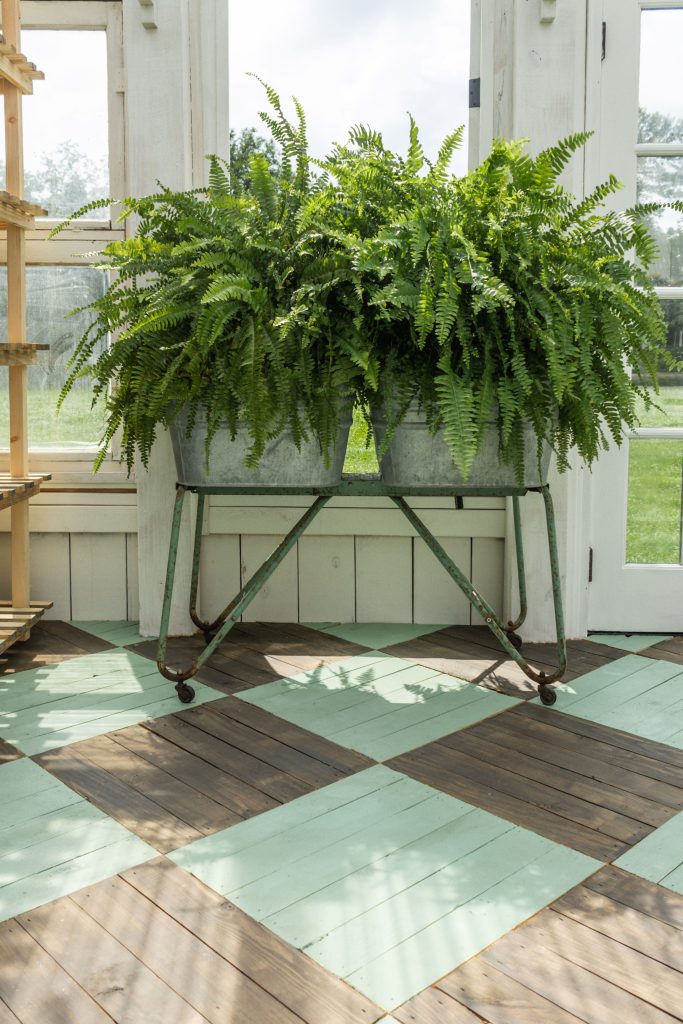
Decorating your greenhouse can be as much fun as building it! Vintage crocks and buckets can serve as garden supply storage; mason jars can be used for seed collections; and climbing plants like ivy or climbing roses can enhance the rustic charm. Arrange a mix of shelving units to accommodate plants of assorted sizes. A rustic table can serve as both a potting bench and dining table. Incorporate a cozy seating area with a comfy outdoor chair and side table to take a break, cool off and enjoy a cold beverage. Painting the floor in a fun color or whimsical pattern is a great way to add pops of color and personality. The jadeite green color for the floors was inspired by a thrifted vintage washstand, and the diagonal checkerboard pattern added a fun twist!
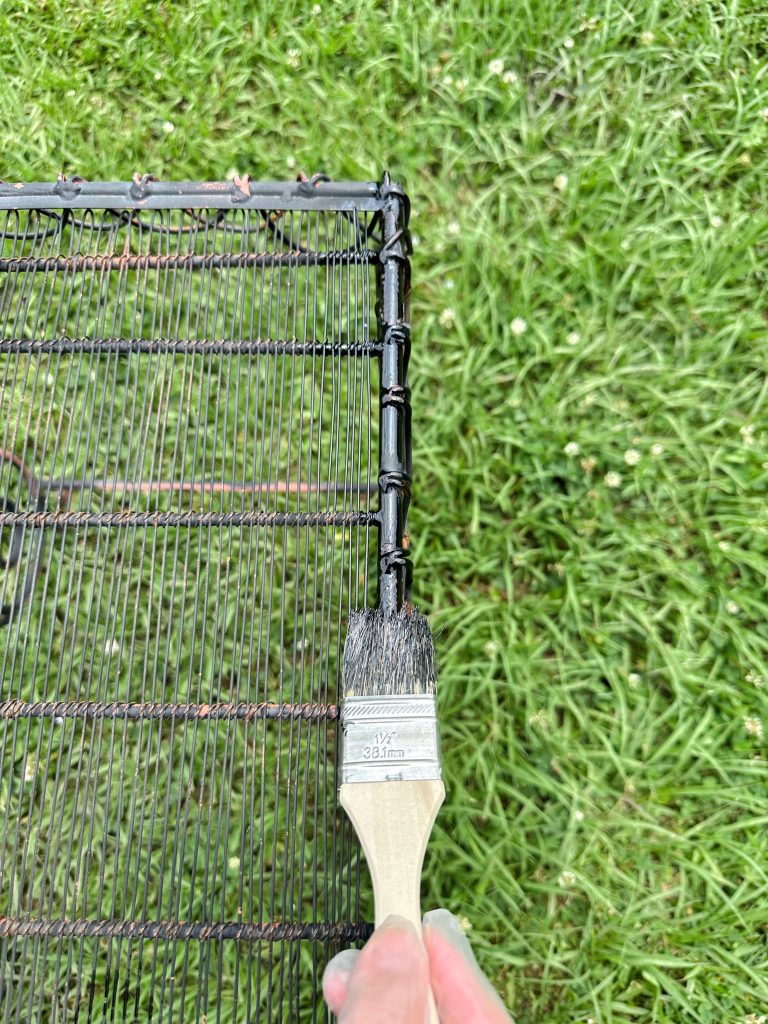
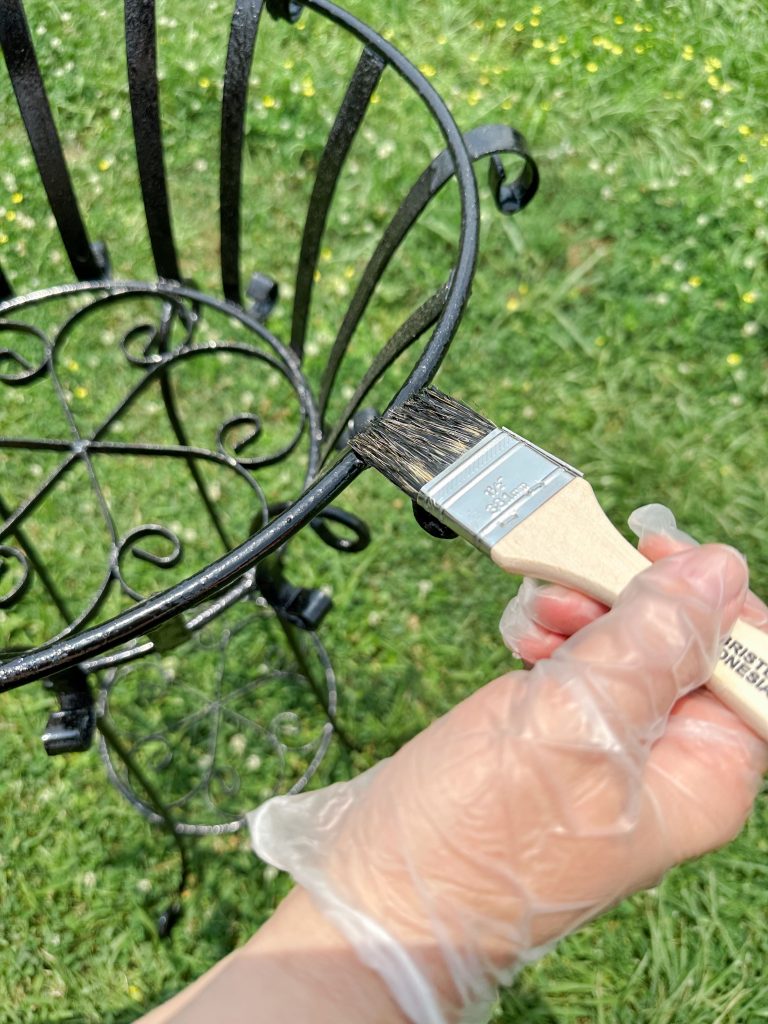
Restoring and Protecting Vintage Metal for Outdoor Use
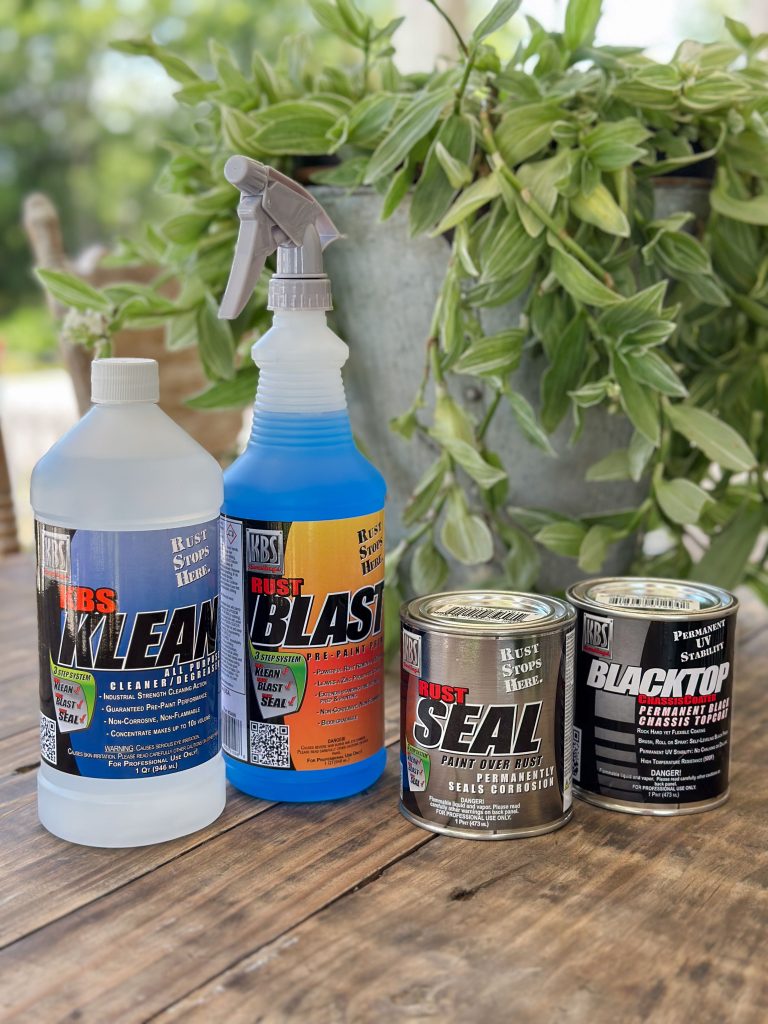
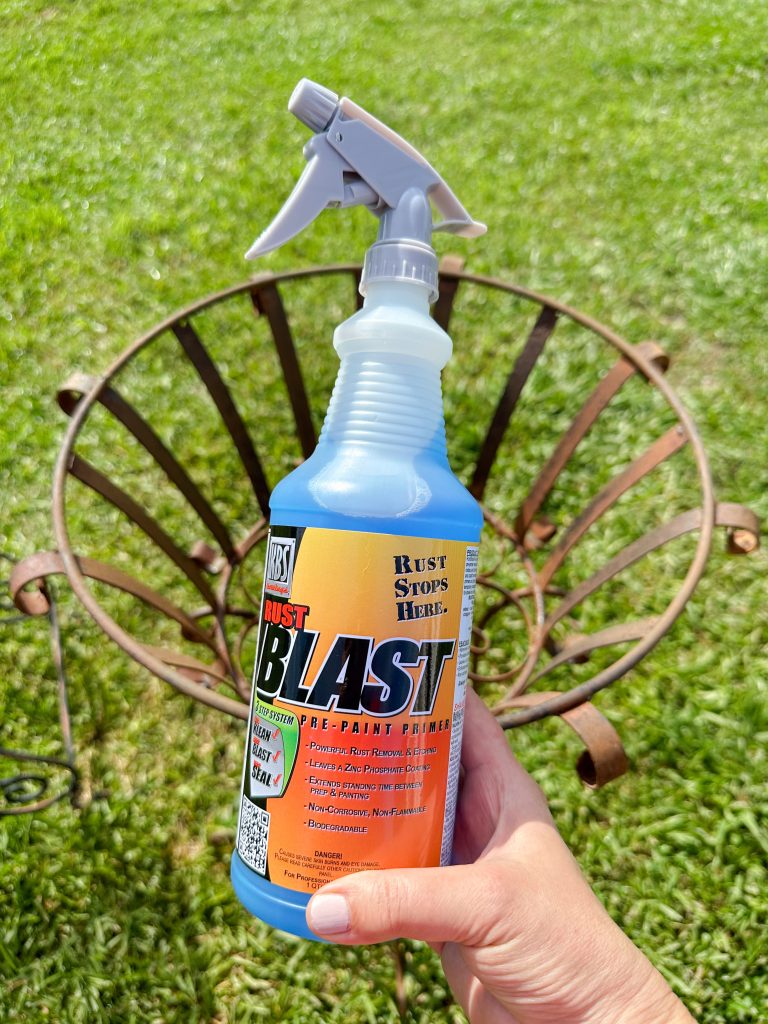
Just like our vintage windows, these metal plant stands have been patiently waiting to be brought back to life. After years of being exposed to sunlight and harsh outdoor elements, they both became significantly rusted. When searching for a way to restore and protect them, the KBS 3 Step System was the perfect product to stop and prevent rust. The application process was so straightforward, with amazing results!
What You’ll Need:
· KBS 3 Step System
· KBS BlackTop Paint (optional if the piece will be in direct sunlight)
· 320 grit sandpaper or wire brush (if the piece has loose rust)
· Kitchen scrubbing pad
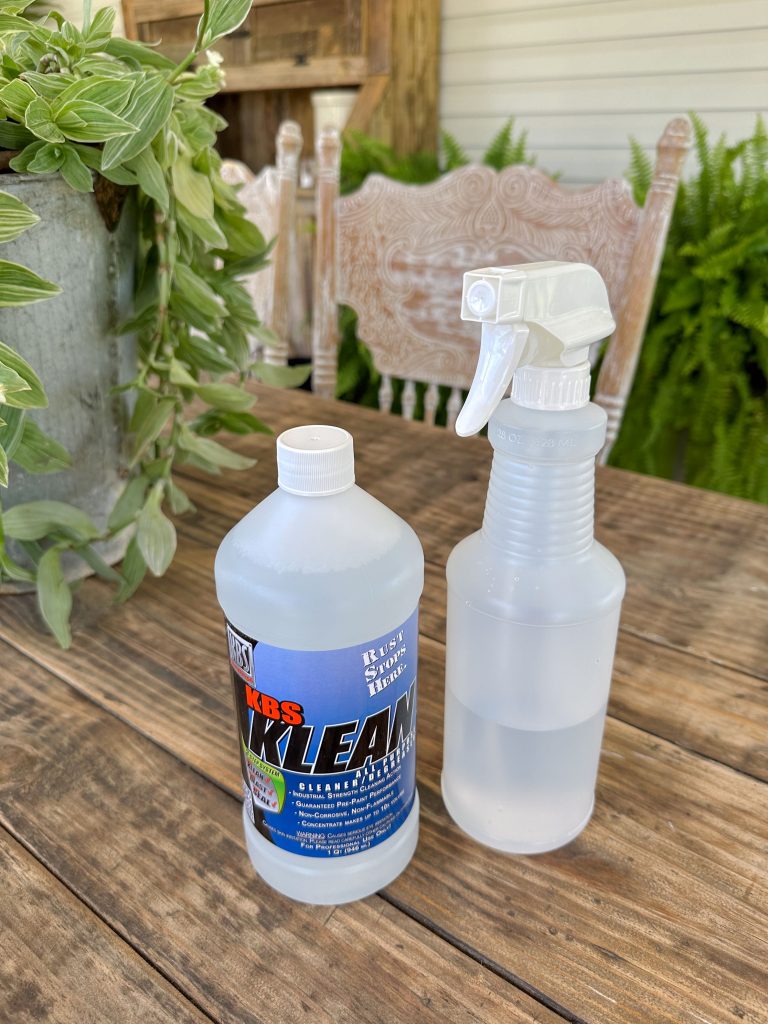
· Spray bottle
· Warm water
· Natural bristle paintbrush
What You’ll Do:
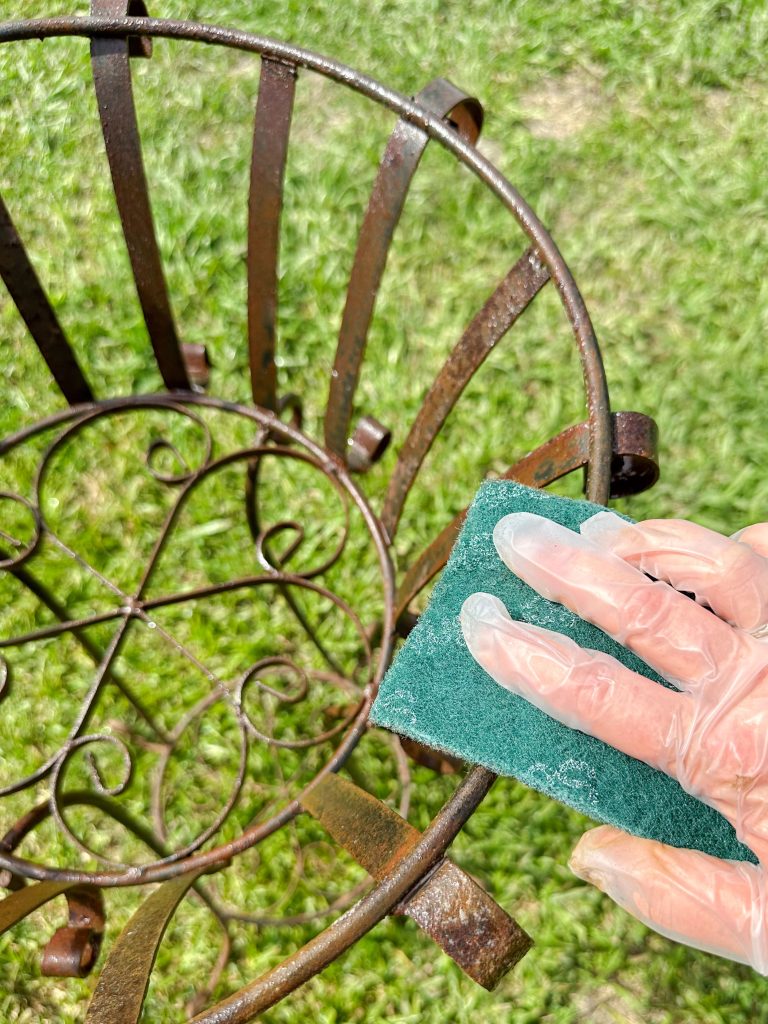
- Scrape off all loose and flaky rust with 320 grit sandpaper or a wire brush.
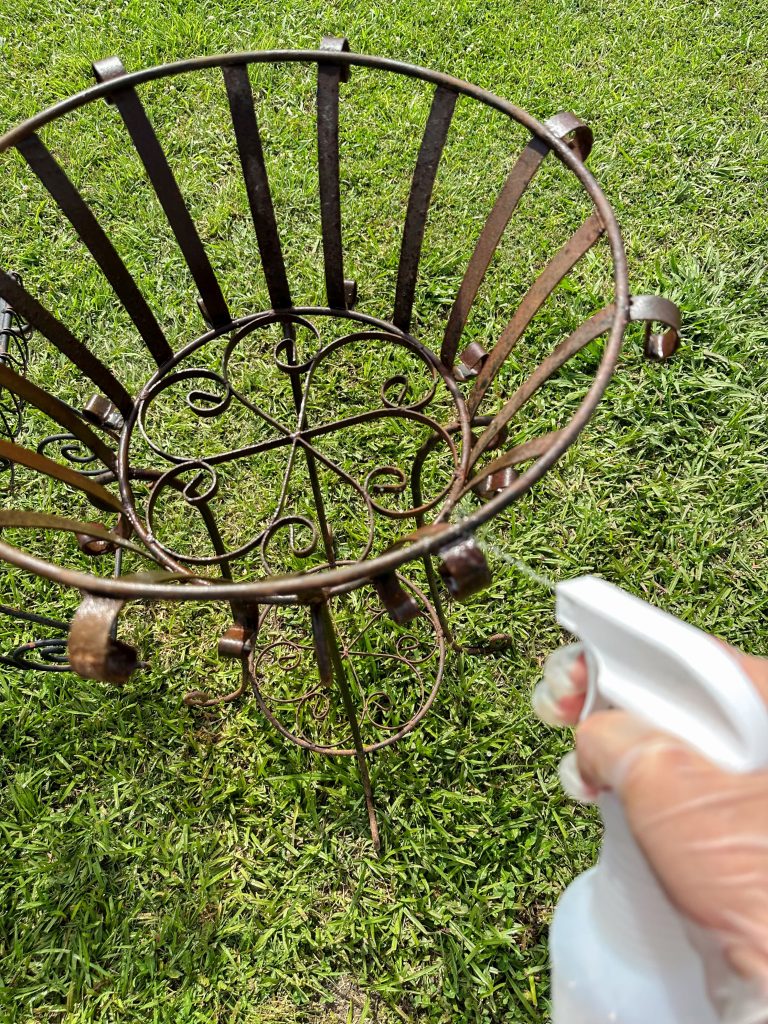
- Mix KBS Clean Concentrate with warm water in a spray bottle and spray over the surface. (See Manufacturer’s instructions for mixing recommendations.)
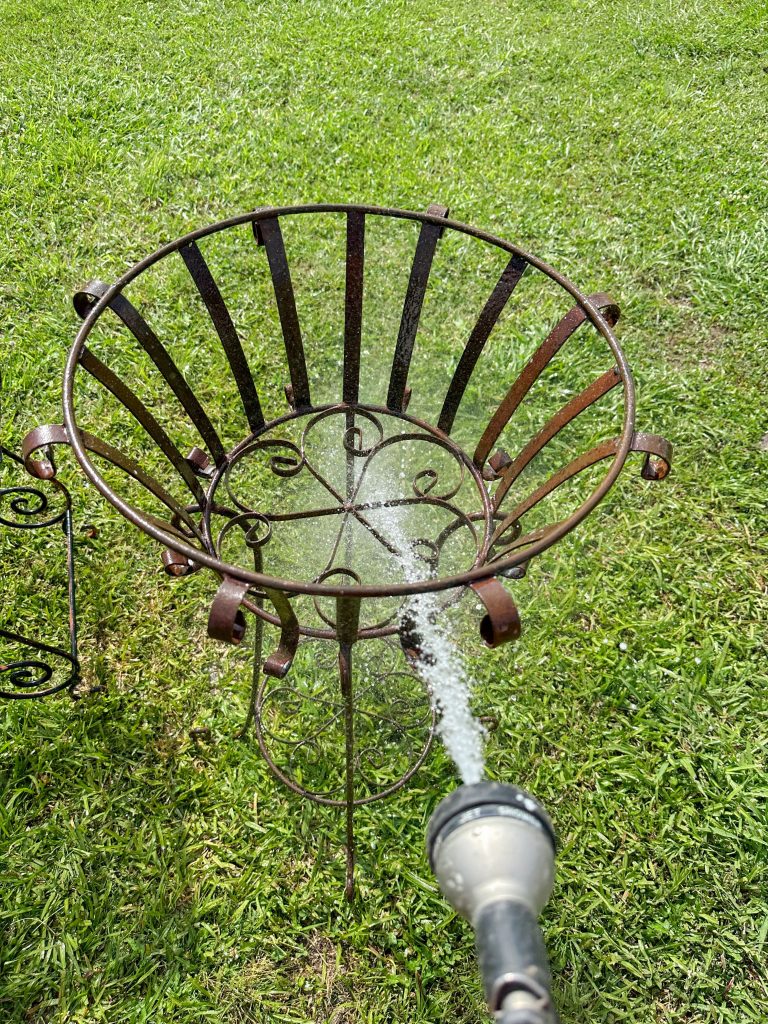
- Scrub the surface with a kitchen scrubbing pad, rinse thoroughly, then dry off with a towel.
- Apply RustBlast and scrub with kitchen scrubbing pad, keeping the surface wet with RustBlast for 10-20 minutes. Then rinse and dry.
- Brush on RustSeal using thin, light coats. Let dry thoroughly before applying additional coats. Two coats are recommended.
- For pieces in direct sunlight, once RustSeal is dry to the touch, apply BlackTop Paint for UV protection. Apply additional coats as needed with proper drying time.
*Remember to work in a well-ventilated area. See the manufacturers’ website for more information and instructional videos at kbs-coatings.com.
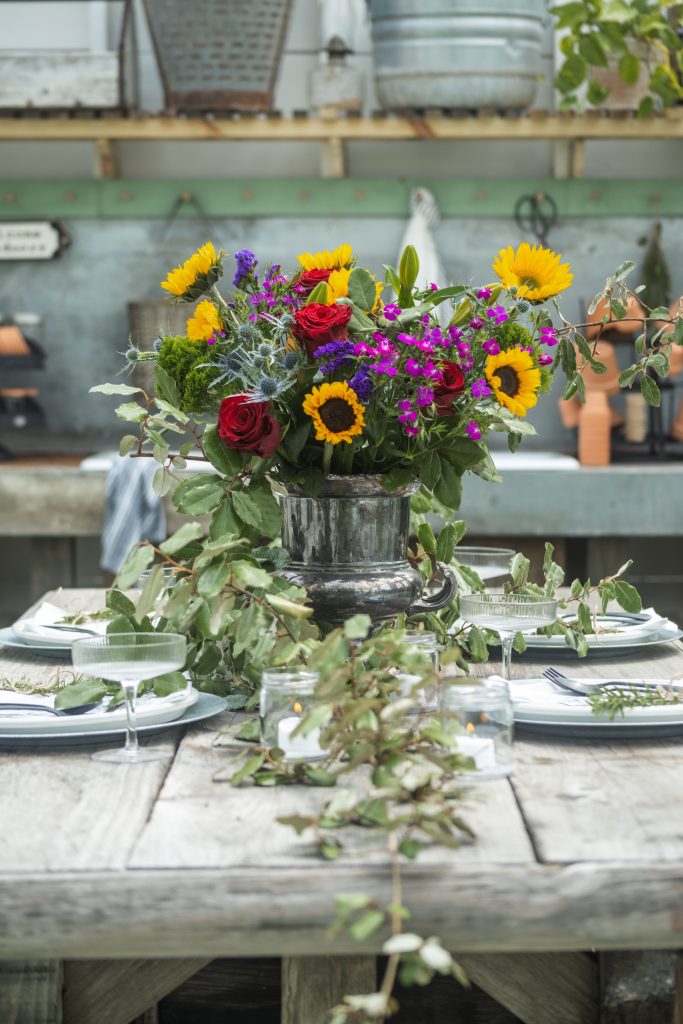
Mastering Outdoor Dining
With your greenhouse as a backdrop, outdoor dining takes on a new level of enchantment! Here are a few tips to make your outdoor meals memorable: - Lighting: As dusk falls, the right lighting can transform your dining area. Solar-powered string lights draped around the greenhouse or battery-powered fairy lights over the dining table create a soft, inviting glow. Candles are a low-cost option that can also add instant ambience to your outdoor dining.
- Table Setting: Use natural materials for your table settings. Linen and cotton napkins, ceramic dishes and simple glassware are perfect choices.
- Natural Decor: Decorate with elements from your yard and garden. Fresh-cut flowers and herbs or a centerpiece featuring seasonal produce can bring the outdoors right to your table and make a stunning display at no cost!
Building a greenhouse from vintage windows not only gives new life to old materials but also adds a unique feature to your home that’s steeped in history and charm. We made so many memories working on this project together and are looking forward to making many more here with our friends and family! You can see more of our DIY and crafting projects on our website at returninggrace.com. Happy growing, building and celebrating!