DIY Reupholstery: From Boring To Beautiful

Customize and update thrift-store finds with this reupholstering DIY.
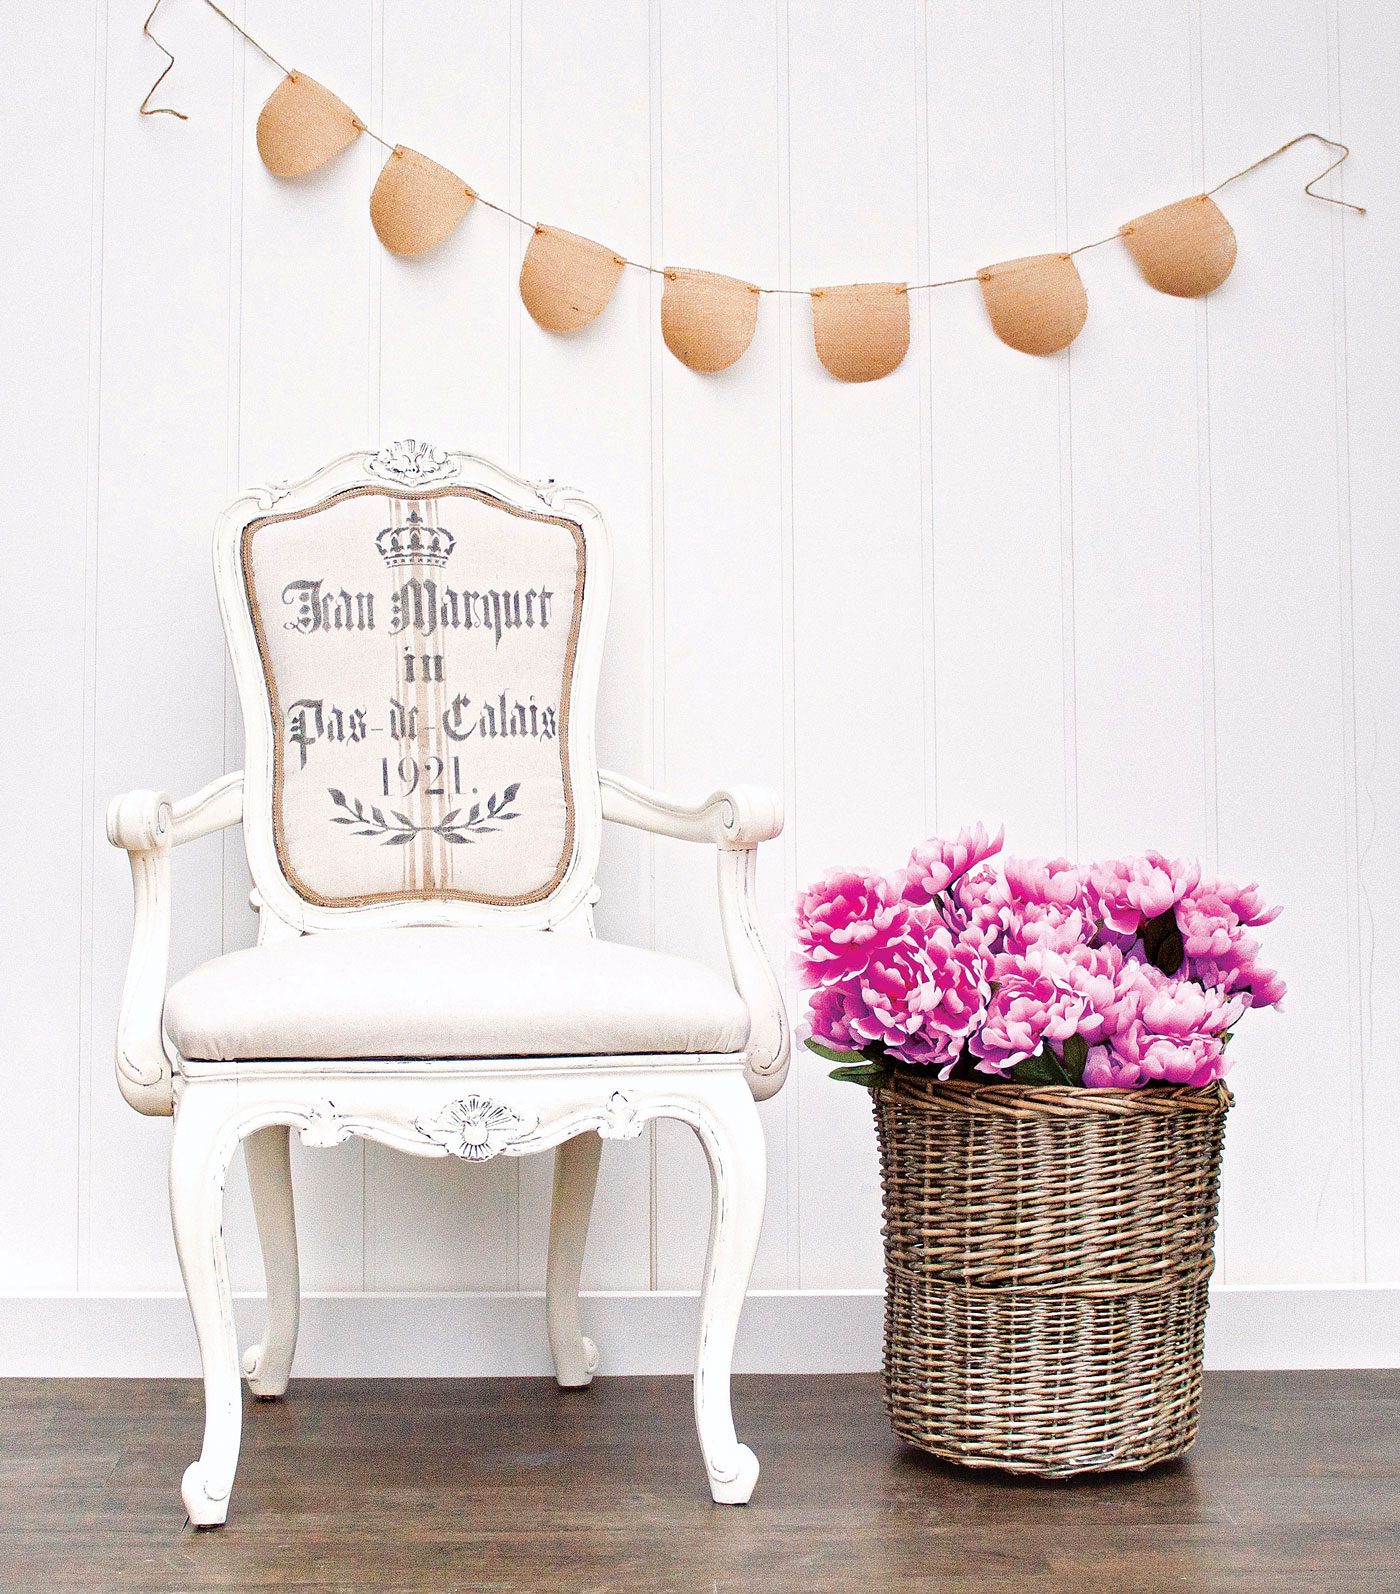
Mint-condition furniture can make any living area look like an immaculate showroom. But Jen Crider’s book, Amazing Furniture Makeovers: Easy DIY Projects to Transform Thrifted Finds into Beautiful Custom Pieces, demonstrates how personalized thrift-store finds can have the same impact as new furniture for half the price. The key? DIY reupholstery!
“I’d much rather update a thrifted chair for cheap in exactly my own style than pay a high price for a brand-new one,” Jen writes. To spruce up your rooms without breaking the bank, here are Jen’s nine steps to reupholstering a thrifted or well-loved chair.
WHAT YOU’LL NEED:
- Screwdriver
- Upholstery staple remover
- Poly foam pad (suggestion: 1-inch [2.5-cm]- thick pad)
- Sewing scissors
- Cotton batting (suggestion: Warm & White)
- Heavy-duty stapler
- Staples
- Hammer
- Durable fabric
- Neutral fabric for bottom side of seat (optional)
- Paint of choice (suggestion: Annie Sloan Chalk Paint® in Country Grey)
- Paintbrush
- 220-grit sandpaper
- Furniture wax
- Lint-free cloth
WHAT YOU’LL DO:
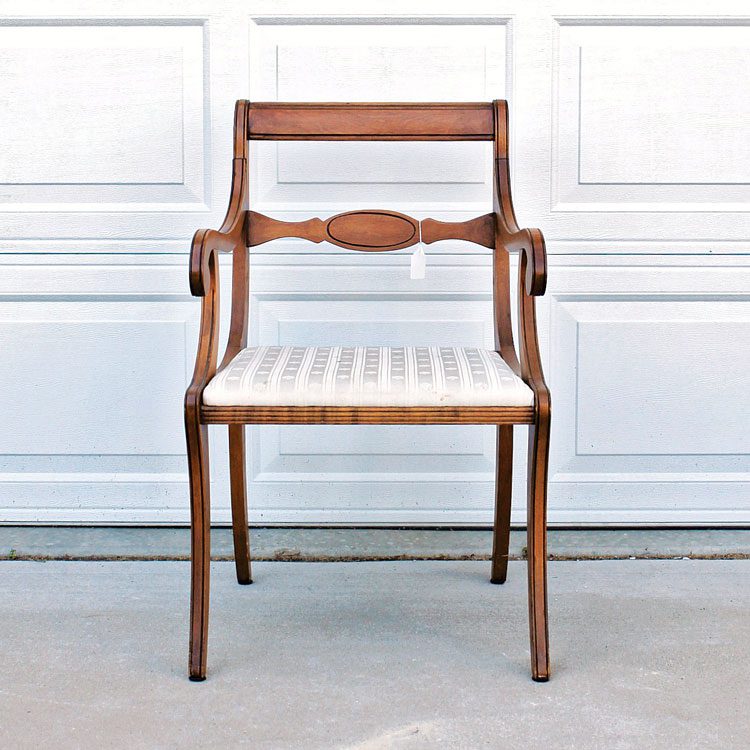
1. First, unscrew the seat from the frame and make any necessary repairs.
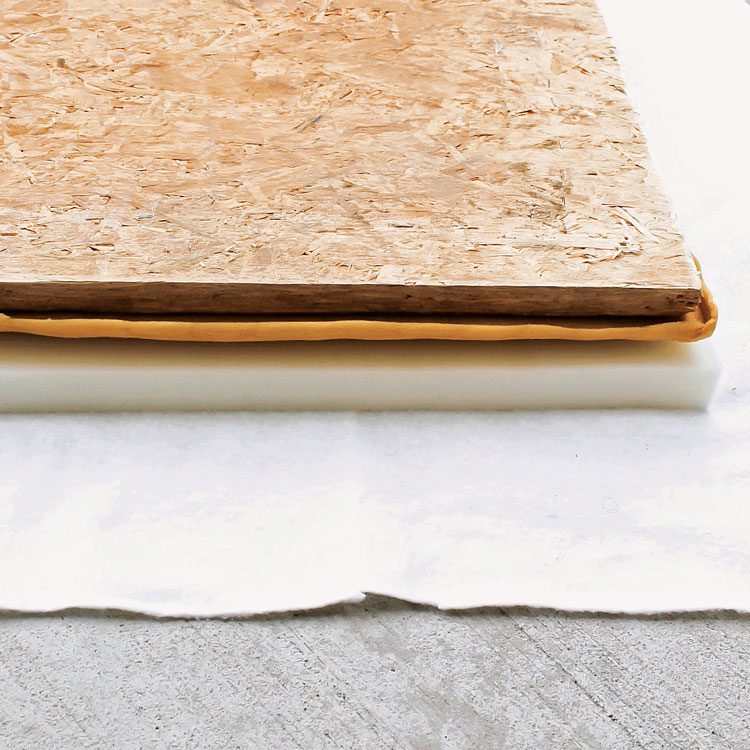
2. Flip the seat over and remove the existing fabric and staples with an upholstery staple remover. Examine the existing cushion to see if it needs to be replaced or just needs extra thickness. If your cushion is a little flat, you can add a 1-inch poly foam pad for a more comfortable seat. Cut the pad to the approximate size of the seat. Then cut the cotton batting 3 to 4 inches longer than each side of the seat.
3. Start with the front side of the seat by folding the batting over and stapling about an inch from the edge. Slightly fold the edge of the batting before stapling for a straighter line. You may need to hammer the staples all the way in. Continue stapling the first side of the seat, but stop about 1.5 inches (4 cm) from the corners.
4. Turn the seat and staple the opposite side, pulling the batting taut. Repeat on the other two sides. You’ll end up with the four corners sticking out.
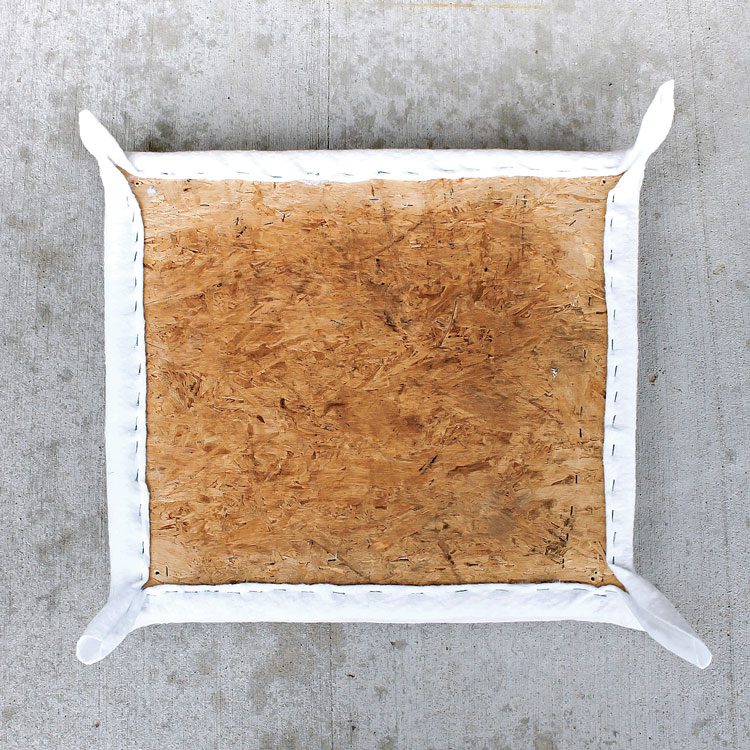
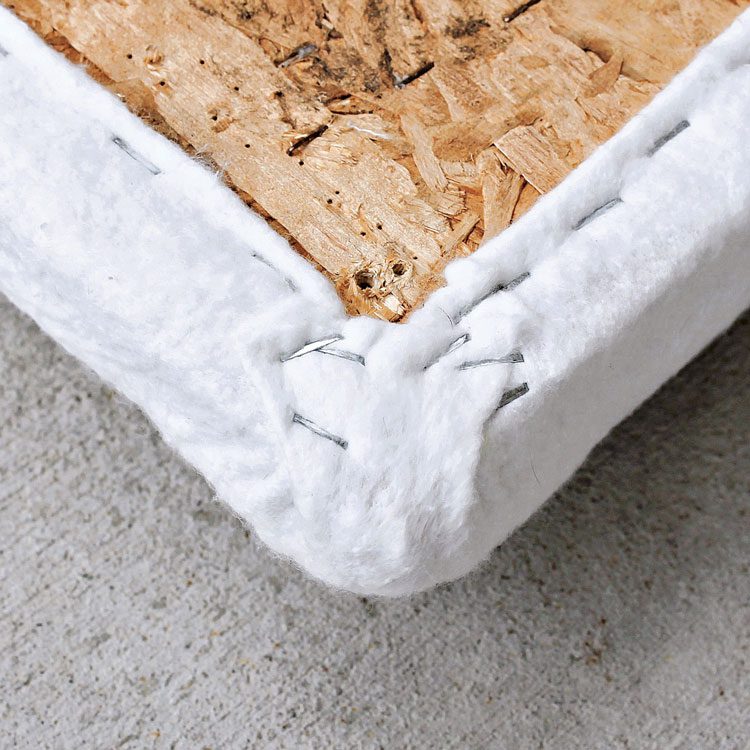
5. Corners can be tricky, so remember: Don’t let the batting get too thick when you’re folding, and don’t cover the holes where the screws go. Make one fold on each side of the corner, one side at a time. Cut the excess fabric underneath to keep the fold thin, pull tight and add a few staples. Repeat on the other side, ensuring that everything is secure. Continue with the other corners.
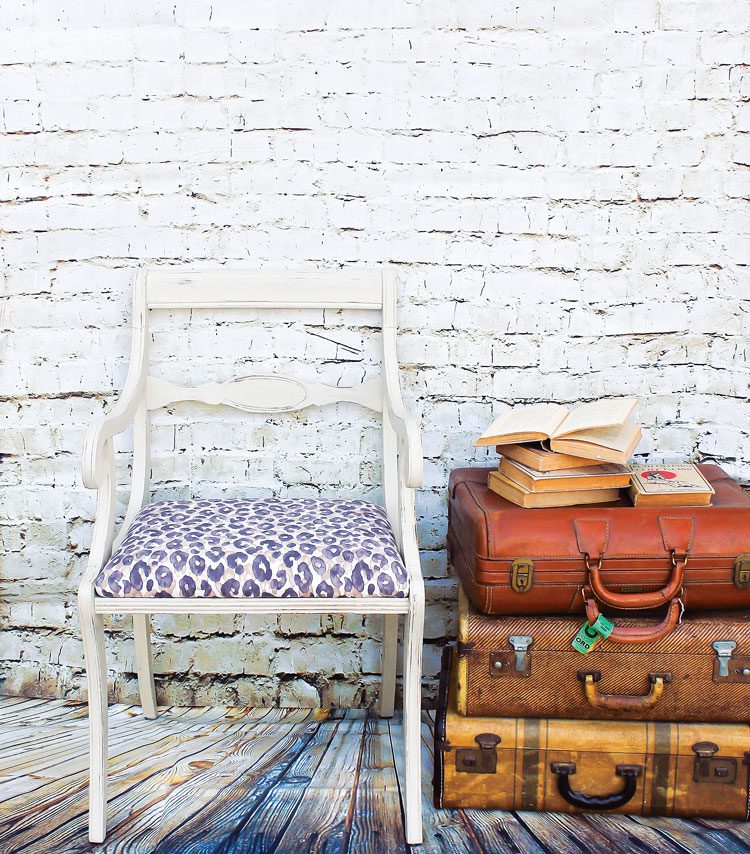
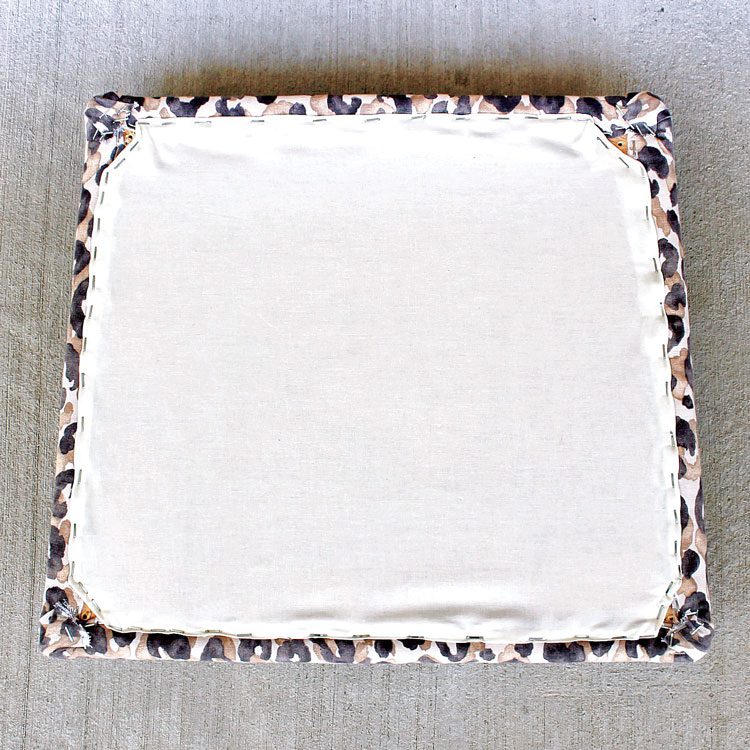
6. Make sure your fabric is ironed and, if working with patterned material, that the design is lined up how you want it. Cut the fabric like the batting, with an extra 3 to 4 inches around the sides. Staple the fabric the same as the batting: work on opposite sides, pulling taut, and save the corners for last.
7. If you want to hide the wood or your staples, you can cut a neutral shade of basic cotton fabric, fold the edges under and staple the fabric to cover the edges you’ve already stapled. Avoid covering the screw holes.

8. Now that the seat is done, paint the chair frame in a color that coordinates with the fabric. Give the chair a few coats of paint, lightly sand and distress it with 220-grit sandpaper and wax it for protection. If your chair is a simple piece without much area to cover, you can apply the wax with a lint-free cloth instead of a brush. Keep in mind that wax will deepen the paint’s hue.
9. Finally, screw the seat back onto the chair, sit down and relax in your latest makeover.
Learn how to do more DIY reupholstery and other beautiful makeovers by getting Jen’s book— Amazing Furniture Makeovers: Easy DIY Projects to Transform Thrifted Finds into Beautiful Custom Pieces.
Discover how this California home transformed into a farmhouse in the suburbs. And don’t forget to follow us on Instagram, Facebook and Pinterest for your daily dose of farmhouse inspiration!