


It’s a Spring Thing! Spring Vignette Ideas for Your Home

Learn from Brand Ambassador Lynn Langford how to style spring vignettes with tiered trays and hand stamp your own linens.
Hey there, Farmhouse Friends!
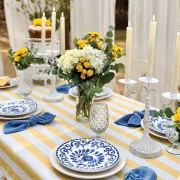
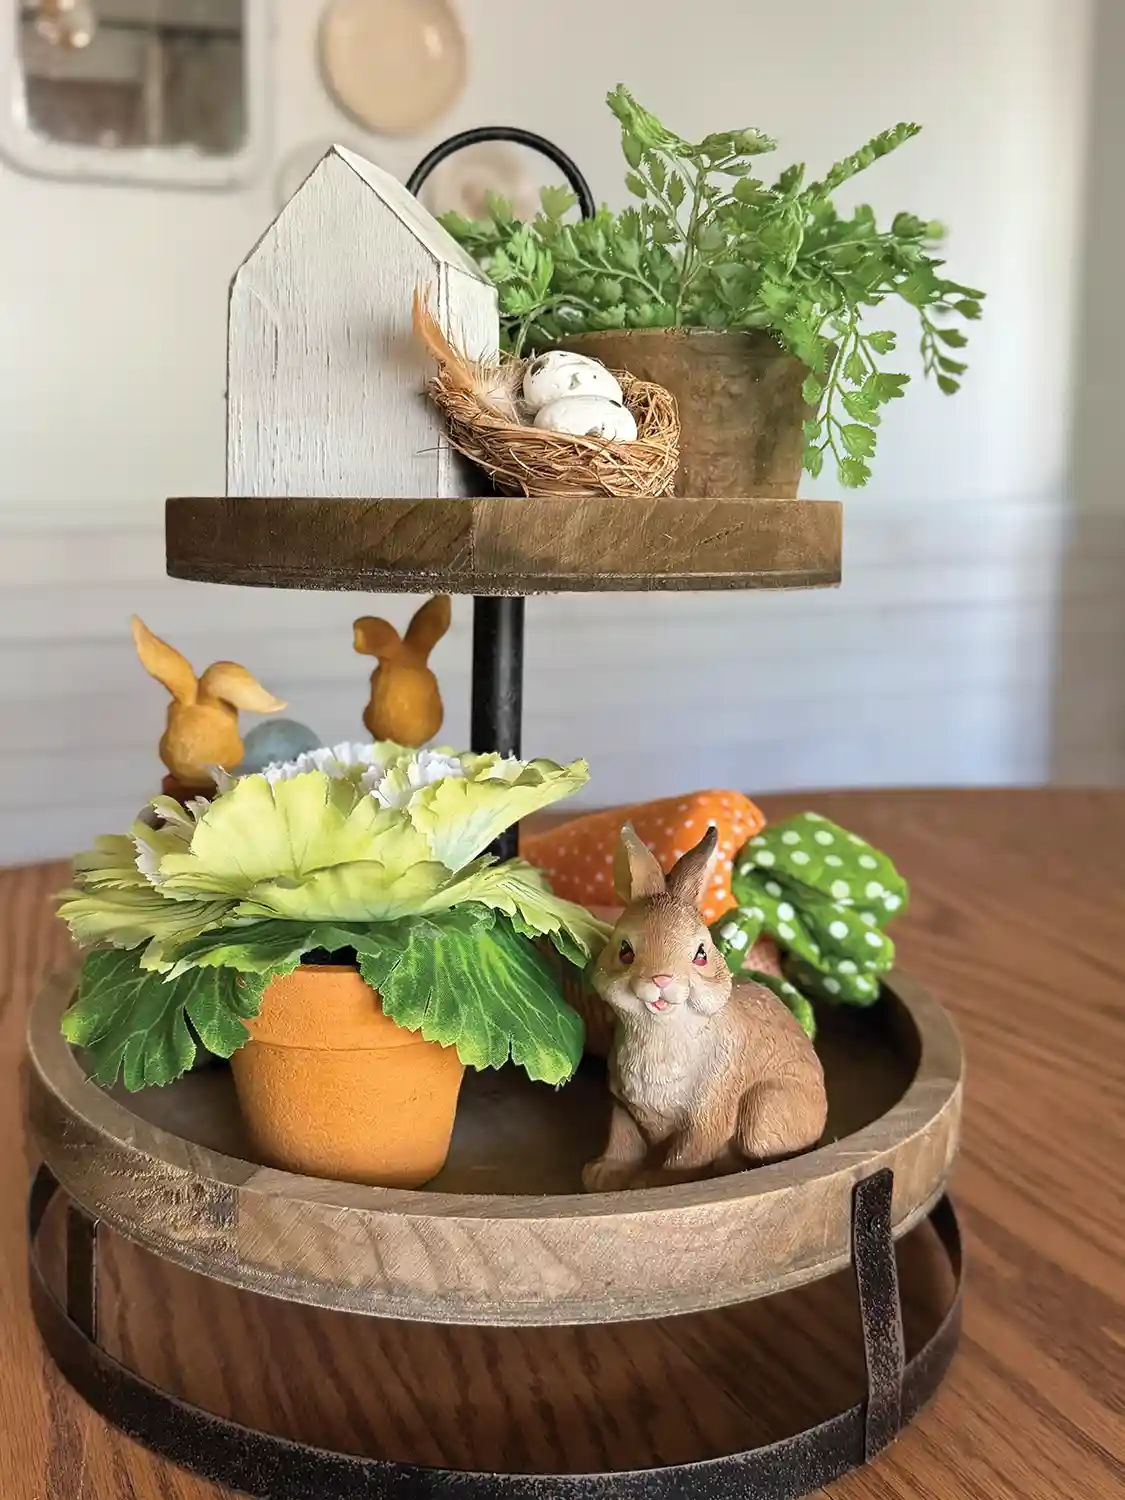
Now that spring is in the air, you may be looking for fun ways to add spring touches to your home to welcome the new season. One way to do this is by styling a tiered tray to enjoy in any room of your home.

Tiered trays aren’t just functional—they are the perfect accessory to style small vignettes for every day and seasonal décor. You can find them in a variety of materials, including wood, copper, galvanized metal and more. They also come in a variety shapes and sizes with many two tier and three tier options.
It’s easy to incorporate tiered trays in various ways in your home. I typically style one on my coffee bar with both functional items and seasonal décor. I also love to add them to bathroom vanities, hutches or entry tables.
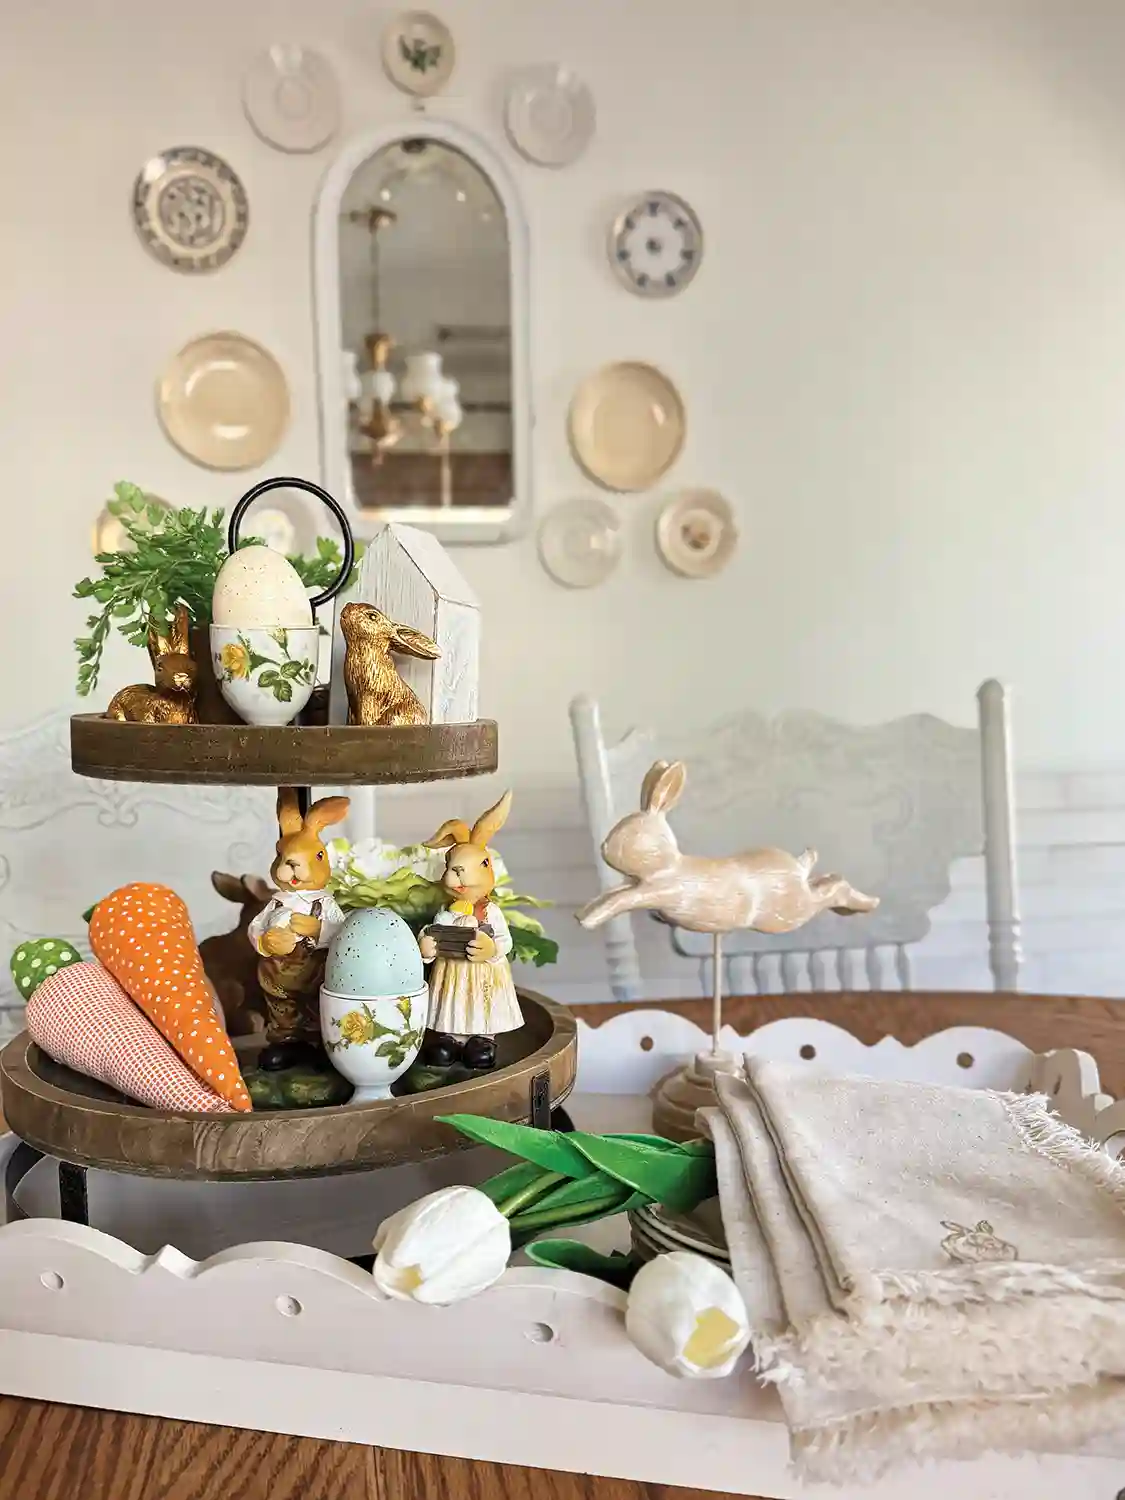
Tips for Styling a Tiered Tray
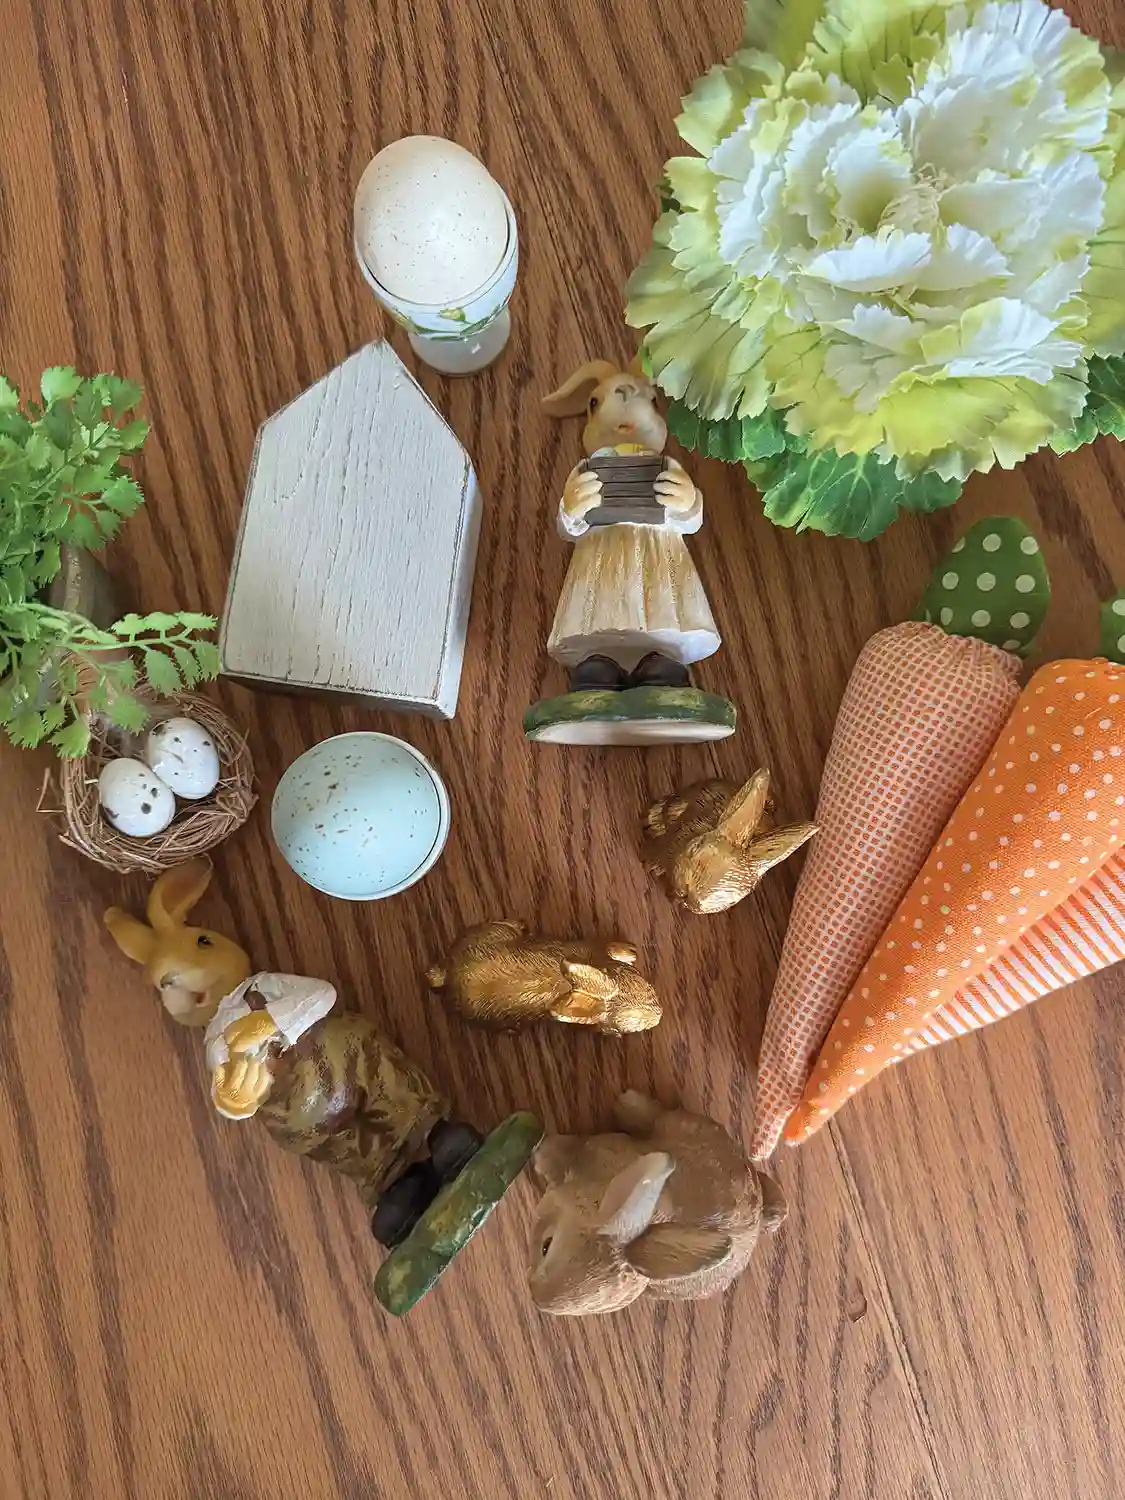
After determining the theme for your tired tray, gather multiple pieces within the theme in varying sizes to fill the tray. When considering your options, think about different textures as well as elements of interest. Add greenery or florals or other items from nature.
Start by placing the largest piece first. Keep things visually balanced in size by not placing all the heavier pieces on the same sides of the tiers.
Add in the smaller pieces and then fill in with greenery and/or florals to soften the edges.
If your tray is visible from the front and back side, be sure to keep that in mind when styling it. All viewpoints should look balanced.
Tiered trays are a fun way to add visual interest to areas in your home without taking up too much space. Whether you style them occasionally or for each of the seasons, feel free to get creative and think outside the box.
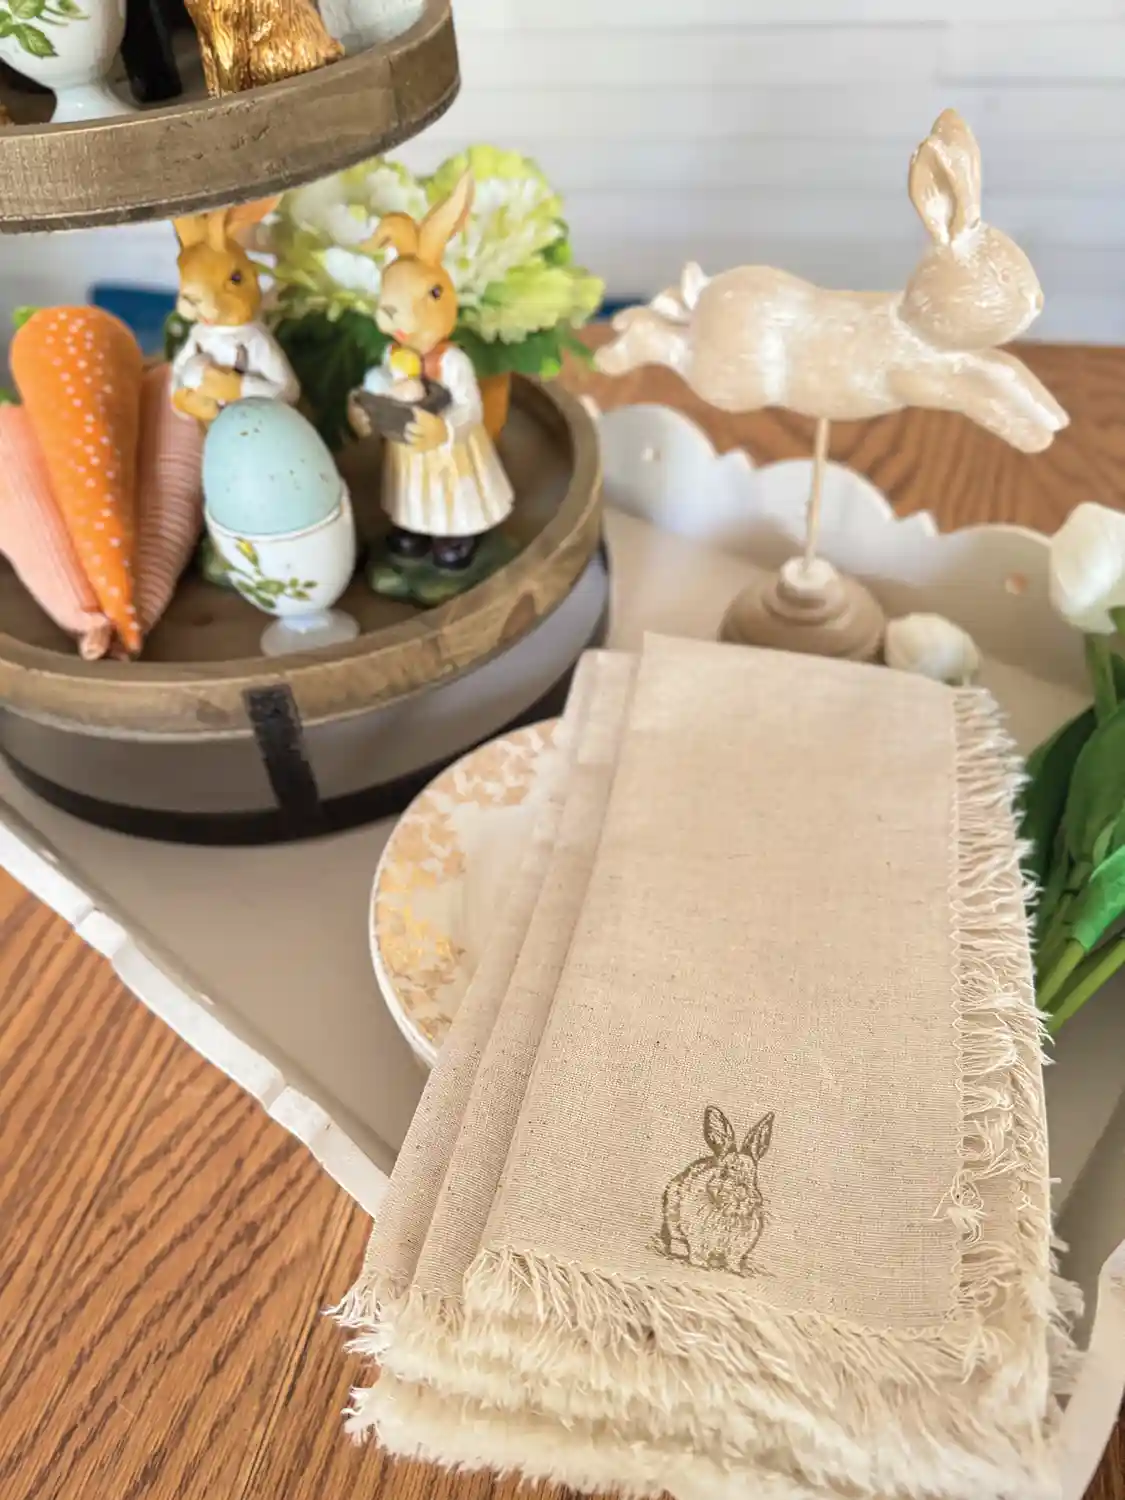
In addition to styling a tiered tray for spring, I’ve also jumped on the band wagon of stamping and made cloth bunny stamped napkins for the season. Paired with my tiered tray, they make the cutest spring vignette.
Gone are the days of just having the option of a rubber stamp. Today’s crafters are using clear acrylic stamping blocks as well as stamp sets with multiple options for
your projects.
How to Stamp Cloth Napkins
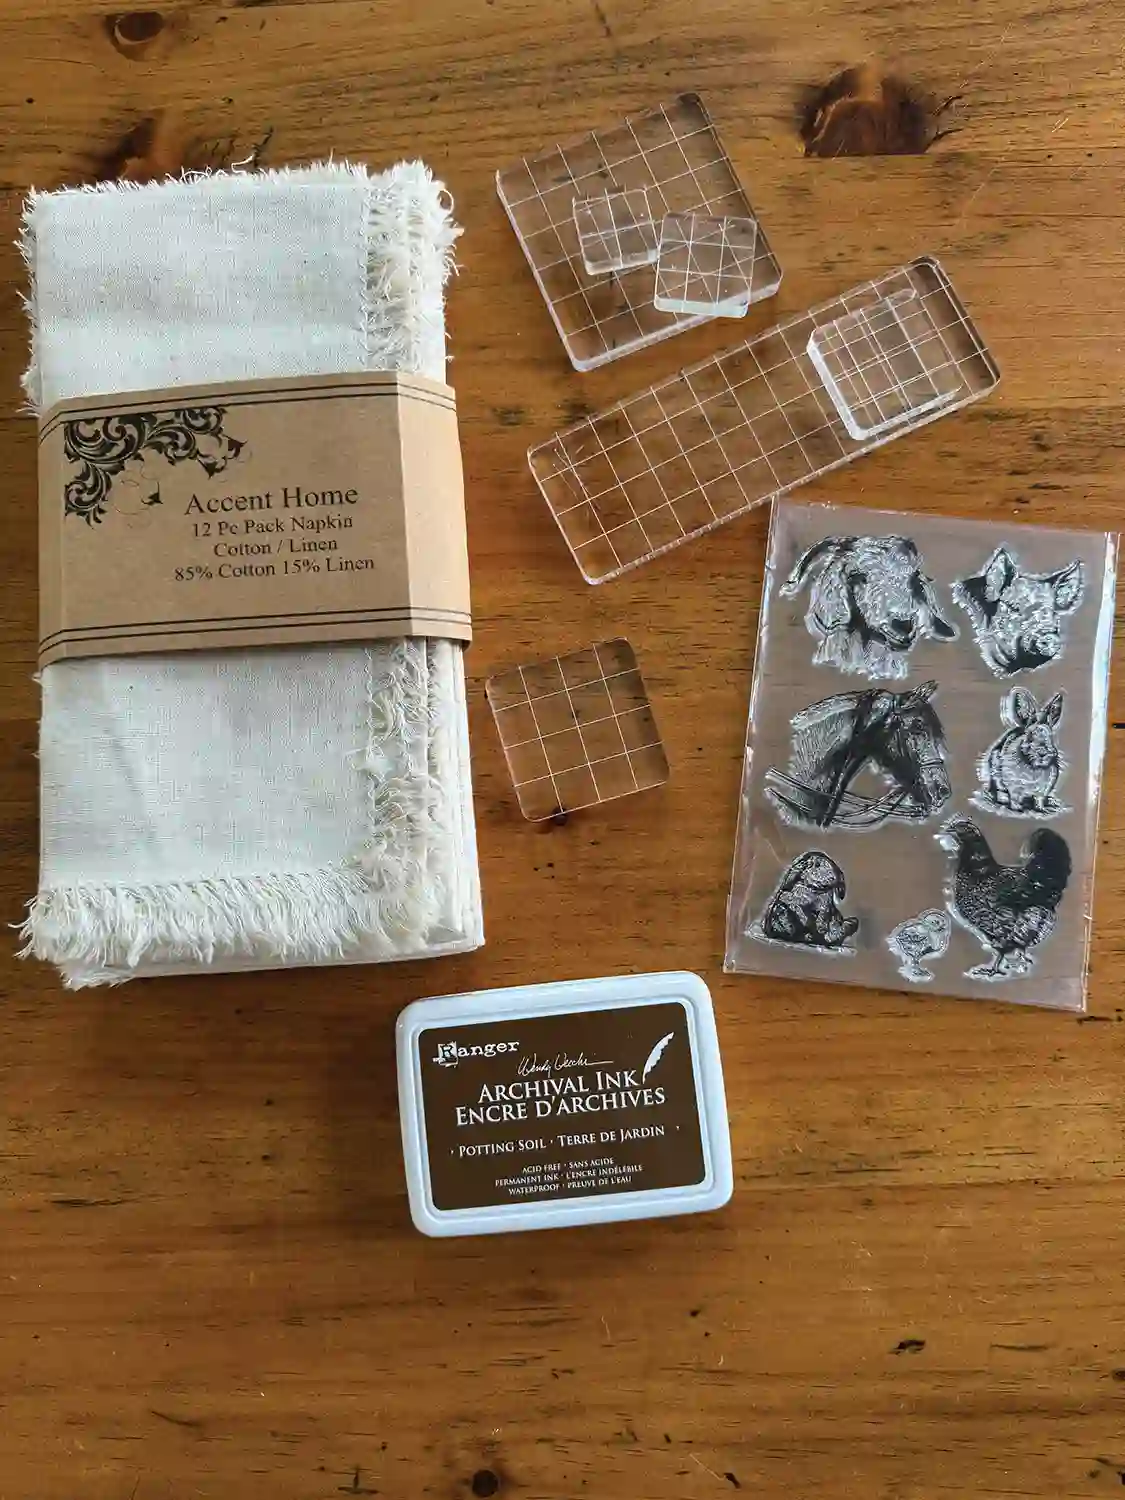
What You’ll Need:
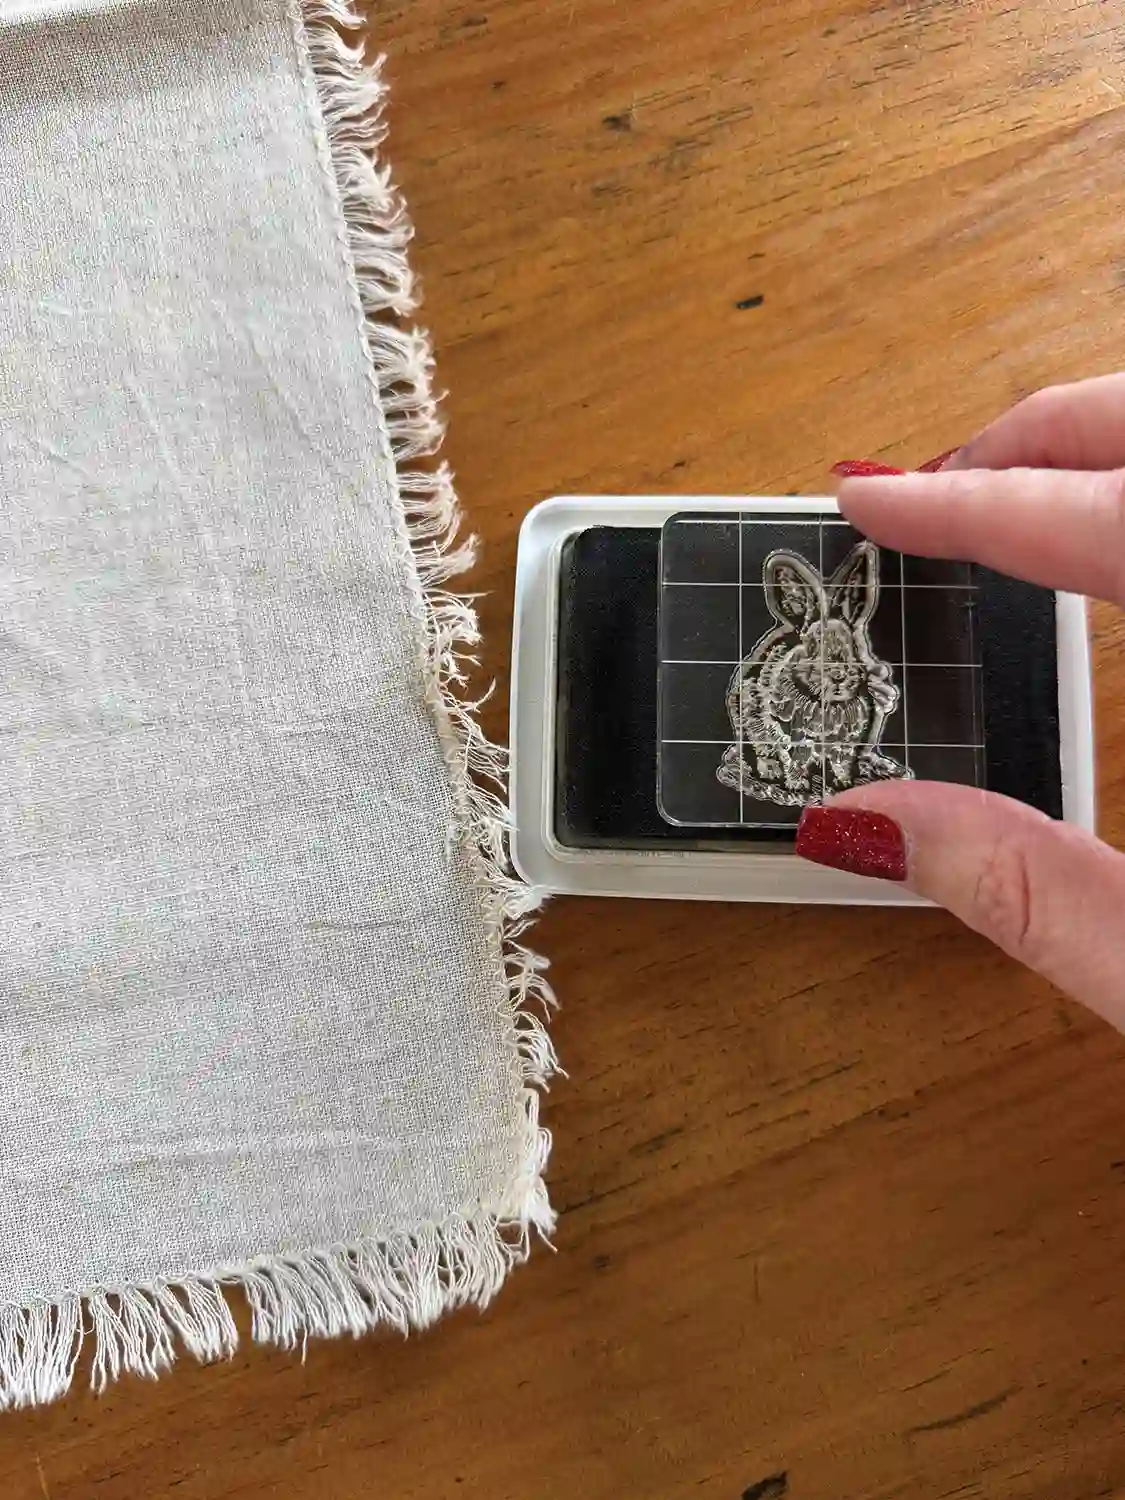
Clear acrylic stamp block (the grid lines make it easy to see where you are placing the stamp design). I ordered a set of six in varying sizes for future stamp projects.

Stamp set (clear, silicone stamp card with multiple designs within your theme). You may only use one design, but it’s nice having options for future projects…and you save money!
Stamp ink pad (permanent waterproof in choice of color)
Cloth napkins (I chose natural cotton linen dinner napkins)
What You’ll Do:
Wash and dry the cloth napkins (iron afterward if they are wrinkled).
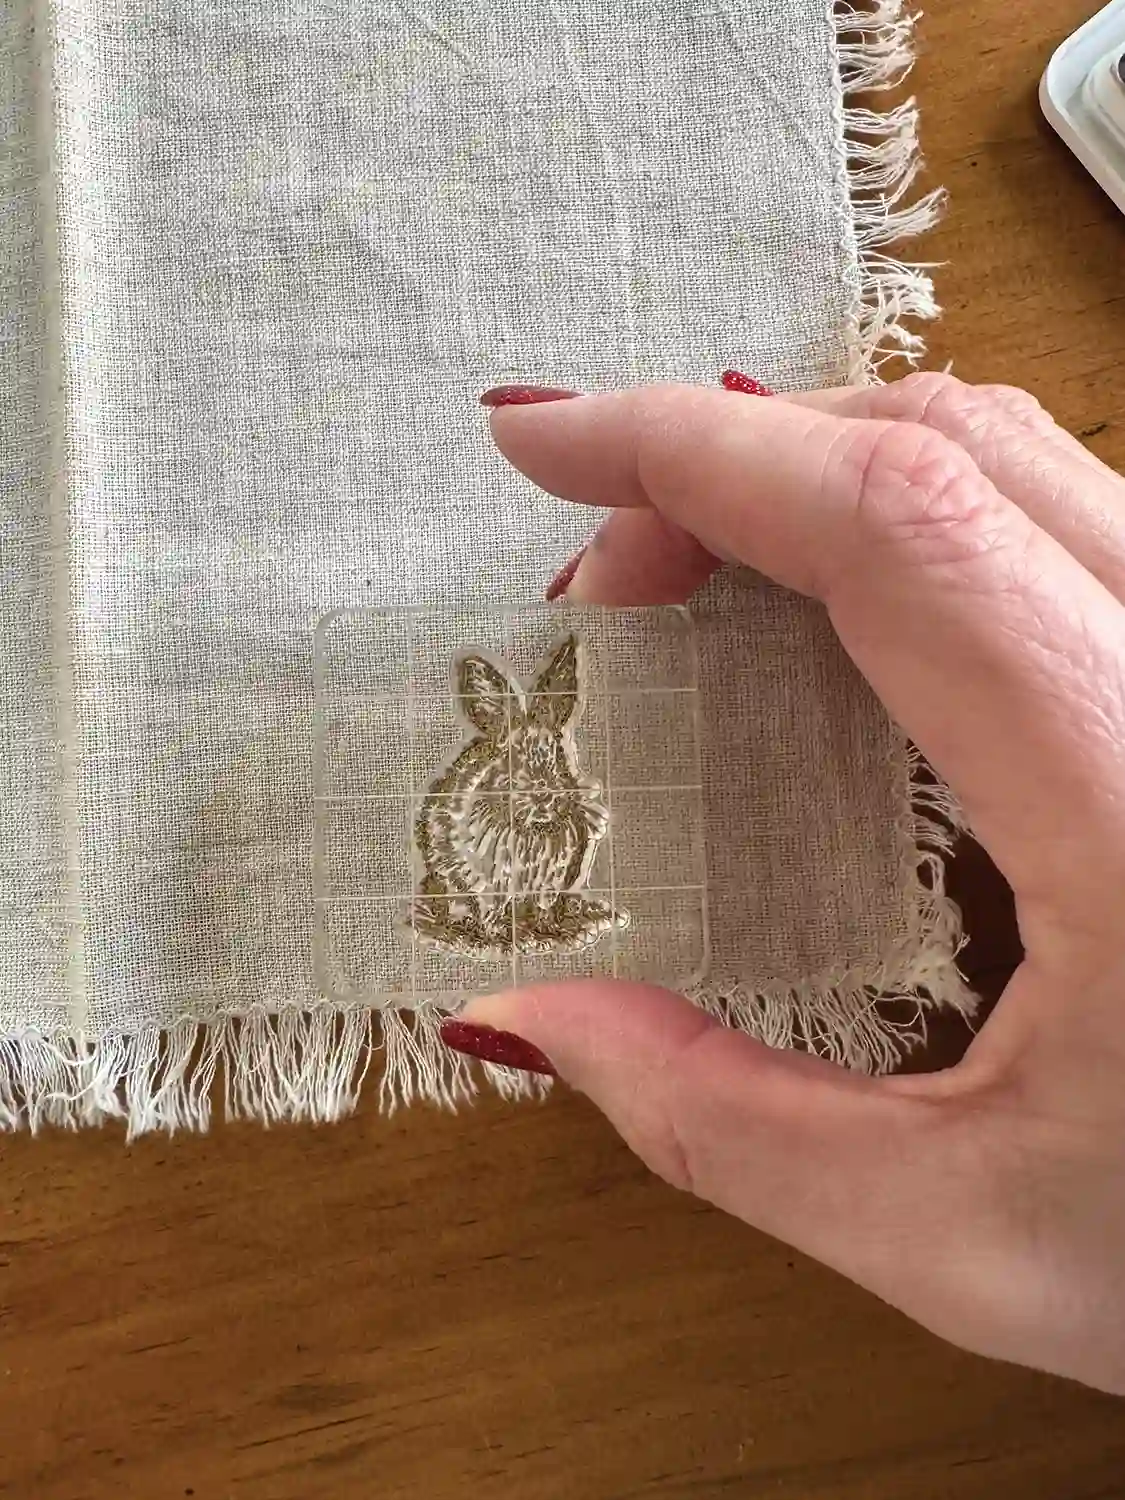
Choose a stamp and carefully peel the stamp from the sheet.
Place the stamp on an acrylic stamping block.
After deciding the placement for your stamp pattern, press the block onto the ink pad.
Press the inked stamp onto the fabric and then carefully remove (I stamped a blank piece of copy paper to get the feel of it before starting on the fabric)
Repeat until you have the desired pattern on the fabric.
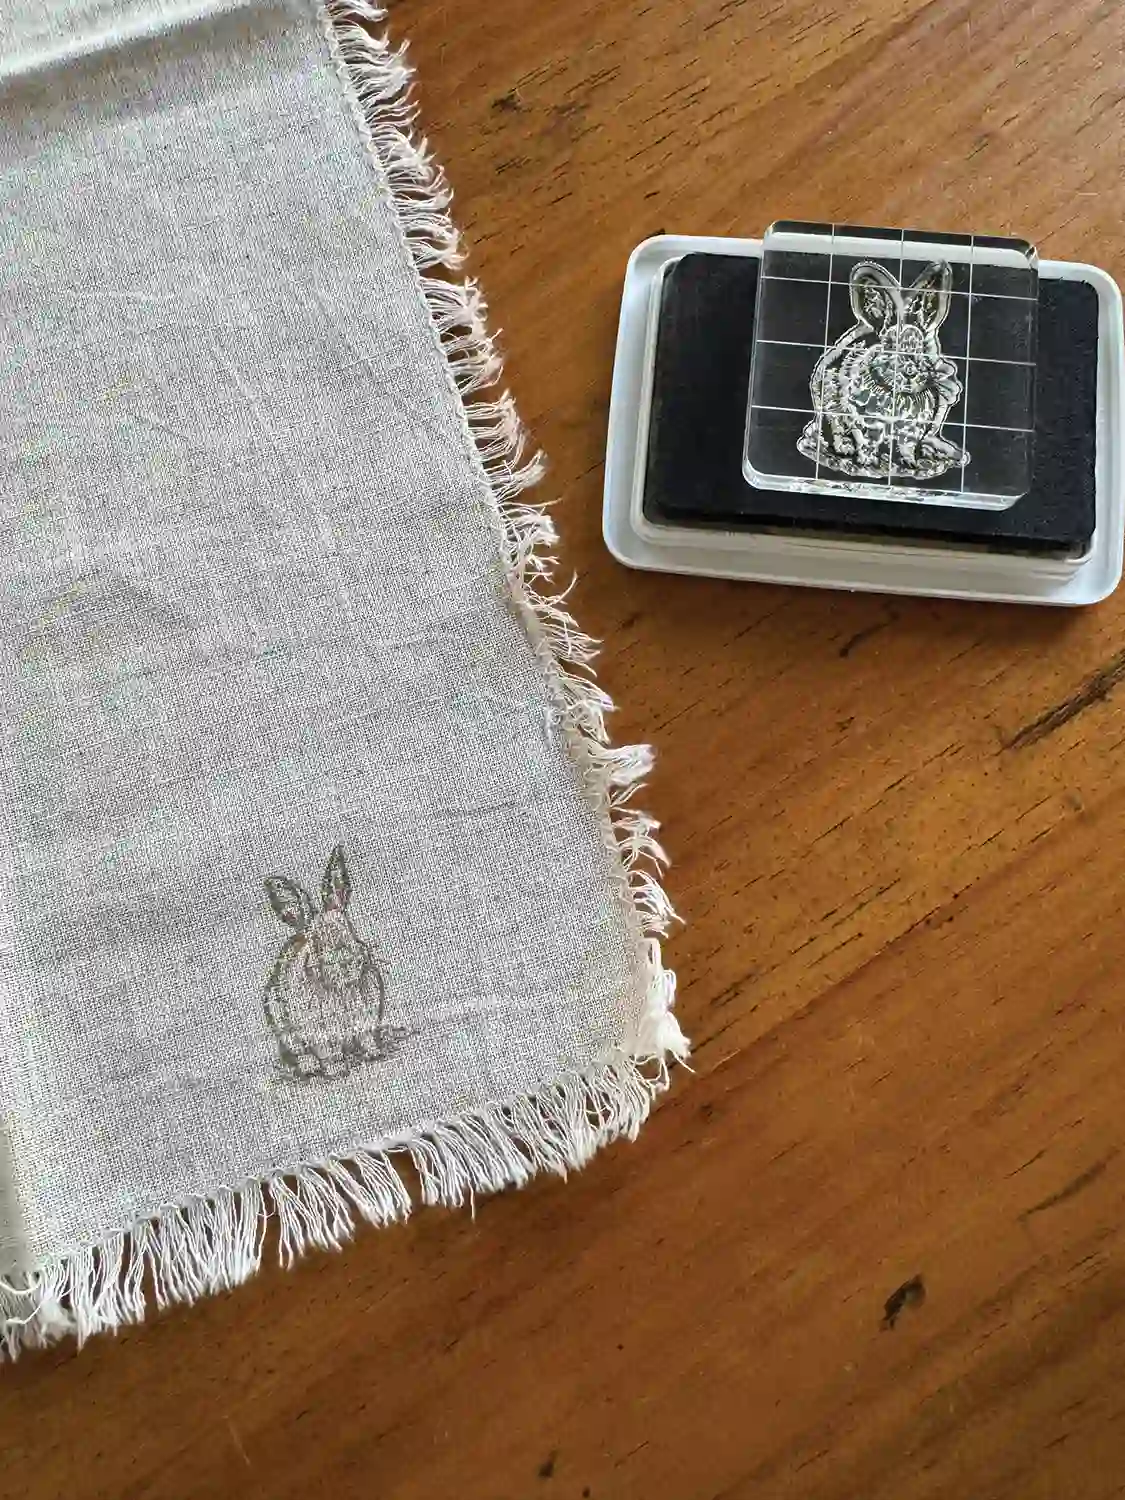
After the ink has dried, place it in the dryer for about 15 minutes to heat-set the design.
Have you joined the latest fascination with stamping? It’s been years since I’ve done any crafts that required stamps, and I had never stamped fabric. But I must admit that I’m officially addicted after stamping my first cloth napkins for spring!

For more about Lynn, see Proudly Introducing our 2025 Brand Ambassador. For more spring decor ideas, don’t miss 10 Quick Spring Decorating Ideas. Of course, don’t forget to follow us on Instagram, Facebook and Pinterest to get your daily dose of farmhouse inspiration.