


DIY Christmas Wreath


Deck your front door with a homemade DIY Christmas wreath to welcome guests.
Consistently, one of my favorite small DIYs is the front door wreath. It’s a good project to like, because being outside in the sun and rain means most front door wreaths don’t last for more than a few seasons. If you’re in need of a new Christmas wreath this year and want to try your hand at making it yourself, here’s a simple, cheerful DIY Christmas wreath to greet passersby.
What You’ll Need:
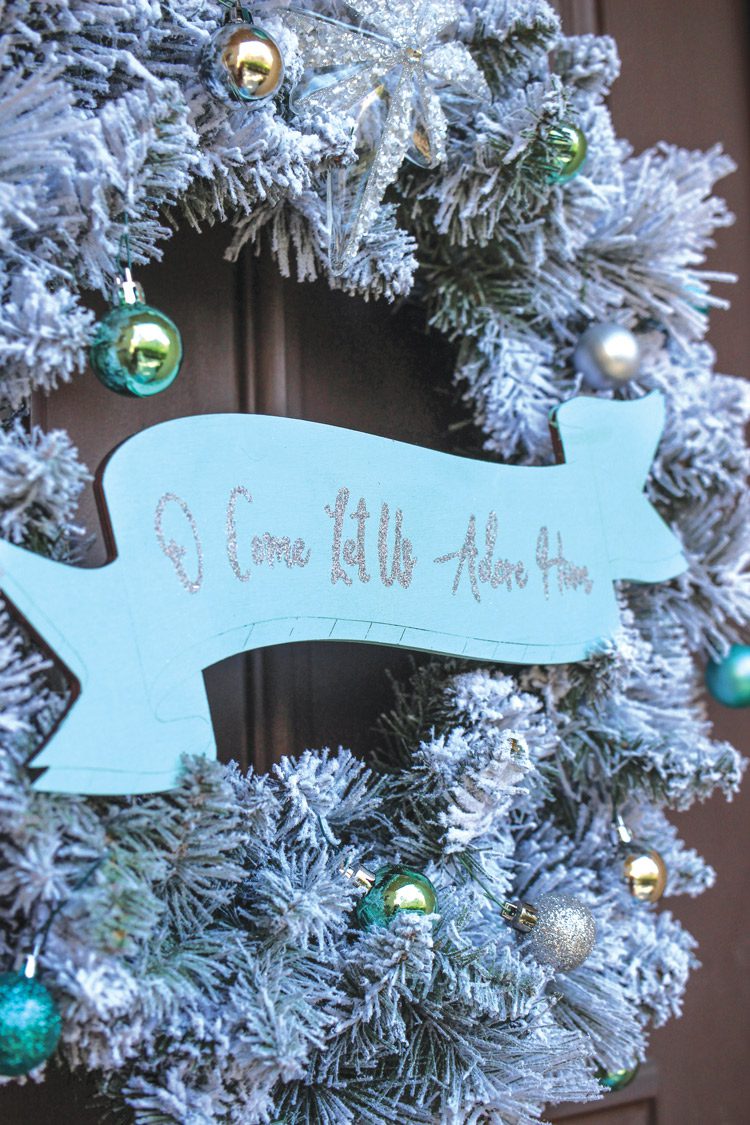
- Plain or flocked wreath of choice
- Small wood banner sign (used here: banner sign from Hobby Lobby)
- Optional: wood filler and sandpaper
- Paint of choice
- Paintbrush
- Pencil
- Craft glue
- Toothpick
- Glitter of choice
- Hot glue and wire
- Optional: Christmas ornaments

What You’ll Do:
1. First, prep the wood banner sign. You can find precut signs at craft stores or online; here, we used a sign that came with a twine hanger, so we removed the twine and filled in the holes with wood glue. If you do this, wait until it’s dry; then sand down the spots until they’re smooth.
2. Paint the wood banner. You don’t need to paint the back, but make sure you get the edges, and wait for it to fully dry.
3. While the sign is drying, head to the computer and type out whatever message you want to use. Find a font that suits the wreath; then print out the message. Dry fit the message on the sign. You may have to print it out a few times while you get the font size right.
4. Flip the paper over to the back and trace the backs of the letters with a pencil. Fill in each letter and press hard so you get as much graphite onto the paper as possible.
5. Once the sign is completely dry, position the paper on the sign where you want it. Then hold the paper down and use a coin, credit card or your fingernail to scratch the paper’s surface. When you pull the paper away, your message should be visible on the sign.
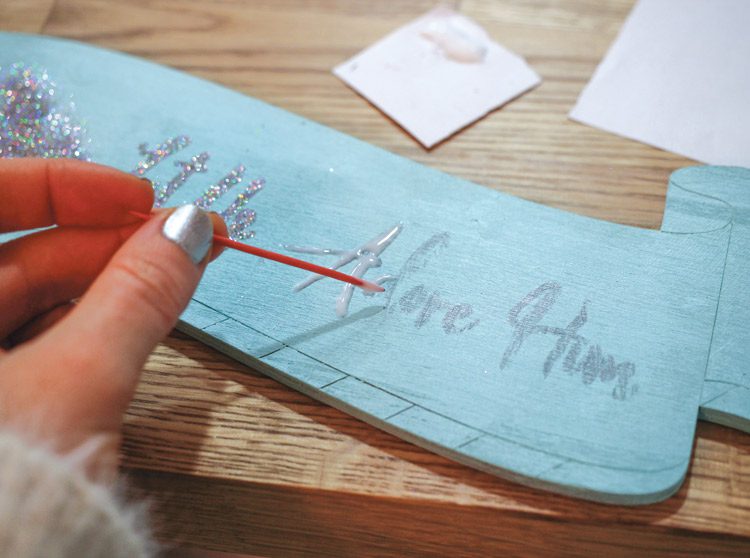
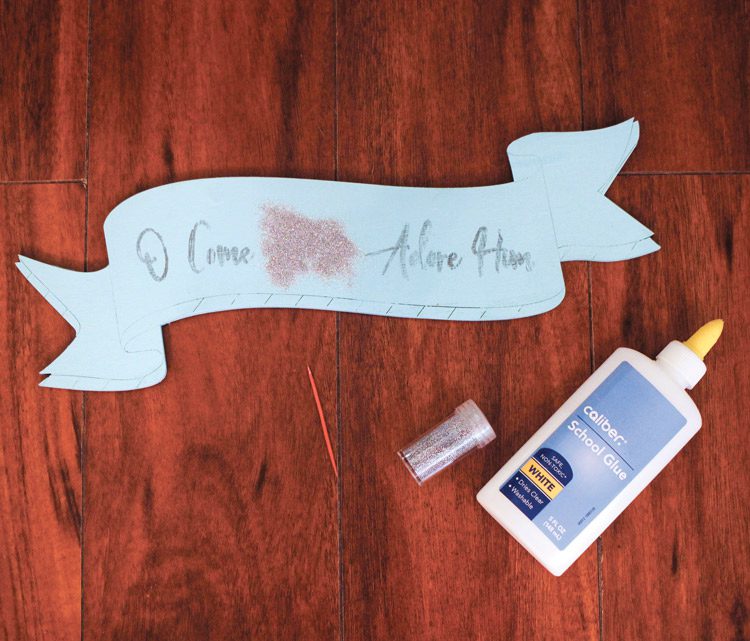
6. Dab a splotch of glue onto a scrap piece of paper. Then dip a toothpick into the glue and carefully trace the first few letters.
7. Once the glue is in place, cover the entire spot with glitter. Let it sit for a few minutes; then shake the excess glitter off the sign and onto a paper plate or paper towel, so you can reuse it.

8. There will be excess glitter around the letters, so take the edge of a damp paper towel and wipe around the letters to get the excess glitter off. For difficult areas like inside an O or A, wait until the glue is dry before dabbing at it with the damp paper towel.
9. Repeat this process until you have glitter on all the letters.
10. Finish decorating the DIY Christmas wreath by adding the sign (you can hot glue wire onto the back and wire the sign onto the wreath), along with additional Christmas ornaments or twinkle lights.

Debating over whether to buy a faux Christmas tree? Check out the pros and cons of buying a real or fake Christmas tree. Of course, don’t forget to follow us on Instagram, Facebook and Pinterest for your daily dose of farmhouse inspiration!